7
4.
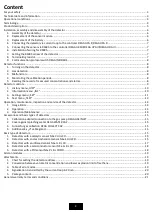
Connecting the detector via current loop to the controler DEGA UPA II/DEGA UPA III
Connect one detector to each channel of the controler as shown in the picture below
5.
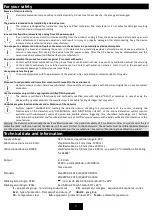
Connecting the sensor via RS485 to the controller DEGA UKAIII/DEGA UPA III/DEGA UDA III
6.
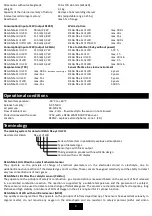
Installation of wiring for RS485
Wiring must be installed using bus topology and in compliance with the RS485 policy.
The maximum number of connected transmitters per controller channel is 16 (may be less depending on the configuration of
the controller), while the total length of the controller (electrical distance between the controller and the last transmitter)
should not exceed 400 meters.
Selecting the appropriate type of cable depends on the fire report and the protocol for determining external influences.
7.
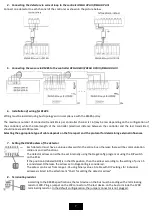
Setting the RS485 adress of the detector
Each detector must have a unique adress within the entire bus, otherwise there will be communication
collisions and malfunctions.
The detector adress can either be set internally using the DegaConfig program or using the DIP switch
on the PCB.
If the position 6 (labeled ADD) is in the ON position, then the adress according to the setting of pins 1-5
is considered. Otherwise the adress set in DegaConfig is considered.
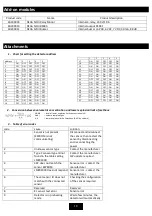
The adress can be set from range 1-31 using binary values. A table with DIP settings for individual
adresses is listed in the attachment "Chart for setting the detector adress"
8.
Terminating resistor
According to the RS485 specifications, the last device on the bus must be ending with a terminating
resistor 120R. Plug a jumper on the JP2 connector of the last device on the bus to include the 120R
terminating resistor. In the default configuaration, the jumper connector is not plugged.


