5
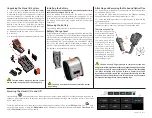
While watching the gage display, move the probe tip closer to the
target, aligning the
Distance Paddle
with the
Distance Target
Bar
. The optimum distance for measurement is 2 cm (3/4 inch)
between the probe tip and the surface of the applied powder.
Ensure the
PosiTest PC
is held perpendicular to the surface.
The instrument will take a measurement when:
a.
The
Distance Paddle
is near the
Distance Target Bar
. This
indicates that the instrument is the correct distance away
from the part.
b.
The
Distance Paddle
is as wide as possible. This indicates
that the instrument is being held perpendicular to the surface.
For best results use
Memory Mode
(pg. 2) to generate averages.
The average of a series of measurements is often a more
meaningful prediction of cured thickness than a single reading.
If a thickness result does not appear after 5-6 seconds, release
the measurement button and try again.
Small and/or erratically swinging parts may present measurement
challenges. Steady the part whenever possible. If erroneous
readings continually result, change the measurement strategy by
rotating the gage, altering its alignment to the part, or by
2 cm (3/4 inch)
90°
Correct
Incorrect
Correct
Incorrect
Содержание PosiTest PC powder Cheker
Страница 1: ...Instruction Manual v 3 0 Powder Checker Uncured Coating Thickness Gage ...
Страница 14: ...Manual de instrucciones v 3 0 Powder Checker Medidor manual de espesor de recubrimientos sin contacto ...
Страница 27: ......
Страница 28: ...Kurzanleitung v 3 0 Powder Checker Berührungslos arbeitendes Schichtdickenmessgerät ...
Страница 41: ...Guide d utilisation v 3 0 Powder Checker Contrôleur de revêtements en poudre ...


