Large
Gladetino
Mounting Options
Deco Lighting practices a program of continuous product improvement, and as a result product specifications change frequently. We reserve the right to change
product specifications without notice. Contact Deco for the latest product information.
2917 Vail Ave., Commerce, CA 90040 • (800)613-DECO (3326) • [email protected] www.getdeco.com
3
Fig. 6
Fig. 7
Fig. 3
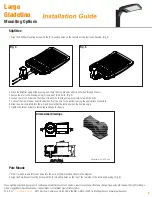
Dimensional Drawings
3. Place the Pole Mount against the housing, and route the Line, Neutral, and Ground wires through the mount.
4. Fasten the arm to the housing using (2) included 1/4-20 bolts through the rear of the mount to the rear of the housing, and (2) additional included
1⁄4-20 bolts through the top side of the mount into the housing, as shown in the diagram. (Fig. 7)
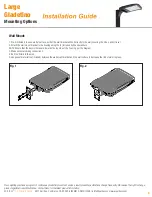
5. Loosen, but do not discard the (2) #8-32 screws on the underside of the arm, and open the access door.
6. Place the luminaire and Pole Mount on the pole, and bolt the pole mount to the pole using (2) 3/8-16 Bolts along with the appropriate washers, lock
washers, and nuts.
7. Connect the Line, Neutral, and Ground wires from the pole to the luminaire using the appropriate connectors.
8. Close the access door and secure the door with the (2) #8-32 screws from step 5. (Fig. 8)
Yoke Mount:
1. Drill (1) wire hole and (2) mounting holes using the dimensions in the attached diagram.
2. Connect the luminaire to the mounting surface using two included retaining bolts.
3. Feed the cable into an appropriate fitting to maintain a watertight seal.
Large Yoke Mount:
1. Drill (1) wire hole and (2) mounting holes using the dimensions in the attached diagram.
2. Connect the luminaire to the mounting surface using two included retaining bolts.
3. Feed the cable into an appropriate fitting to maintain a watertight seal.


