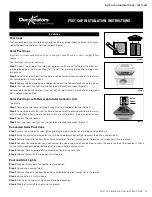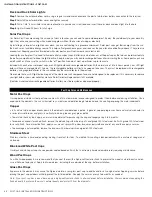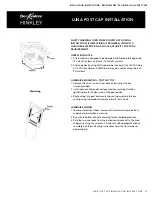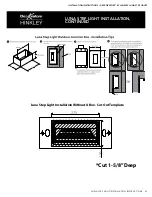
48 SECONDARY HANDRAIL INSTALLATION INSTRUCTIONS
INSTALLATION INSTRUCTIONS • SECONDARY HANDRAIL
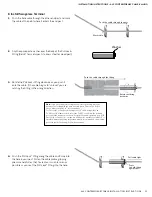
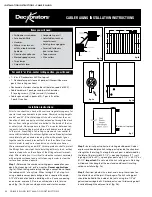
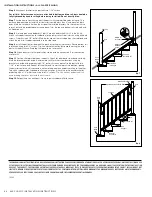
Aluminum Joiner Kit
Step 1:
Use aluminum joiner to fasten handrail components at
straight joints.
Step 2:
Slide joiner an equal distance into both components.
Drill 5/32” pilot holes and fasten using 1” screws provided.
Note: All joiners should be supported by an aluminum bracket
as closely as possible to the joint.
1
2
2
AluminumJoinerKit2.ai
3
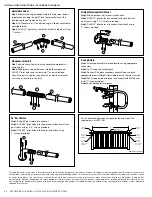
90° Post Return
Step 1:
Slide 90° post return into handrail.
Step 2:
Drill 5/32” pilot holes into the desired surface and attach
post return using 1-1/2” screws provided.
Step 3:
Drill 5/32” pilot holes into handrail and attach using
1” screws provided.
1
2
3
90°Post Return2.ai
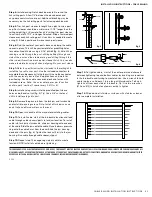
Straight Aluminum Wall Mount
Step 1:
Slide aluminum wall mount into handrail.
Step 2:
Drill 5/32” pilot holes into desired surface and attach
wall mount using 2-1/4” screws provided.
Step 3:
Drill 5/32” pilot holes into handrail and attach using
1” screws provided.
1
2
StraightWall-Mount2.ai
3
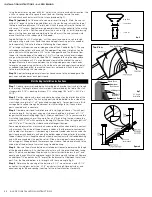
P-Loop Return
Step 1:
Attach top bracket at desired location using appropriate
connectors.
Step 2:
Cut P-Loop to desired length.
Step 3:
Connect P-Loop to secondary handrail tube using the
appropriate joiners (Straight, Adjustable joiners or External swivel).
Step 4:
Set P-Loop on top of bracket and pre drill with drill bit and
install 1” screw provided.
Step 5:
Install desired lower bracket.
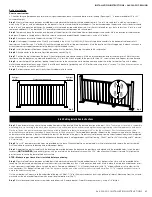
The diagrams and instructions in this brochure are for illustration purposes only and are not meant to replace a licensed professional. Any construction or use
of the product must be in accordance with all local zoning and/or building codes. The consumer assumes all risks and liability associated with the construction
or use of this product. The consumer or contractor should take all necessary steps to ensure the safety of everyone involved in the project, including, but
not limited to, wearing the appropriate safety equipment. Seller makes no warranty for this product, either express or implied. Seller expressly disclaims any
and all liability for damages arising out of the use or ownership of the product, including disclaiming incidental and consequential damages, unless otherwise
required by state law.
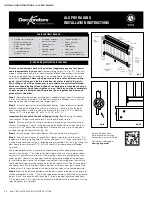
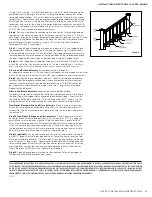
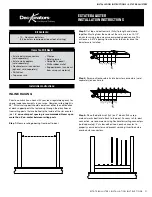
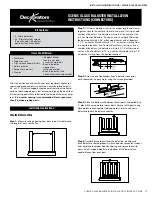
This handrail configuration has been tested and meets the
requirements of 2009 IRC.
6' O.C.
Structural
Support
Structural
Support
Aluminum
Bracket
with Screws
Provided
Aluminum
Bracket
with Screws
Provided
Handrail with
Aluminum Insert
Handrail Asm.ai
(2) #10 x 1"
Screws
Provided
(2) #10 x 1"
Screws
Provided
Universal Consumer Products, Inc.
933 US Rt. 202
Greene, Maine
www.ufpi.com
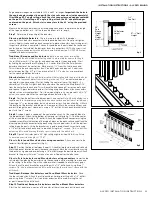
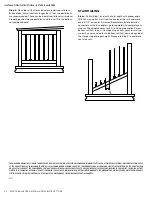
Adjustable Joiner
Step 1:
Measure the angle needed. Adjoin the two joiner halves
together by inserting the bolt. Place the joiner halves at the
desired angle, and tighten bolt to set.
Step 2:
Cut handrails at ½ the desired angle. Slide handrails onto
adjustable joiner.
Step 3:
Drill 5/32” pilot holes and fasten handrails together using
1” screws.
1
2
2
3
AdjustableJoiner2.ai
4
1
2
3
3
4
5
2"
4
1
2
3
3
1
ADAP-Loop.ai
5
2-1/2"
2-1/2"
End Caps optional
© 2017 Universal Forest Products, Inc. All rights reserved. 6453_5/17


