background image

2

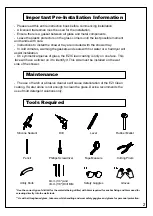
Silicone Sealant

Drill

Level

Rubber Mallet

Pencil

Phillips Screwdriver

Tape Measure

Utility Knife

Important Pre-Installation Information

-  Please read this entire instruction book before commencing installation.
-  A licenced tradesman must be used for the installation.
-  Ensure there is a gasket between all glass and metal components.
-  Leave the plastic protectors on the glass corners until the last possible moment
and handle with care.
-  Instructions to install the shower tray are included with the shower tray.
-  In cold climates, warming the gaskets and seals with hot water or a hairdryer will
assist installation.
-  On symmetrical pieces of glass, the E

ZI

 Clean coating is only on one face. This

face will have a sticker on it to identify it. This side must be installed on the wet
side of the shower.

Cutting Pliers

6mm (1/4") and
3mm (1/8") Drill Bits

* Use the correct type of drill bit for the material being drilled, with 6mm required for anchor fixing and 3mm used for

screwing directly into the wall studs.

Safety Goggles

Gloves

** As with all toughened glass, take care while handling and wear safety goggles and gloves for personal protection.

Maintenance

-  The use of harsh or abrasive cleaners will cause deterioration of the E

ZI

 Clean

coating. If water alone is not enough to clean the glass, Decina recommends the
use of mild detergent solutions only.

Tools Required

Содержание Cascade 1000

Страница 1: ...Instruction Manual CASCADE 1000x1000 6mm ANGLE CORNER With Decina s Exclusive EZI Clean Coating 1 ...

Страница 2: ... hairdryer will assist installation On symmetrical pieces of glass the EZI Clean coating is only on one face This face will have a sticker on it to identify it This side must be installed on the wet side of the shower Cutting Pliers 6mm 1 4 and 3mm 1 8 Drill Bits Use the correct type of drill bit for the material being drilled with 6mm required for anchor fixing and 3mm used for screwing directly i...

Страница 3: ...rip 9 Hinge Back Cover 11 Allen Head Screw M6x10 13 Allen Head Screw Cover 14 Countersunk Allen Head Screw 15 Clamping Washer 16 Plastic Washer 17 Long Drip Strip 18 Handle 19 Hinge Side Door Seal 20 Door Glass 21 Gasket Insertion Tool 2 pcs 2 pcs 2 pcs 10 pcs 10 pcs 2 pcs 2 pcs 1 pcs 4 pcs 2 pcs 6 pcs 2 pcs 6 pcs 4 pcs 4 pcs 8 pcs 1 pcs 1 pcs 1 pcs 1 pcs 1 pcs 21 Parts List 12 Brace 10 Hinge Asse...

Страница 4: ... of the shower wall If a shower base is fitted do not measure from the edge of the shower base to determine the position of the wall channel If your wall and shower base are not at right angles the glass will not push fully into the wall channel at the top or bottom This misalignment is acceptable if not exceeding 15mm however the overall shower size will then increase by the amount of this misalig...

Страница 5: ...l 2A 1 2B 2C 2D Start at the bottom and work up with the supplied roller tool Important Seal must be fully inserted Maximum Install the fixed panel glass There is a sticker to indicate 16mm which side has the EZI Clean coating This side must go on the inside of the shower Important Leave the corner glass protectors on until the last possible moment ...

Страница 6: ... Fit cap to the wall channels Attach the top hinge to the top brace Install the door onto the bottom hinge For white screens run the screw in and out of the threaded holes in the brace before fitting Important Leave the corner glass protectors on until the last possible moment Like the side panels there is a sticker on the door to indicate which side has the EZI Clean coating 9 13 4E ...

Страница 7: ...s being installed on the door with the frame removed for clarity Install the vertical door seals along the whole height of the door and fit the bottom drip strips in between Cut the seals to the correct length before fitting Silicone inside and outside of the shower silicone not supplied 24 h ...

Отзывы: