


DMON
‐
16S
USB
CONTROL
PANEL
MANUAL
V2.0.7
with
Firmware
V1.3
34
Copyright
©
2017
Decimator
Design
Pty
Ltd,
Sydney,
Australia
E&OE
12.1
Custom
Window
Positioning
Since
we
know
roughly
where
each
window
will
go
and
we
have
the
size
of
the
multiview
we
wish
to
use
we
can
now
do
a
few
calcualtions
to
determine
the
size
of
each
box
we
wish
to
create.
Window
1:
1920
x
(1080
/
2
)
=1920
width
540
height
Window
2:
(1920
/
5)
x
(1080
/
4
)
=384
width
270
height
5
windows
across
and
each
window
is
a
quarter
of
the
height
to
create
2
rows
of
5
windows,
we
repeat
this
size
for
the
next
9
windows.
Window
3:
384
width
270
height
Window
4:
384
width
270
height
Window
5:
384
width
270
height
Window
6:
384
width
270
height
Window
7:
384
width
270
height
Window
8:
384
width
270
height
Window
9:
384
width
270
height
Window
10:
384
width
270
height
Window
11:
384
width
270
height
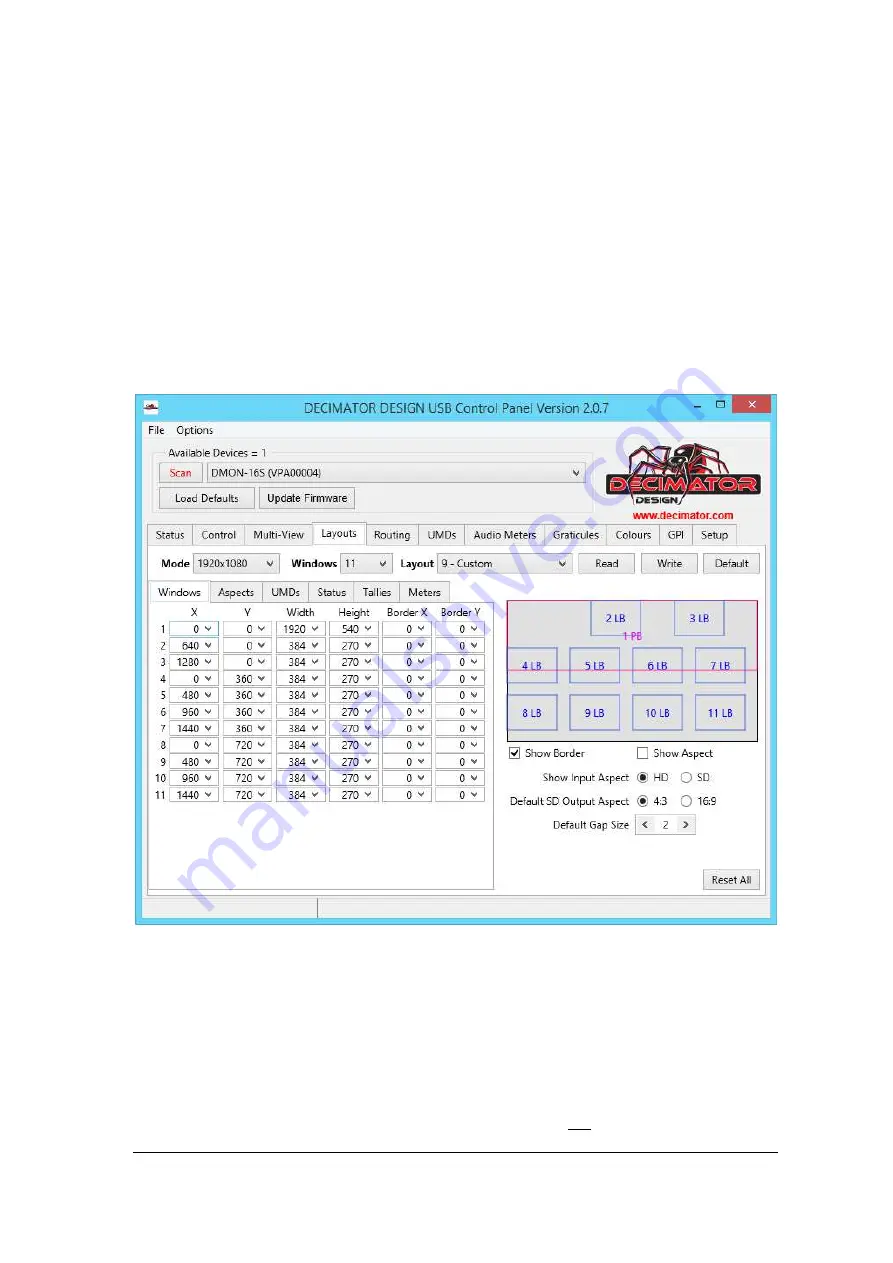
The
layout
tab
should
now
look
like
the
image
below:
Here
the
windows
are
correctly
sized,
but
their
x
and
y
positions
are
wrong
for
what
we
are
trying
to
design.
We
now
need
to
calculate
the
new
starting
points
for
each
window.
We
start
by
going
through
the
positions
of
each
window.
Window
2
position
is
below
window
and
on
the
left
of
the
multi
‐
viewer
and
its
position
will
be
540
pixels
down
and
0
pixels
from
the
left
of
screen.
The
starting
point
of
window
2’s
height
is
also
the
same
for
window
4,6,8
and
10
so
we
enter
it
in
the
y
position
coloumn
for
these
windows
too.
Next
we
find
the
location
of
window
3,
as
it
is
below
window
2
it
will
have
the
same
x
position
and
also
window
2
is
270
pixels
high
so
the
Y
position
of
window
3
is
540
+
270=810.
This
is
also
the
Y
starting
point
for
windows
5,
7
,
9
and
11.


