background image

3

Product Packing Details

Our transmission system kits includes a transmitter, a receiver, and its related accessories.

Transmitter DQVPT-030T

Receiver

DQVP-030R

4dBi V0101T x1

Antenna x1

DC cable x1

CVBS cable x1

V0102R x1

Antenna x2

DC cable x1

A-frame*2

Product Interface Introduction

一、

Transmitter Interface Introduction

[1] channel indicator, when performing channel switching, channel

1, 2, ..., corresponding channel LED CH1, CH2, ...;

[2] HDMI HD input interface, for connecting video sources;

[3] SMA female connector, for connecting the transmitting antenna;

[4] power interface;

[5] channel switch button, press once to switch

to the next channel to cycle;

二、

Receiver Interface

[1] SW hole site signal channel switch button. It can be adjusted to the next channel when you press one time. It

circulates according to the type of 1-2-3-4-1...It will search signal automatically,if you don’t press the button.

[2] CH1-CH4 receive signal indicator light. It can receive the signal normally when the light is green.

[3] Feedthru capacitor DC power supply connector. It’s used for the power input.

Содержание DQVPT-030

Страница 1: ...1 DQVPT 030 User s Manual for HD Video Transmission System ...

Страница 2: ...ecified models of antennas to ensure that the parameters match the band impedance 6 Keep a appropriate distance between the electronic devices When install thereby reducing electromagnetic interference between devices to a minimum Usage Notice 1 Make sure that all the cables are high fasten and interfaces are correct 2 This product requires about 15 seconds to start up and thereafter it can be use...

Страница 3: ...DMI HD input interface for connecting video sources 3 SMA female connector for connecting the transmitting antenna 4 power interface 5 channel switch button press once to switch to the next channel to cycle 二 Receiver Interface 1 SW hole site signal channel switch button It can be adjusted to the next channel when you press one time It circulates according to the type of 1 2 3 4 1 It will search s...

Страница 4: ...ect the video source Meanwhile make sure the video source is on power 3 Connect to DC 15 36V power supply and the transmitter starts to send the signal after finishing the initialization 二 Receiver Installation Steps 1 The installation of the receiver antenna to antenna connector and tighten in place and adjust the antenna tilt to the right direction 2 Using a HDMI cable one side is to connect the...

Страница 5: ...Audio input interface Standard HDMI Power Consumption 30W Standard Power 10W Transmission Rang distance 30km with 7dBi receiving antenna Net weight excluding antenna About 250g Dimension About 105 59 5 30 5mm Product Name HD COFDM Receiver Model DQVPT 030R Working Frequency 500 520MHz 300 900MHz Customizable Interface of Antenna 50Ω SMA Female Modulation format COFDM Receiver Performance Receiving...

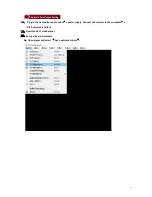
Страница 6: ...Setting 一 Plug in the transmitter and receiver s power supply Connect the receiver to the computer s RJ45 network interface 二 Download VLC video player 三 Set up player parameters 1 Open player and select open network stream ...

Страница 7: ...224 1 1 1 8000 Note the format of input method don t have a blank space 3 Set up Buffer 4 Press OK after completing set and watch video It s normal that the delay of RJ45 network output is longer than HDMI because of difference data flow ...

Страница 8: ...g Try to restart the transmitter receiver or video source camera HDMI interface or cable failure Contact the manufacturer to replace the new HDMI interface or replace with a new HDMI cable There is picture on display but picture color clarity are abnormal Transmitter or receiver HDMI cable is not connected Reconfirm if the cable connects well The transmitter or receiver is not working Restart the ...

Отзывы: