23
Transferring files to a computer
Recorder File System limitations
This recorders NTFS format is fully compatible
with PCs and is read compatible with Macs. Its
main advantage is that results in one large file per
recording.
Note:
Some editing software packages cannot
accept video file sizes greater than 40GB, make
sure your edit software is not affected if you plan
on shooting one long continuous take greater than
this.
File Organization
All bins that contain video will appear to the
computer as
folders named BINxx. Where xx
represents the BIN number ranging from 01 to 99.
Inside each BIN folder,
each clip will be
represented as a separate file with an extension
such as .MXF or .MOV depending on the setting
chosen prior to recording.
Each file will be named
B
xx
C
nn where xx
represents the BIN
number; nn represents the
CLIP number ranging from 01 to 99.
Mounting the HE-3 drive enclosure to a Computer
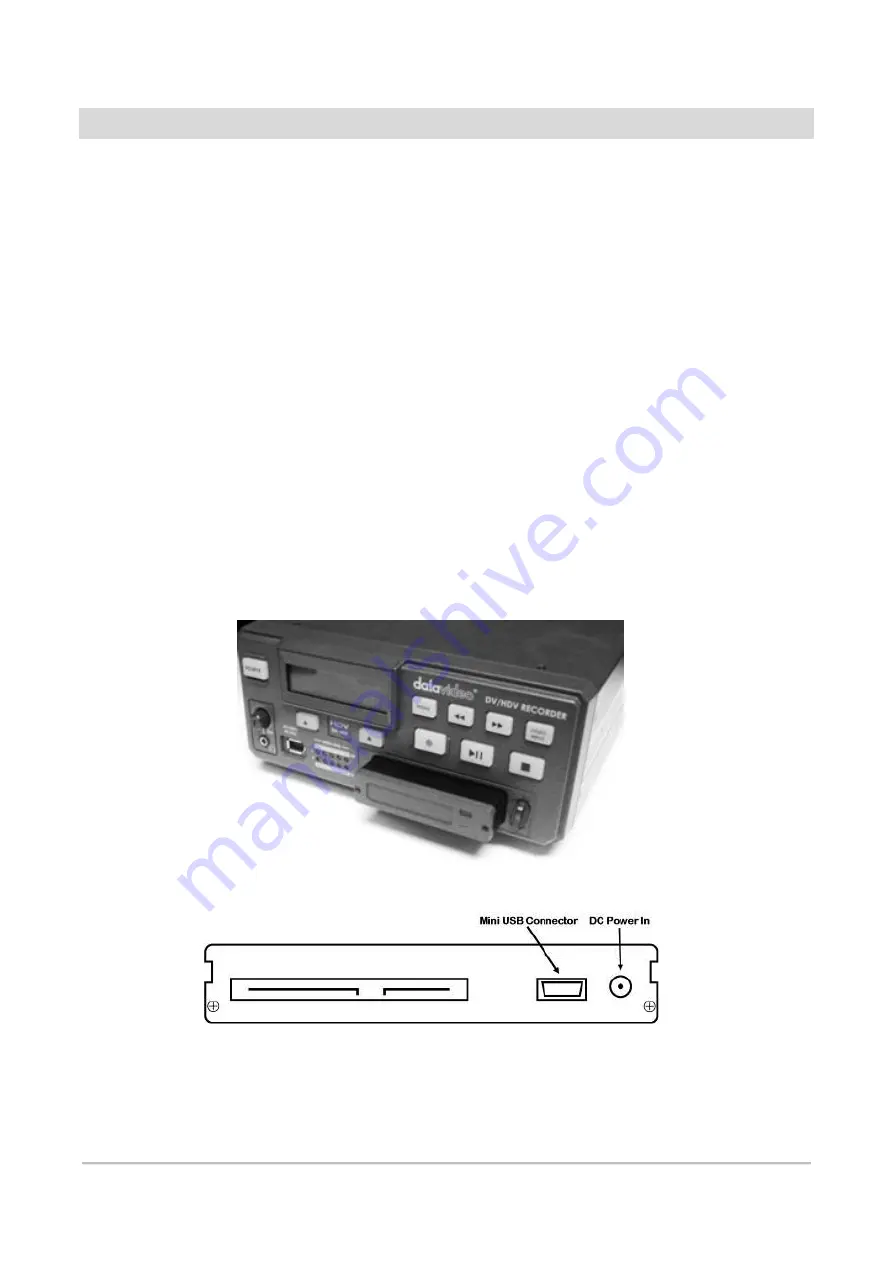
Move the drive lock lever to the right to unlock the HE-3 drive from the recorder. Push the HE-3 into the
unit and when released it will pop out a few centimetres. Gently pull the drive enclosure clear of the
recorder. You may feel some slight resistance as the drive disconnects internally
– this is normal.
The removable HE-3 drive enclosure has a mini USB connector on its rear panel; this can provide power to
the HDD, as well as allow the exchange of data.
Note:
With some PCs and Laptops the USB bus power may not be enough to power the drive.
Connect the supplied mini USB to USB A cable to the HE-3 drive, and connect the double lead to your
computer or Laptop. If the drive does not power up correctly
– connect the second USB connector to the
computer as well as the first.


