8
ASSEMBLING THE HDD ENCLOSURE
To begin using the Enclosure Kit, simply install a 2.5” SATA hard drive in the
Enclosure and complete the assembly steps outlined below:
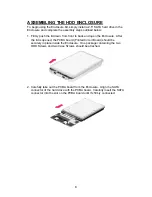
1. Firmly push the lid down from front to back and open the Enclosure. After
the lid is opened, the PCBA board (Printed Circuit Board) should be
securely in place inside the Enclosure. One package containing the two
HDD Screws and two Case Screws should be attached.
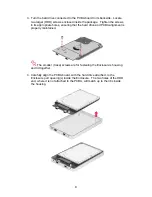
2. Carefully take out the PCBA board from the Enclosure. Align the SATA
connector of the hard drive with the PCBA board. Carefully insert the SATA
connector into the slot on the PCBA board until it’s firmly connected.


