background image

DI-789 Hardware Manual

Installation

13

TCP/IP Manager

The TCP/IP Manager allows you to easily manage all DI-789, DI-720, DI-722, DI-730, DI-785, and DI-788 Ethernet 
Instruments installed on your PC. The TCP/IP manager is installed when installing W

IN

D

AQ

 Software. Access the 

TCP/IP Manager via the Windows program group specified during W

IN

D

AQ

 Software installation (default is 

Start > 

Programs > WINDAQ > IP Manager

). For help with TCP/IP settings and the TCP/IP Manager see the help files 

accessible in the application (press F1 to access context-sensitive help or use the Help menu).

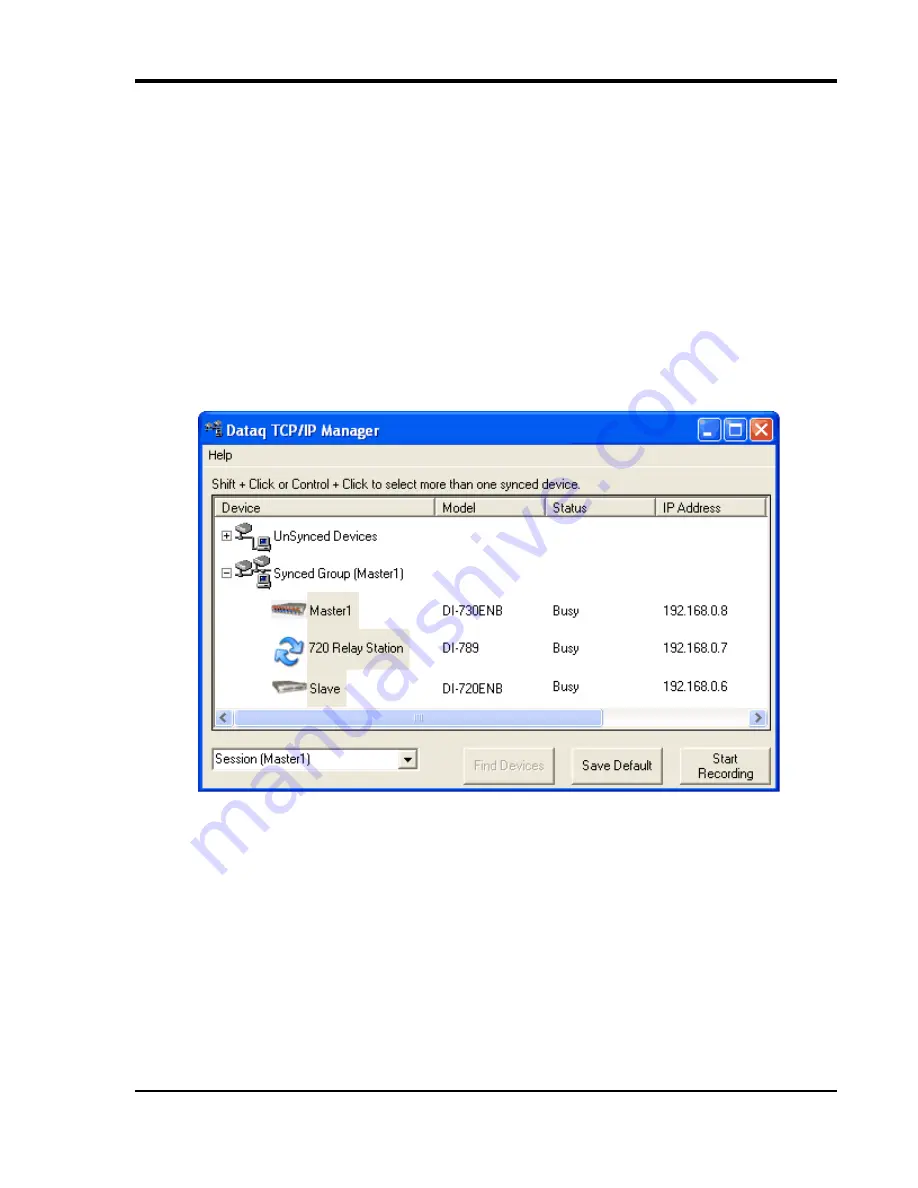
The main TCP/IP window shows all Ethernet devices installed on your PC. Devices could be busy or unavailable if 
there are multiple users. If you entered the wrong MAC address during installation, the status of the device will be 
“Off Line.” “UnSynced” devices are all single units installed to your network (units that are not daisy-chained). 
Synced Groups are daisy-chained instruments. There is one Synced Group for each daisy chain. Each Synced Group 
is named using the first device in the chain (in parentheses).

Use the drop down command menu to change the description of a device. All commands are performed by first 
selecting a device, then using the drop down command menu. Multiple devices in the same Synced Group may be 
selected for a recording session by using the Shift or Control key. Multiple Synced Groups cannot be accessed by the 
same PC at the same time.

W

IN

D

AQ

 Acquisition software must be initiated from the TCP/IP Manager for all Synchronous Ethernet instruments. 

To begin a recording session select a single device or a group of daisy-chained devices (using the Control or Shift 
key) and click the 

Start W

IN

D

AQ

 button. Each device (except the DI-789) will open an instance of W

IN

D

AQ

 Acqui-

sition software. Change channel settings, calibration, and display options independently for each device using each 
instance of W

IN

D

AQ

. Most W

IN

D

AQ

 menu items are available when recording synced devices with the following 

exceptions: The Open and Record menu items in the File Menu are not available; The Triggered Mode, Triggered 
Storage, and Remote Storage menu items in the Options Menu are not available.

Содержание Ethernet DI-789

Страница 1: ...ical manual or otherwise without expressed written authorization from the com pany The distribution of this material outside the company may occur only as authorized by the company in writing DATAQ In...

Страница 2: ......

Страница 3: ...products that have been repaired or altered by persons other than DATAQ Instru ments employees or products that have been subjected to misuse neglect improper installation or accident DATAQ Instrument...

Страница 4: ......

Страница 5: ...Hub Switch 5 Installing a DI 789 to a Synchronous chain on network without a DHCP server 8 Installing a DI 789 to a Synchronous Chain on a network with a DHCP Server 9 Installing Software 10 Connecti...

Страница 6: ......

Страница 7: ...to setup DI 789 instruments is included with purchase TCP IP Manager The DATAQ Instruments TCP IP Manager allows you to effectively manage and run multiple DI 72x 730 78x instru ments installed or con...

Страница 8: ......

Страница 9: ...hernet activity LED green Downstream Ethernet activity LED green Lost Synchronization LED red Rear Panel none Power Voltage Range 9 36 VDC Power Requirements 5 Watts Environmental Operating Temperatur...

Страница 10: ......

Страница 11: ...9 to a Synchronous Chain that is Directly Connected to your PC or Connected via a Hub Switch Installation of an Ethernet Synchronous chain of devices directly connected to the network card on your com...

Страница 12: ...n 4 Select Internet Protocol TCP IP in the This connection uses the following items window and click on the Properties button 5 Click on the General tab 6 Select the radio button Use the following IP...

Страница 13: ...connect your PC to a network or router you should change the TCP IP proper ties back to their original state 10 Install WINDAQ software see Installing Software on page 10 11 Run the TCP IP Manager sof...

Страница 14: ...s could instead be routers with DHCP turned off i e a static IP assigned network Contact your system admin istrator for details about your network 1 Have the system administrator designate an IP addre...

Страница 15: ...gned automatically by a DHCP server or router you will need to change the device settings using the Dataq TCP IP Manager See the Dataq Instruments TCP IP Manager help file for complete details Install...

Страница 16: ...OK 7 The Welcome dialog box allows you to cancel the installation Click OK to continue installation or Cancel to abort 8 Read through the Software License agreement carefully and either Accept and Co...

Страница 17: ...ynchronous distributed data acquisition system Any combination of multiple DI 789s or Synchronous Ethernet instruments may be placed in the same daisy chain To maintain synchronicity Ethernet hubs and...

Страница 18: ...g procedure to apply power to your DI 789 instrument 1 Plug the five pin DIN end of the power adapter cable into the five pin jack labeled POWER on the rear panel of the instrument 2 Plug the appropri...

Страница 19: ...ch daisy chain Each Synced Group is named using the first device in the chain in parentheses Use the drop down command menu to change the description of a device All commands are performed by first se...

Страница 20: ......

Страница 21: ...ity The Ethernet Activity LEDs Toward PC and Expansion correspond with the Ethernet ports on the rear of the instrument Sync Lost LED This LED will glow red when the unit is inside a chain of Ethernet...

Страница 22: ...th the included power adapter or you can use an appropriate alternate source use the following diagram for pin out If power is on the Power LED on the front panel of the instrument will be on Ground L...

Отзывы: