Pre-Compliance v180808n
iBoot-WiFi
Page 5
5.
Initial Configuration
5.1. Using the Micro Access Point (uAP)
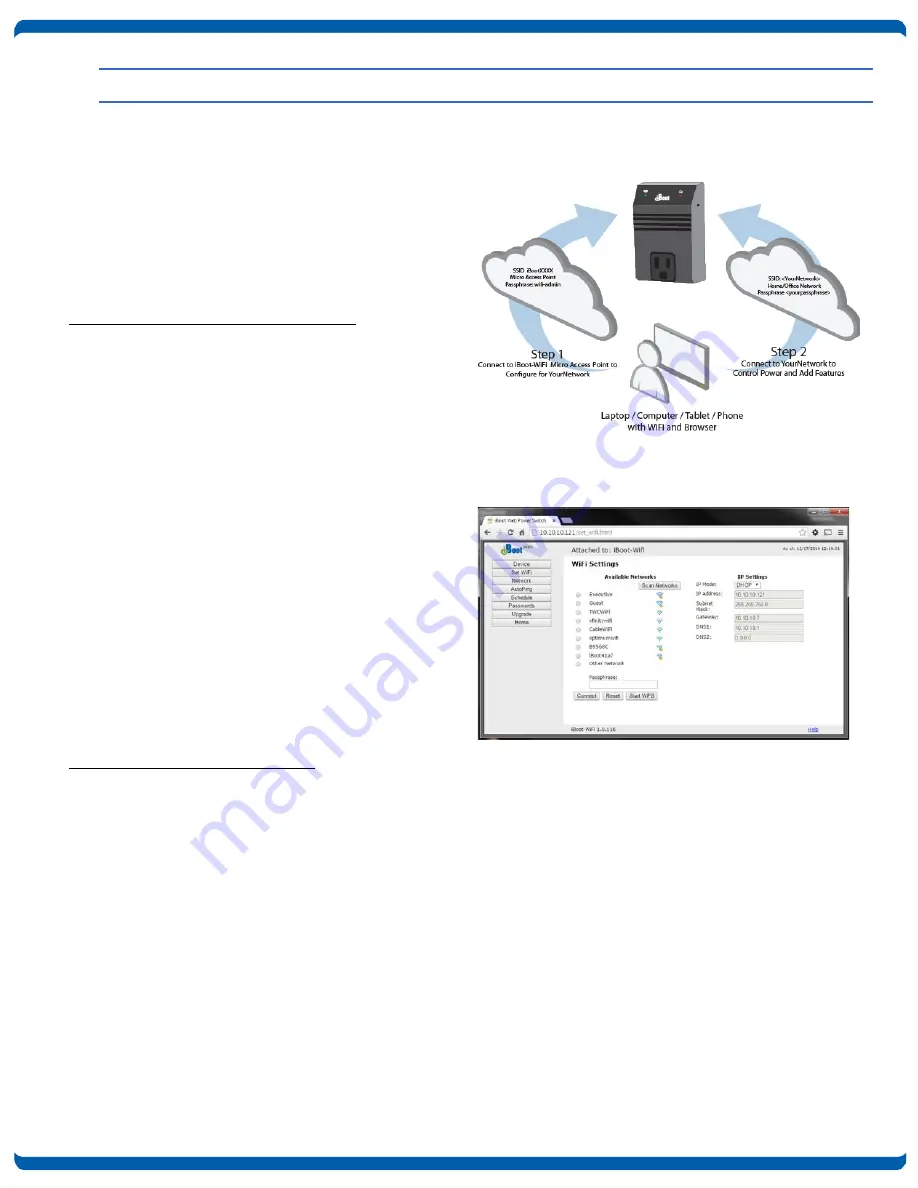
The iBoot-WiFi generates its own WiFi hotspot to
assist you in easy configuration. Through this uAP,
you can access iBoot-WiFi and join it to your local
wireless network. This hotspot is always available and
serves as a back-up means of access, should the
primary network not be available.
Step 1. Access the Micro Access Point
•
Plug iBoot-WiFi in and wait for blinking blue
Network LED.
•
Connect to WiFi hotspot iBootxxxx. (xxxx is the
last 4 digits of the MAC Address, located on the
bottom of the unit. The password is
wifi-admin
•
Open browser to 192.168.10.1
•
Login to iBoot with user: admin password: admin
•
Access WiFi Setup Page. From Home page click
Setup. Then click Set WiFi
•
Select desired network. You may Click Scan
Networks to update list if needed.
•
Fill-in Passphrase and click Connect. Wait 30
seconds for the iBoot to join the network and
obtain an IP Address.
•
iBoot-WiFi will display IP Address of the selected
network under the heading IP Settings.
Note this IP Address for Step 2
Step 2. Connect to Local Network
•
Connect the computer to the WiFi Network
selected for iBoot-WiFi
•
Open browser and connect to IP Address from
Step 1
•
Login to iBoot-WiFi with
user: admin password: admin
•
Congratulations. Now you can configure your iBoot-WiFi and enjoy improved network reliability.
Figure 3 uAP Setup
Figure 4 WiFi Setup Page


