Operation
23
Operation
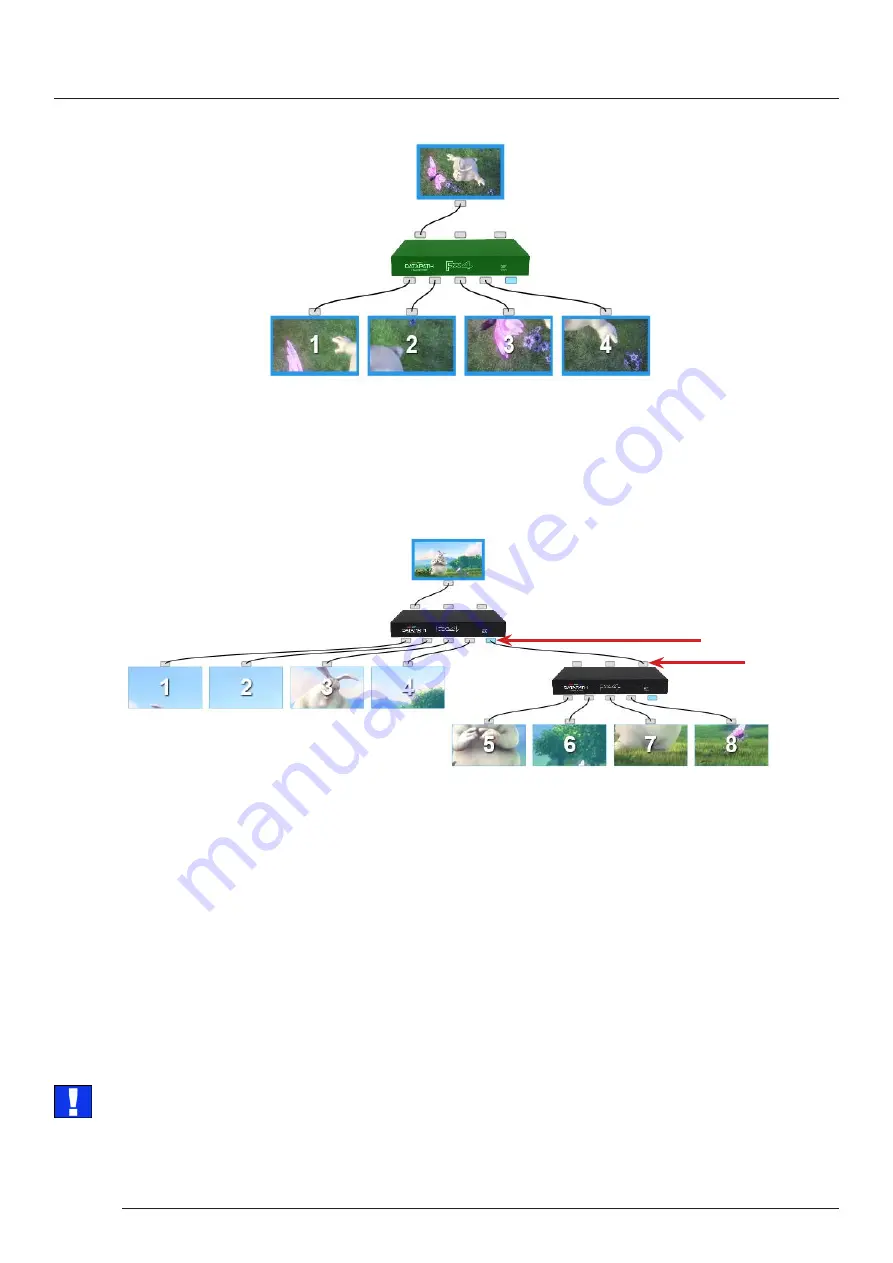
The illustration on the previous page shows the input source connected to Input 1 (HDMI1) on the Fx4 and each monitor
connected to the respective output connector.
Where more than four outputs are required, (the example below shows eight) the Auto Config Fx4 function will determine the
most logical way to connect all devices. The blue output connector on the first Fx4 represents the DisplayPort Out Loop
connector which is used to daisy chain additional Fx4’s if more outputs are required. To daisy chain a second Fx4, use a
DisplayPort cable (not supplied) to connect the DisplayPort Out Loop on the first Fx4 to the DisplayPort Input on the
second Fx4.
DisplayPort Out Loop
DisplayPort In
To associate the virtual Fx4 in the main window with an actual physical device, highlight the device by right clicking then select
Associate Device
from the displayed menu, a list of available Fx4’s is displayed.
Click on the virtual device to display its properties, the
Device Properties
can be changed if required, for example you may wish
to allocate a different Friendly Name which can be useful when connecting to multiple devices. Once changes have been made
click on
Apply Settings
to save.
If an input source is connected to the Fx4 but the actual signal fails, the Fx4 will try to connect to a valid signal by scanning the
input connectors in the following order:
1 - DisplayPort
2 - HDMI 1
3 - HDMI 2
If no signal is detected on either of the three input connectors the Fx4 will display a pre-configured Datapath logo. To upload
your preferred logo (max 4k), click on the Upload Logo button in the
Devices Tab
and browse to upload your logo.
It can take up to 5 minutes to complete the upload
Full instructions on how to configure your Fx4 are available in the Wall Designer application help file.


