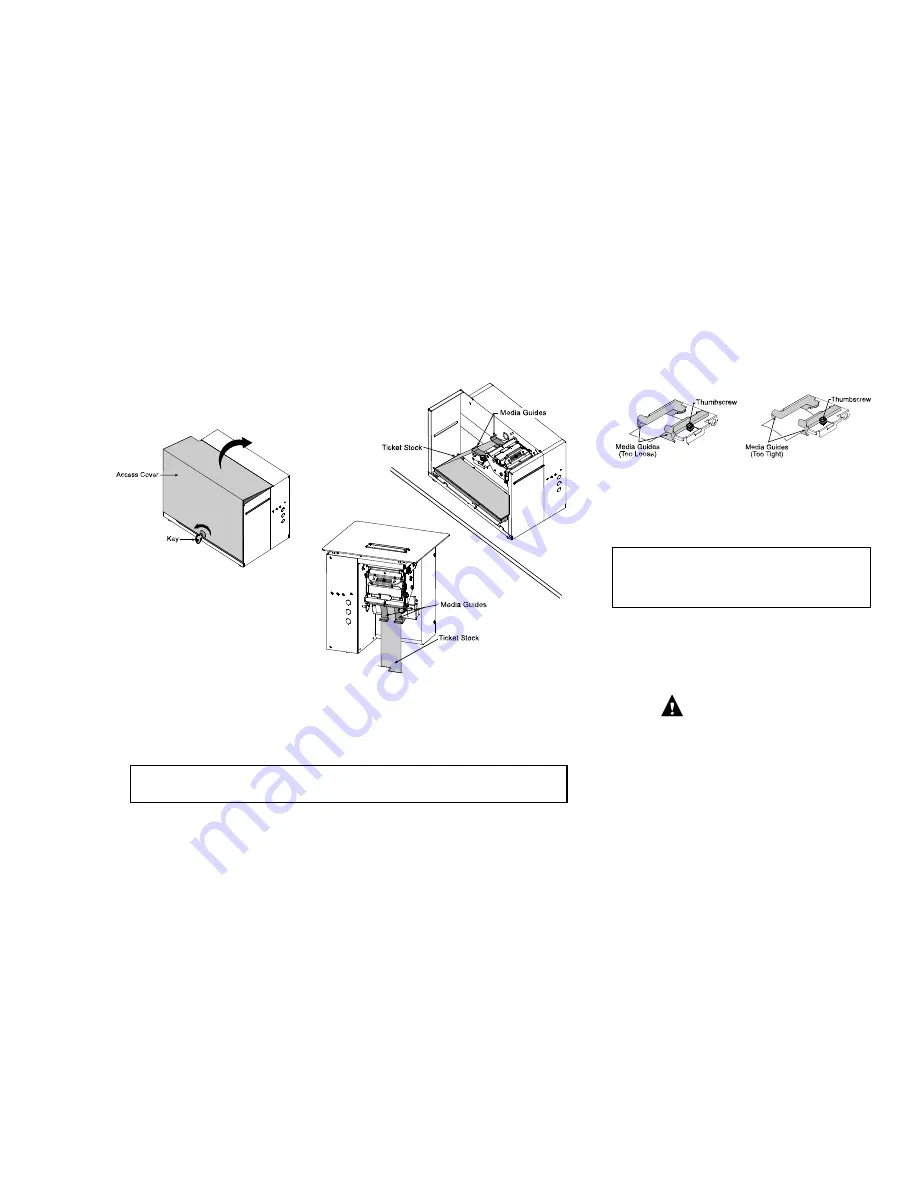
Loading
Ticket Stock
¾
ST Models only: Unlock the Access
Cover then lift to open (for
convenience, the cover may be
removed by sliding it forward and
then lifting up).
¾
Install Ticket Stock and insert it between the Media Guides.
¾
Adjust the Media Guides to fit the Ticket Stock, then tighten
the Thumbscrew to secure.
¾
Turn ‘On’ the Power Switch.
¾
Slide the media through the Media Guides, continue until the
printer grabs the media and automatically completes the
loading process.
;
Note: When loading, ensure that the black marks on the
ticket stock face away from you. If the ticket stock does not
feed to the proper position, the Media Sensor may need
adjustment (see Section 4 of the Operator’s Manual for
instructions).
Printing a
Configuration
and Test
Pattern Ticket
¾
With the Power Switch turned ‘Off’ and ticket stock loaded, press and hold the FEED Button while turning
the Power Switch ‘On.’ Continue to depress the FEED Button until printing begins.
¾
After printing is complete, cycle the Power Switch ‘Off’ and ‘On’ to return the printer to the normal
operating mode.
;
Note: The printer maintains a selection of user-modifiable ticket setups, each with a specific print
width, start of print position, and cut/tear position. The default setting for these setups is Stock ID 5 (see
Section 4 of the Operator’s Manual for details).
Additional
Information
Be sure to follow and perform the
suggested cleaning schedule explained
in the Operator’s Manual.
Contacting Datamax…
Corporate Headquarters
(407) 578-8007
Technical Support
(407) 523-5540
For the latest products, news, and
support visit our web page at
www.datamaxcorp.com


