background image

OMNI MAX - User Guide        


© 2014 Datamars SA.  All rights reserved. 


Page 7 of 20 


4  Charging The Battery 

OMNI  MAX  comes  with  a  rechargeable  Lithium-Ion  battery  that  can  be  charged  in  two  ways.  You  can 
connect the USB cable to the wall-mounted adapter and plug it into a standard electrical socket, or you can 
connect the USB cable to your computer. 

4.1 

Battery Indicators 

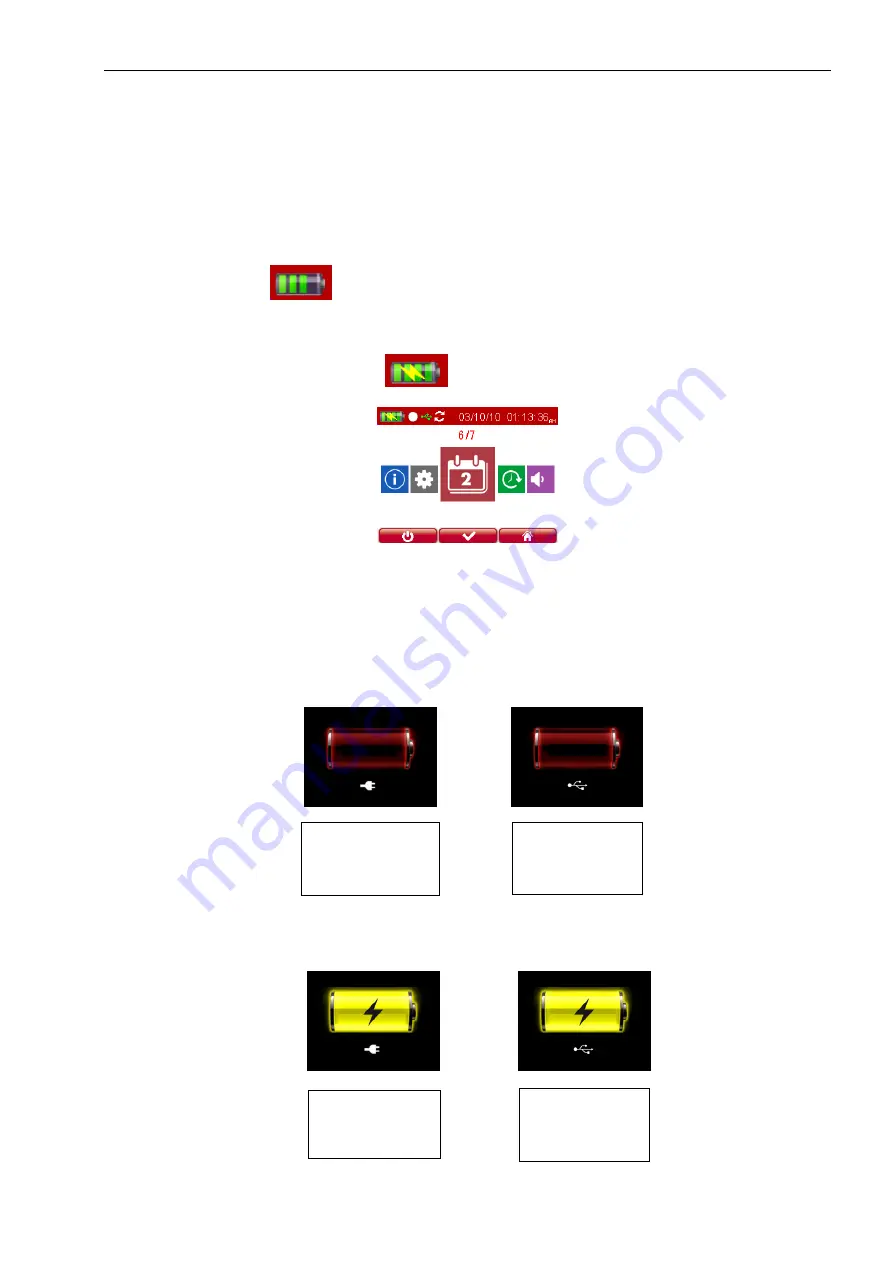
When the reader is switched on, in the upper left corner of the display header you will always be able to see 

the battery charge level (

). 


If the reader is on and connected via USB to a computer, the battery level indicator will show a thunderbolt, 

indicating the reader is in charging mode (

): 


The following indicators are shown on the display when the reader is switched off but connected to a power 
source: 

Battery Discharge/Power Low 

The  following  image  will  appear  when  the  battery  is  completely  discharged,  indicating  that  you  need  to 
connect the reader to a power source: 


Battery Charging 

The following image will appear when the unit is plugged in and the battery is charging: 


Indicates unit is 

plugged into the 

wall 

Indicates unit is 

plugged in via 

USB 

Indicates unit is 

plugged into the 

wall 

Indicates unit is 

plugged in via 

USB 

Содержание OMNI MAX

Страница 1: ...80 Fax 41 91 945 03 30 animal id datamars com www datamars com Americas Headquarters 250 West Cummings Park Woburn MA 01801 USA Phone 1 781 281 2216 Fax 1 781 300 7330 Asia Headquarters Northern Regi...

Страница 2: ...DICATORS 7 Battery Discharge Power Low 7 Battery Charging 7 Full Power 8 5 OMNI MAX SETTINGS 9 5 1 AUDIO SETTING 9 5 2 BRIGHTNESS SETTING 9 5 3 TIME 9 Setting The Time Format 9 Setting The Time 10 5 4...

Страница 3: ...atly increasing the read field for fast and easy scanning This larger wider read field improves the read distance and time which are critical to making an identification With OMNI MAX Datamars deliver...

Страница 4: ...U used to select additional advanced settings o single read vs continuous read o enable disable recording of microchips o USB mode o select 15 23 digit microchip format o access memory folders o set c...

Страница 5: ...on press the right navigation button to access the Main menu o Rotate the scroll wheel clockwise or counter clockwise to access menus and settings 1 Volume 2 Brightness 3 Time 4 Calendar 5 Info 2 3 A...

Страница 6: ...lose proximity to the animal to be scanned and then press the on button located in the center of the scroll wheel Once the reader is scanning you will see the scanning icon appear on the screen OMNI M...

Страница 7: ...n the diagram below Consider scanning each animal more than once to ensure any present microchip can be localized by the scanner Which Microchips Is OMNI MAX Able To Scan The OMNI MAX universal scanne...

Страница 8: ...If the reader is on and connected via USB to a computer the battery level indicator will show a thunderbolt indicating the reader is in charging mode The following indicators are shown on the display...

Страница 9: ...SA All rights reserved Page 8 of 20 Full Power While still plugged into a power source OMNI MAX will display one of the following images when fully charged Indicates unit is plugged into the wall Ind...

Страница 10: ...edium setting and is suitable for most environments o HIGH this setting should be used in very noisy environments 5 2 Brightness setting The Brightness setting allows you to adjust the brightness of t...

Страница 11: ...R o MONTH DAY YEAR Once in the Calendar menu pressing the right navigation button will allow you to select your preferred date format Setting The Date Use the scroll wheel to increase or decrease the...

Страница 12: ...D codes once the system will display each new unique ID code but it will not store duplicates If no microchip is localized during a continuous read session the reader will stop after an allotted perio...

Страница 13: ...ID code to go in your application and then press the center button on OMNI MAX to read the microchip If a microchip can be localized the unique ID code will appear automatically in the correct field...

Страница 14: ...ch for a specific microchip ID code by selecting the Options button in the center of the scroll wheel o Transfer only one record or the entire file to your computer tablet or smartphone according to y...

Страница 15: ...and receive data via Bluetooth as though it were a serial RS232 port This can be very helpful if you d like to connect your OMNI MAX to a wireless printer Keyboard Wedge data is transferred from OMNI...

Страница 16: ...ignals LBT Simulate press left function CBT Simulate press center function RBT Simulate press right function r Read command remotely WO Rotate Wheel clockwise WA Rotate Wheel counter clockwise GH Go H...

Страница 17: ...able keyboard sound 1 enabled 0 disabled RT Set the reading timeout RTxx xx 10 60 s GRT Get the reading timeout ST Set the auto shutdown timeout 2Min ST0 5Min ST1 15Min ST2 30Min ST3 GST Get the shutd...

Страница 18: ...e Metal will reduce the performance of the reader The reading distance will be somewhat reduced if the microchip is still inside the needle The reader does not read a microchip It takes time and patie...

Страница 19: ...llowing two conditions 1 This device may not cause harmful interference and 2 This device must accept any interference received including interference that may cause undesired operation This equipment...

Страница 20: ...device must accept any interference including interference that may cause undesired operation of the device Le pr sent appareil est conforme aux CNR d Industrie Canada applicables aux appareils radio...

Страница 21: ...r casing of the reader becomes soiled clean it with a damp cloth Be sure it is not connected to the charger before cleaning If for any reason the reader is not working as expected please do not attemp...

Отзывы: