DM4270 – Installation Guide
DM4270 Installation
204.4331.03 - October/2019
28
Make sure the rack’s power supply isn’t overloaded.
4.3.1.1
Environment requirements
Electrical equipment can generate significant heat. Thus, it is essential to provide a
temperature-controlled environment to ensure proper and safe operation.
In addition to temperature control, it is necessary to observe that the product operates
only in places with controlled humidity. In addition, the environment must be free of
materials or gases capable of conducting electricity.
4.3.1.2
Equipment requirements
To ensure correct operation, when installing the DM4270, observe the information
available in the
.
4.4
19-
INCH RACK INSTALLATION
The DM4270 was designed to be installed to 19-inch racks, occupying only 1U in height.
To choose the suitable installation site, pay attention to the following items:
Choose an easily accessible location where your LEDs can be viewed;
The temperature should be between operation temperature specification and the
relative air humidity should be between 10% and 90% non-condensed;
Install the equipment near a power supply.
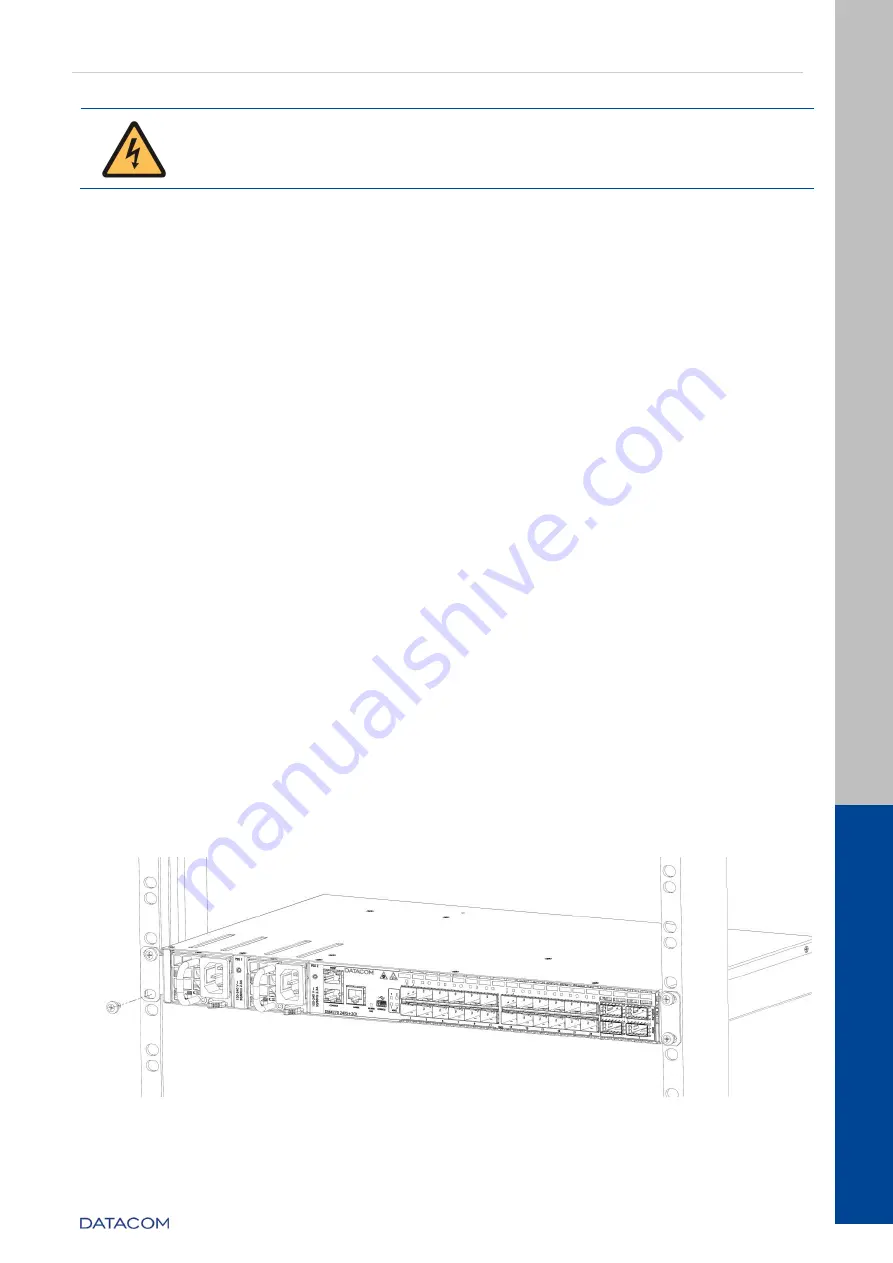
After choosing the appropriate location, bring the equipment to the rack and insert two
standard M5 screws (not shipped with the product) into each side of the adapter to
secure the assembly to the cage nuts on the rack (not shipped with the product).
Finally, tighten the screws so as to guarantee that the equipment is securely attached
to the rack.
Figure 22 – Installation of the DM4270 24XS+2CX on a 19-inch Rack


