background image


15 

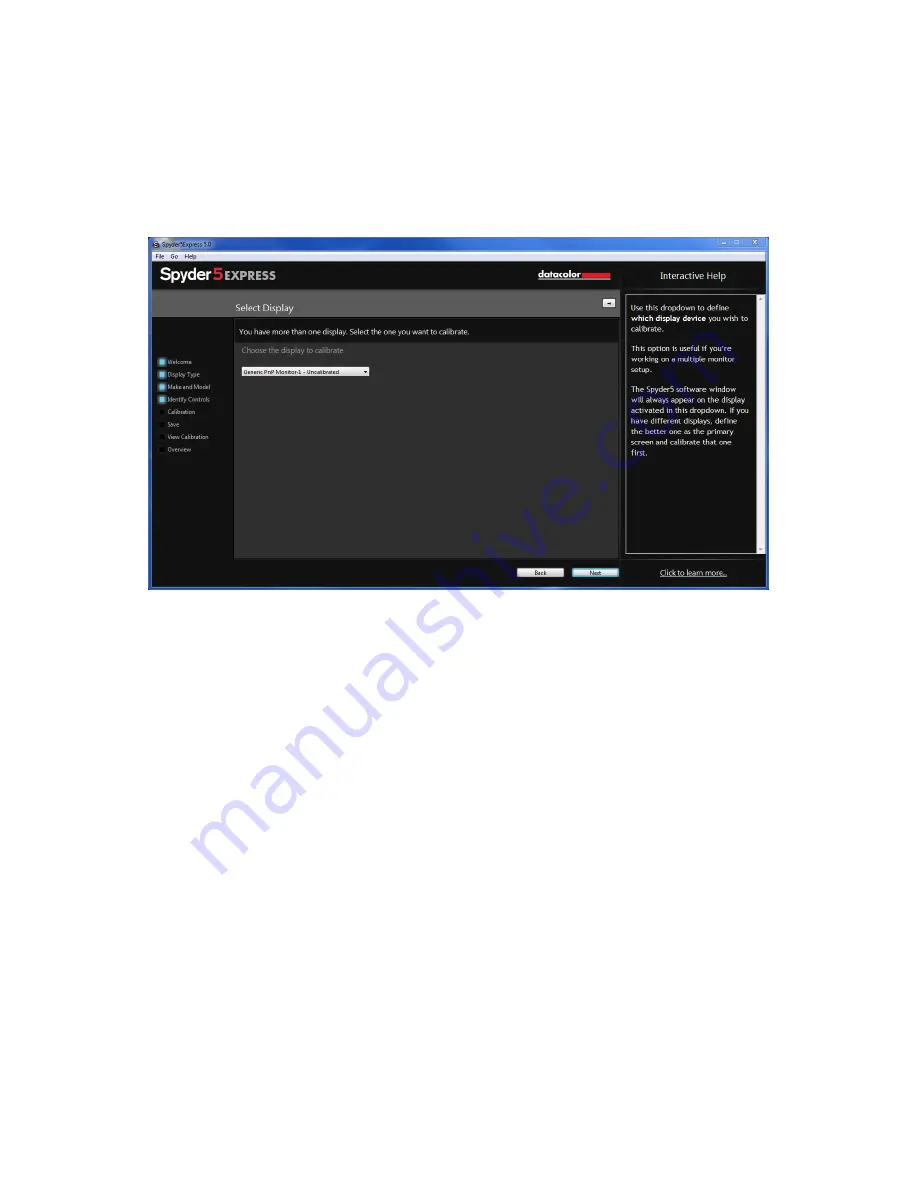
Select Display 


If you have more than one display connected to your computer, you can select which 
display to calibrate in this drop-down menu.  The software will automatically move 

to the selected display to run the calibration. 


Once you have completed this step, please click the “Next” button in the lower right 

corner. 


Содержание Spyder5 Express

Страница 1: ...See and share your images as you intended with confidence Simple 4 step process guides you to a precise calibration giving you exceptional color accuracy for image display and printing Before and Afte...

Страница 2: ...nd compare the health of all your laptop and desktop monitors Spyder 5ELITE Professional photographers studios and calibration perfectionists seeking ultimate control of the color workflow Next Genera...

Страница 3: ...algorithm for the smoothest gradients possible Video standards for the pro crossing over to motion Advanced Monitor Quality Analysis module lets you monitor and compare the health of all your laptop...

Страница 4: ...SAVE PROFILE 20 SPYDERPROOF 21 SPYDER5PRO 22 WELCOME SCREEN 22 SELECT DISPLAY 23 DISPLAY TYPE 24 IDENTIFY CONTROLS 25 MAKE AND MODEL 26 CALIBRATION SETTINGS 27 MEASURING ROOM LIGHT 28 CALIBRATION 30...

Страница 5: ...5 SAVE PROFILE 50 RECAL 51 CHECKCAL 52 SPYDERPROOF 53 SPYDERTUNE 54 PROFILE OVERVIEW 56 SHORTCUTS 57 DISPLAY ANALYSIS 58 GLOSSARY OF TERMS 60 FAQ S 62...

Страница 6: ...n Thank you for purchasing your new Spyder5 Color Calibrator This document will offer a step by step guide for using your Spyder5 Calibrator to get the best possible color from your laptop and or desk...

Страница 7: ...download the Spyder5 software System Requirements Windows 7 32 64 Windows 8 0 8 1 32 64 Mac OS X 10 7 10 8 10 9 10 10 Monitor resolution 1280x768 or greater 16 bit video card 24 bit recommended 1GB of...

Страница 8: ...teractive help Interactive help Interactive help Advanced features Expert Console Suite of expert features Calibration Settings Fixed 2 16 Choices Unlimited choices user defined and TV standards for v...

Страница 9: ...s the same for all 3 models The software wizard will walk you through the activation process step by step First make sure that your Spyder5 is plugged into a USB port on your computer make sure it is...

Страница 10: ...you have already registered the software on another machine enter the license code you were provided then With the easy automated activation please make sure that your computer is connected to the in...

Страница 11: ...11 Save the email with the license code you will need this if you want to use the device on another computer...

Страница 12: ...s the second if you would like to share your calibration data with Datacolor We recommend clicking yes to both of these as new updates come out frequently which can improve the quality of your calibra...

Страница 13: ...are versions are outlined here While you are working with the software you will see an Interactive Help screen on the right hand side as you are navigating through the steps describing the buttons and...

Страница 14: ...alibration 3 Display Controls If your computer has these controls make sure to set them to the default settings or equivalent 4 Spyder Connection Please plug your Spyder5EXPRESS into a USB port on you...

Страница 15: ...ted to your computer you can select which display to calibrate in this drop down menu The software will automatically move to the selected display to run the calibration Once you have completed this s...

Страница 16: ...16 Display Type Here you will choose whether you are using a Desktop or a Laptop Display Once you have completed this step please click the Next button in the lower right corner...

Страница 17: ...17 Make and Model Please choose the Manufacturer of your display in this screen and enter the display model...

Страница 18: ...ove the cover of the sensor as it is used as a counter weight so that the unit remains in place and flat against the screen We recommend that you slightly tilt your display back so the unit rests agai...

Страница 19: ...lace click the next button to proceed with the calibration A series of color patches will flash on the screen this process takes approximately 5 6 minutes Once the measuring is completed click on the...

Страница 20: ...he name you would like to save the profile as Here is a sample file name we think works best to keep an archive of your monitor profiles Make_Model_yyyymmdd date _ver1 Click Save to proceed You can al...

Страница 21: ...icking on the Switch button You can click inside an image to zoom into it for more detail in both calibrated and uncalibrated views Once you are done with this screen you can click on Quit to exit the...

Страница 22: ...ibration 3 Display Controls If your computer has these controls make sure to set them to the default settings or equivalent 4 Spyder Connection Please plug your Spyder5PRO into a USB port on your comp...

Страница 23: ...ted to your computer you can select which display to calibrate in this drop down menu The software will automatically move to the selected display to run the calibration Once you have completed this s...

Страница 24: ...24 Display Type Here you will choose whether you are using a Desktop or a Laptop Display Once you have completed this step please click the Next button in the lower right corner...

Страница 25: ...25 Identify Controls If you are calibrating a desktop monitor here is where you will let the software know if you have Brightness and or Kelvin preset controls on your monitor...

Страница 26: ...26 Make and Model Please choose the Manufacturer of your display in this screen and enter the display model...

Страница 27: ...CheckCAL will check to see if your display is still accurate You will also see your current target settings for Gamma White Point and Brightness here To make an adjustment to either of these targets p...

Страница 28: ...lick the next button a reading of your room light will be taken Please be sure that no direct light is falling on your display or the Spyder at this time After the reading is done the software will te...

Страница 29: ...recommend target settings here as well based on the room lighting level You can choose to accept these targets or continue with the targets you have already chosen Please click Next to proceed to the...

Страница 30: ...he recommended setting When you are within the parameters you can press the Continue button It may take a couple of times to get your brightness set properly please try to get as close as possible to...

Страница 31: ...lace click the next button to proceed with the calibration A series of color patches will flash on the screen this process takes approximately 5 6 minutes Once the measuring is completed click on the...

Страница 32: ...nter the name you would like to save the profile as Here is a sample file name we thinks works best to keep an archive of your monitor profiles Make_Model_yyyymmdd date _ver1 Click Save to proceed You...

Страница 33: ...AL After you have already Fully Calibrated your display you can do a ReCAL this will save time versus doing a FullCAL Select ReCAL from the Calibration Settings Window and proceed as in the full calib...

Страница 34: ...A CheckCAL will quickly see if your display is in need of a calibration It will measure a small amount of color patches and either gives you two checks or one or two X s which mean you will need to r...

Страница 35: ...calibrated views At the bottom of this screen you will see SpyderProof Image with a drop down menu Here you can choose to use the standard set of images the ones that are displayed by default or you c...

Страница 36: ...ndustry standards sRGB NTSC and AdobeRGB You can also choose profiles you have made previously to see how they compare Once you are done with this screen you can click on Quit to exit the software or...

Страница 37: ...37 Shortcuts In the lower left corner of the software window is the Shortcuts drop down menu Here you can quickly access Display Type Calibration SpyderProof and Display Analysis...

Страница 38: ...Brightness Contrast and White Point at Different presets Select the tests you wish to perform and then click Begin Tests The software will walk you through where to place the sensor and direct you whe...

Страница 39: ...ighting Conditions Please make sure that there is no direct light falling on your display as this could have an adverse effect on your calibration 3 Display Controls If your computer has these control...

Страница 40: ...ated the first time you run the software the next time you run the software the reminders will show up but you will not need to check the boxes again Once you have completed this step please click the...

Страница 41: ...on mode you want to use Step by step Assistant the software assistant will walk you through each step of the process StudioMatch this will match all of your studio displays as closely as possible Expe...

Страница 42: ...ecalibrate your display A CheckCAL will check to see if your display is still accurate You will also see your current target settings for Gamma White Point and Brightness here To make an adjustment to...

Страница 43: ...move onto the next screen The final dropdown is the Grey Balance Calibration with Better Faster recommended and off Better will do an iterative grey Balance which though taking longer will give a mor...

Страница 44: ...workstation If you are trying to match displays from another machine please enter the lowest Brightness Value on this page as well If you haven t calibrated the other machines yet leave this blank fo...

Страница 45: ...e be sure that no direct light is falling on your display or the Spyder at this time Next you will take brightness readings of the displays you are looking to match The software will keep track of the...

Страница 46: ...are will show you where the file is If you are calibrating monitors connected to another computer you will copy this file to the other computers and select this file when calibrating Click Next to mov...

Страница 47: ...ure the room light to define the brightness target needed for your particular room In Measured Mode you can enter a custom value in cd m2 as a calibration target Under Options you have a checkbox to v...

Страница 48: ...he recommended setting once you are within the parameters you can press the Continue button It may take a couple of times to get your brightness set properly please try to get as close as possible to...

Страница 49: ...with the calibration A series of color patches will flash on the screen this process takes approximately 5 6 minutes If you choose Grey Calibration Better this process takes 1 3 minutes longer Once th...

Страница 50: ...Enter the name you would like to save the profile as Here is a sample file name we think works best to keep an archive of your monitor profiles Make_Model_yyyymmdd date _ver1 Click Save to proceed You...

Страница 51: ...CAL After you have already Fully Calibrated your display you can do a ReCAL this will save time versus doing FullCAL Select ReCAL from the Calibration Settings Window and proceed as in the full calibr...

Страница 52: ...L A CheckCAL will quickly see if your display is in need of a calibration It will measure a small amount of color patches and either give you two checks or one or two X s which mean you will need to r...

Страница 53: ...calibrated views At the bottom of this screen you will see SpyderProof Image with a drop down menu Here you can choose to use the standard set of images the ones that are displayed by default or you c...

Страница 54: ...y necessary It will change the sophisticated monitor calibration of your Spyder5 and is therefore only a compromise to match screens whose technological differences make it difficult to achieve an ali...

Страница 55: ...une corrections are done be sure you compare with the original Spyder5 calibration by clicking the Switch button Save If the result is as expected and you could match your screens together you can cli...

Страница 56: ...ndustry standards sRGB NTSC and AdobeRGB You can also choose profiles you have made previously to see how they compare Once you are done with this screen you can click on Quit to exit the software or...

Страница 57: ...cuts In the lower left corner of the software window is the Shortcuts drop down menu Here you can quickly access Display Type Calibration Expert Console SpyderTune SpyderProof StudioMatch and Display...

Страница 58: ...response and white point Brightness and Contrast Brightness Contrast and White point at different Brightness settings White Point at Different OSD Settings Brightness Contrast and White Point at Diffe...

Страница 59: ...nce you click the measure button it will take about 10 seconds to perform the test As your screen will be fully dimmed it will be impossible to see when the test is complete please wait about 10 secon...

Страница 60: ...lue white and 6500 Kelvin is a standard white point that matches daylight at noon Contrast Difference in color and or brightness of an image and other images within the same field of view Curves Graph...

Страница 61: ...61 Tone Lightness brightness or value of a patch in an image dark tones correspond to shadows light tones correspond to highlight areas White Point See Color Temperature...

Страница 62: ...ture is the color of light a perfect black body radiator emits when heated to the temperature Computer monitors typically have a color temperature of 5000 9300 Kelvin 5000 Kelvin is a yellow white 930...

Страница 63: ...her kind of difference Even if two samples have the same color but different luminance they will be perceived as also different in color Thus when you calibrate a CRT and an LCD to the same Gamma and...

Страница 64: ...ortant to confirm that the image file being viewed has an embedded ICC profile that accurately defines its color space Also that Photoshop s Color Settings are set such that the embedded color profile...

Отзывы: