


SP75 Quick Install Guide
Page 5
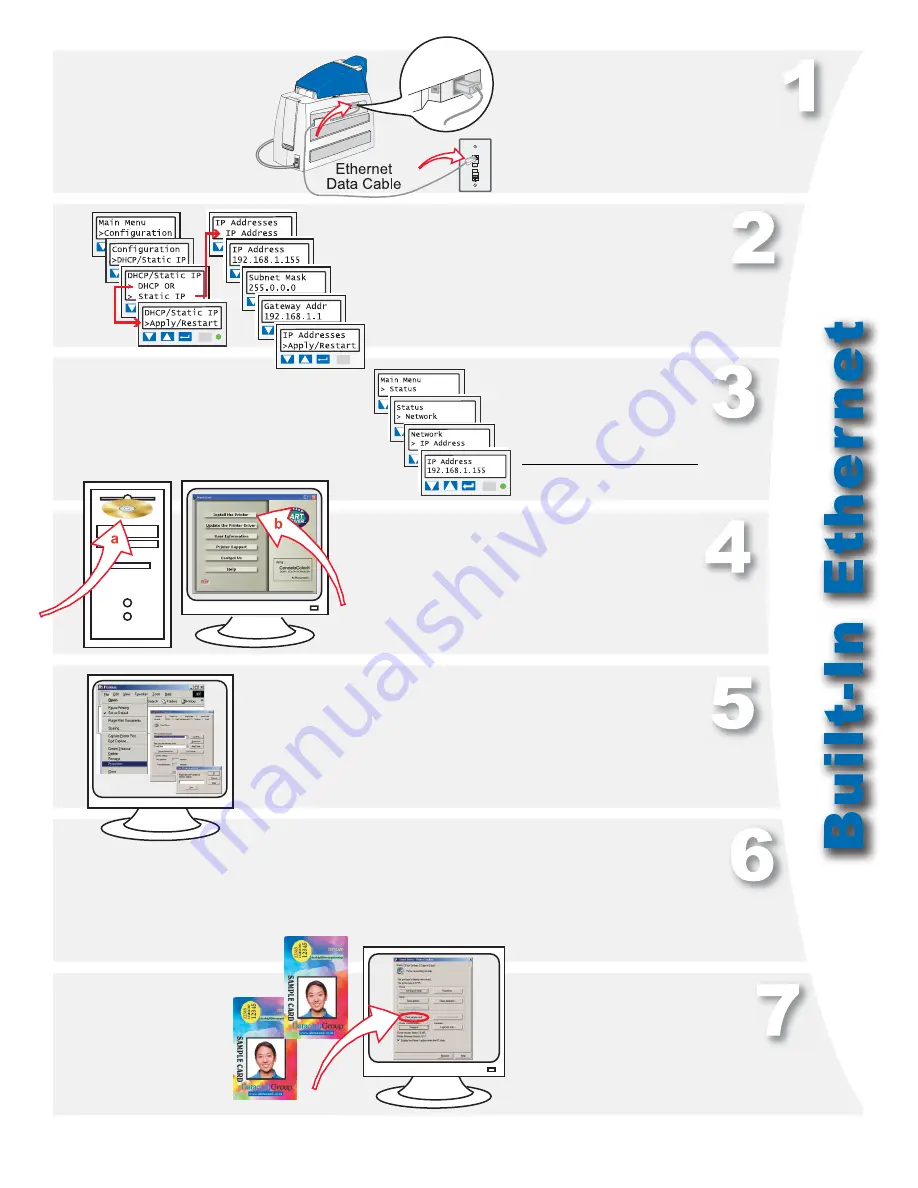
Congratulations
,
you have installed the
printer! Complete the
installation report
and install your ID
software now.
Open the Printing Preferences (Windows 2000 and XP), Properties (Windows
98 and Me), or Default Document Properties (Windows NT) dialog box and
change the laminator “Apply Material” settings to match the supplies loaded in
the printer. Change other settings if needed.
Set the printer IP address in the driver’s Properties\ Ports\
Configure or Properties\ Details\ Port Settings dialog box.
a
Insert the Smart Driver CD-ROM.
b
Click “Install the Printer” after the
window opens. Choose “Direct
Network” during installation.
Use the printer LCD panel to set the IP address
mode—DHCP or Static IP. Set the IP address if
needed. The printer restarts if you changed settings.
Connect the printer to the network
using an Ethernet cable.
Retrieve the IP address
and record it.
Open the Printer Toolbox when
Printing Preferences, Properties,
or Document Default Properties
opens. Click “Print Sample Card”
on the Printer Toolbox.
Compare your card with the
factory card.
IP Address:
Содержание SP75 Plus
Страница 1: ......


