background image

V M S   C O M P U T E R   –   A D VA N C E D   F E AT U R E S

13

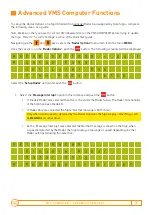
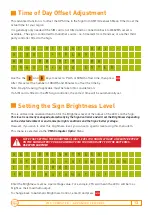
Time of Day Offset Adjustment 

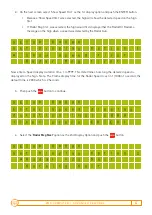
Setting the Sign Brightness Level 

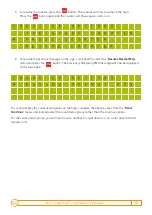
This advanced function is to offset the GPS time in the Sign from GMT (Greenwich Mean Time) to set the 
actual time for your region.
It is generally only needed if the SIM card is not fitted and no connection back to WebVMS server is 
available.  The sign is controlled from another source.  i.e. 

Streams® from Transmax

, or another third 

party controller fitted to the Sign.
    

T

i

m

e

O

f

f

s

e

t

A

d

j

-

S

i

g

n

:

+

(

P

L

U

S

)

H

R

:

0

0

M

I

N

:

0

0

T

h

e

n

P

r

e

s

s

E

N

T

E

R

.

 
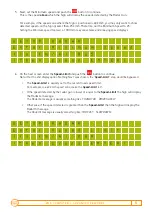
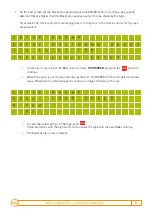
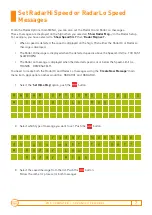
Use the  the           and           keys to select a  PLUS or MINUS offset time, then press          .
After this select the number of HOURS and Minutes to offset the time by.
Note: Daylight saving if applicable must be taken into consideration.
If a SIM card is fitted to the VMS sign controller, the correct time will be automatically set.

This is an Override advanced function for the Brightness level of the output of the LED’s on the Sign.  

This level is normally managed automatically by the Sign Controller and will set the Brightness depending 
on the detected ambient or environmental light conditions and the Signs’ battery voltage.  

However, if you wish to alter this brightness level, you can set a specific level using this menu item. 
This menu is selected via the

 ‘VMS Computer Optns’

 Menu 


S

E

T

B

R

I

G

H

T

N

E

S

S

E

n

t

e

r

a

v

a

l

u

e

f

r

o

m

1

T

O

1

0

0

%

(

0

=

A

u

t

o

m

a

t

i

c

)

 
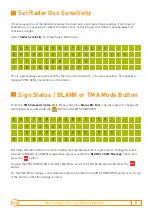
Enter the Brightness level as a percentage value. For example, 25% will mean the LED’s will be ¼ as 
bright as their maximum output.
To change back to Automatic Brightness Control, enter 0 and press          .

NOTE THAT SETTING THE BRIGHTNESS LIGHT LEVEL TOO HIGH MAY HAVE A NEGATIVE EFFECT 

ON THE SIGN BATTERY VOLTAGE AND MAY VOID YOUR WARRANTY FOR THE BATTERIES.  

USE WITH CAUTION!

Содержание VMS II Series

Страница 1: ...VMS Computer Advanced Features DataSigns VMS 123...

Страница 2: ...features of the VMS Product For further Training for this product contact Data Signs on 1300 785 850 This User Manual applies to Controllers operating on firmware xx xx xx or later Table of Contents...

Страница 3: ...a r S e t L o H i M S G V i e w R a d a r S e t u p Select the Setup Radar option and push the button 1 Select the Message Interrupt option in this instance and push the button If Disable Radar was s...

Страница 4: ...n 1 S h o w S p e e d f i r s t R a d a r M s g f i r s t Now enter a Speed display duration time 1 to 9999 This determines how long the detected speed is displayed on the Sign Note The Frame display...

Страница 5: ...6 On the next screen enter the Speed Limit and push the button to continue Note if for the 2nd display option Nothing Next was chosen the Speed Limit step would be bypassed The Speed Limit is usually...

Страница 6: ...e r M a x i m u m m S p e e d i n k m h 1 0 0 T h e n p r e s s E N T E R On the next screen select the Yes option to show YOUR SPEED and push the button to continue When this option is set the Sign...

Страница 7: ...etected speed is above the Speed Limit i e TOO FAST SLOW DOWN The Radar Lo message is displayed when the detected speed is at or below the Speed Limit i e THANKS DRIVE SAFELY You need to create both t...

Страница 8: ...ve This applies to Signs with RM 32B or Later Version Controllers From the VMS Computer Optns Main Menu select the Status Btn Func sub menu item to change the functionality associated with the button...

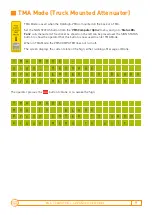
Страница 9: ...er the SIGN STATUS button to show the operator that this button is now used to enter TMA Mode When in TMA Mode the VMS COMPUTER does not turn off The screen displays the current state of the Sign eith...

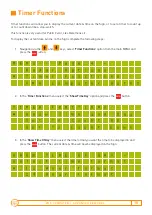
Страница 10: ...main MENU and press the button M E N U P a g e 4 R a d a r O p t i o n s T i m e r F u n c t i o n s V M S C o m p u t e r O p t n s 2 In the Timer Functions menu select the Show Time Day option and...

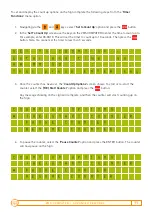
Страница 11: ...E T T O C O U N T U P E n t e r e n d t i m e a s H H M M S S T h e n p r e s s E N T E R k e y 3 Once the counter has been set the Count Up Options screen shows To start or re start the counter selec...

Страница 12: ...e on the sign scroll down to select the Resume Normal Msg option and press the button The previously displaying VMS message will now be displayed on the Sign again C O U N T U P O P T I O N S R e s u...

Страница 13: ...itted to the VMS sign controller the correct time will be automatically set This is an Override advanced function for the Brightness level of the output of the LED s on the Sign This level is normally...

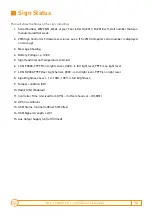
Страница 14: ...ing 4 Battery Voltage i e 12 8V 5 Sign Head Internal Temperature Celcius 6 LDR F 0000 9999 Front Light sensor 0000 is full light level 9999 is no light level 7 LDR R 0000 9999 Rear Light Sensor 0000 i...

Страница 15: ...available Notwithstanding the foregoing Data Signs Pty Ltd does not make any warranty as to the information contained herein and does not accept any liability for any injury loss or damage of any kin...

Отзывы: