1130 - Wireless 20V Voltage & Current Sensor
5 / 19 | Revision: 1.0 | DS157
Operational Overview
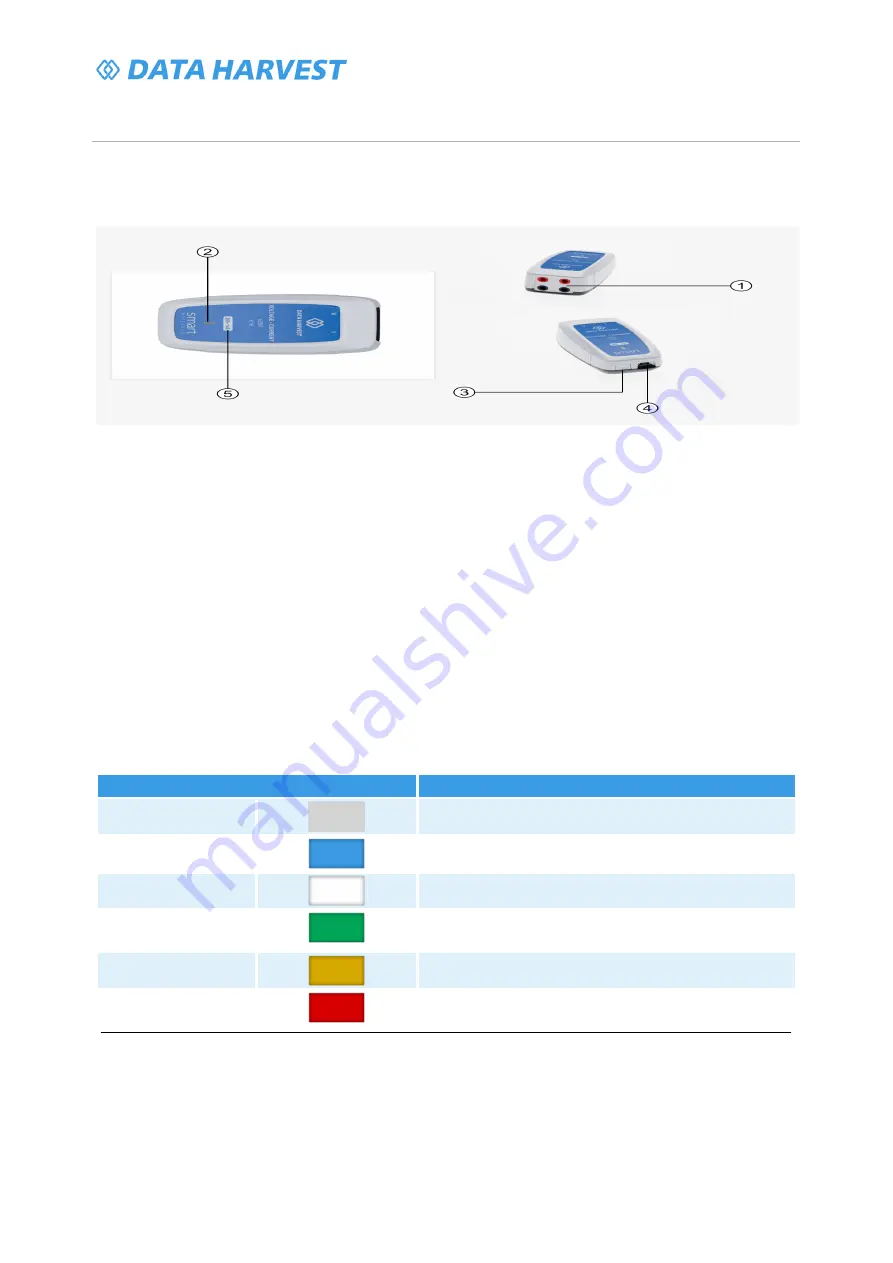
The diagram below shows the specific parts of the sensor. Read further to explore the functionality of
each part of the sensor.
1.Sensor End Cap
2.Status Indicator
3.On/Off Switch
4.USB Port
5.Unique ID Number
Sensor End Cap (1)
Most Smart Wireless Sensors feature an end cap that is specific to the requirements of the device's
internal sensor. The sensor's end cap is the direct interface between the device’s internal sensor and
your experiment.
The Status Indicators (2)
The sensor features a single status indicator that changes colour and flashes. See the table below for
further information.
Status Light
Indicates
No light
Sensor is Off. Short press the On/Off switch
Blue flashing
Sensor On and Bluetooth advertising
White flashing
Charging via USB mains charger or USB port
Green flashing
Communication with the EasySense2 app (via USB or
Bluetooth) has been established
Orange flashing
Recording data
Red flashing
Battery is low
On/Off Switch (3)
The sensor's on/off switch allows you to turn the sensor on, off or perform a hard reset.
To switch the sensor off


