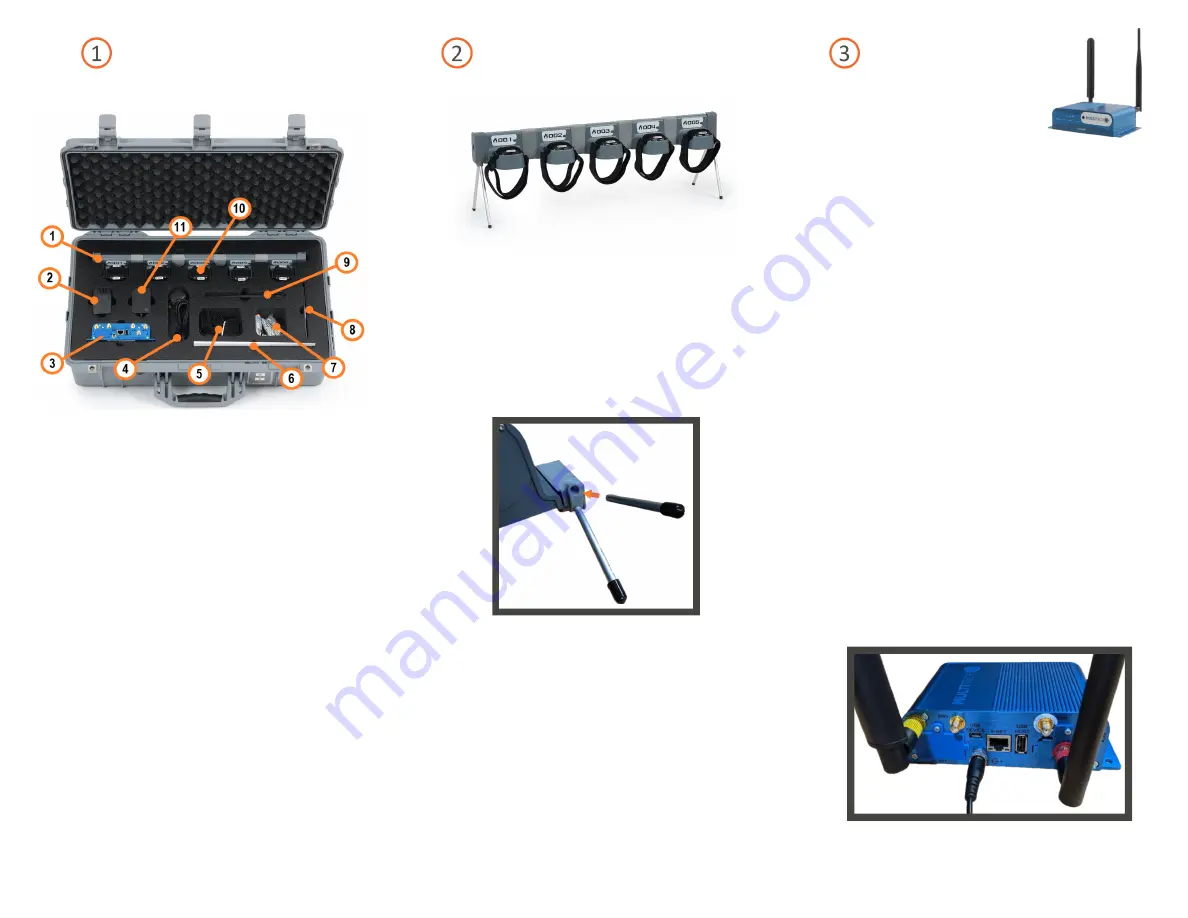
• Devices will arrive discharged. Before getting
started with the system, all devices must be
recharged.
• Remove the charging rail and legs from the kit
and insert each leg into the charging rail.
• Then plug the charging rail power supply into the
rail and the wall outlet (If multiple charging rails
present use cable splitter to power from the power
supply).
• Place the devices on the charging rail.
• The indicator light on the devices will be blue
when charging and purple when charging is
completed. When not using the devices place
back on the charging rail to charge.
• The gateway is the entry point for the data that
is sent from the devices. The gateway contains a
cellular module that transmits biometric data to
the FireHUD web application.
• Place the gateway on an elevated surface near
a wall outlet that is also close to the area that
devices will be used.
• The two antennas need to be plugged in. The
round antenna screws into the ‘RF’ port on the
back of the gateway. The flat paddle antenna
screws in the ‘cell’ port. The gateway power
supply should be plugged into the wall and into
the gateway. The nut on the plug to the gateway
should be screwed in to ensure a good
connection.
• After the gateway is powered, it will take 2-3
minutes to boot. Once booted and ready for
operations, the status light on the front of the
device will begin blinking.
• Additional questions can be answered at
https://support.firehud.co/
1) Device Charging Railing
2) Charging Rail Power Supply
3) BioTrac Gateway
4) Gateway GPS Antenna
5) Additional Storage
6) Instruction Pamphlet
7) Additional Storage
8) Charging Rail Legs
9) Gateway Antenna
10) BioTrac Devices
11) Gateway Power Supply
Kit Layout
Gateway
Charging Rail
• Typical kit contents include the items below.
• Note: Actual contents received may vary depending on setup or
type of kit requested.


