background image


DB-70 Automatic Wheel Balancer 

39


P/N 5900261 — Rev. A1 — January 2021 

l.


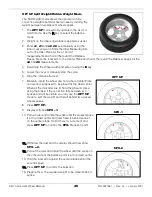
Turn the Wheel, watching the indicators to the 

right

 of the 

Inner Display Window

. The 

Indicators light up or go out as you move the Wheel. 

m.


When all of the Indicators are lit, press the Brake Pedal to hold the Wheel at that position. 

n.


Clamp the Weight at Top Dead Center on the Wheel (12 o’clock high) on the Inner Edge. 

o.


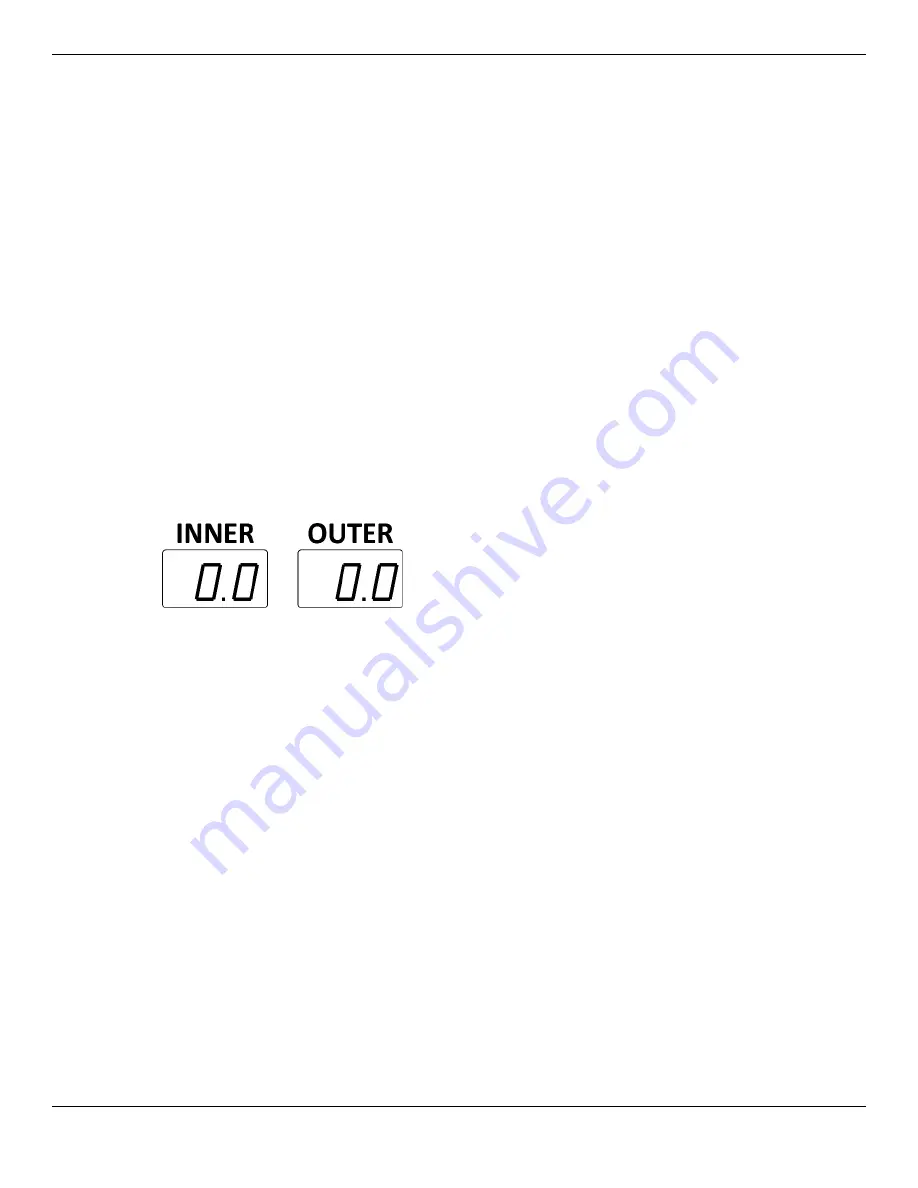
Check the value on the Outer Display Window: 


If the value is 

0.0

, you do not need to add Weight to the Center Plane. 


If there is a value—

.25

, for example—you need to add that amount of Weight to the 

Center Plane for 

ALU 3

). 

p.


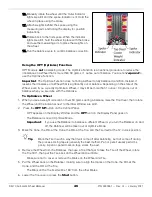
To add Weight, manually turn the Wheel, watching the indicators to the 

left

 of the 

Outer 

Display Window

. The Indicators light up or go out as you move the Wheel. 

q.


When all of the Indicators are lit, press the Brake Pedal to hold the Wheel at that position. 

r.


Pull the backing off the Adhesive Weights, then add the Weight at Top Dead Center on the 

Wheel (12 o’clock high) on the Center Plane for ALU3. If you are adding Adhesive Weight 
with multiple sections, center them on Top Dead Center. 

s.


Release the Brake Pedal. 

t.


Lower the Tire Cover to spin the Wheel again. 

The Wheel is balanced when both the Inner and Outer Windows show 

0.0


It may take more than one time adding weights to get to 

0.0 | 0.0


To balance a Wheel using ALU 4 Mode

a.


Make sure you are dressed appropriately: leather gloves, steel-toed work boots, back belts, 

hearing protection, and ANSI-approved eye protection: safety glasses, face shield, or goggles. 

b.


Visually inspect the Balancer to make sure everything is in place. The Tire Cover should be 

up

If you find any issues, fix them. If there are issues you cannot fix, refer to 

Troubleshooting

. 

c.


Make sure the Wheel you want to balance is both clean and free of any weights that may have 
been put on previously. If it is dirty, clean it. Remove any existing weights. 

Important:

  When using adhesive weights it is extremely important to clean the Wheel. The 

cleaner the Wheel, the longer the Adhesive Weight stays in place. 

d.


Mount the Wheel on the Balancer. 

Refer t

Mounting a Wheel

 for mounting instructions, if needed. 

Содержание DB-70

Страница 1: ...hina DANGER Read the enTire contents of this manual before using this product Failure to follow the instructions and safety precautions in this manual can result in serious injury or death Make sure a...

Страница 2: ...our new product was designed and manufactured with safety in mind Your safety also depends on proper training and thoughtful operation Do not set up operate maintain or repair the unit without reading...

Страница 3: ...irs it You can always find the latest version of the manual for your product on the Dannmar website DANGER Be very careful when installing operating maintaining or repairing this equipment failure to...

Страница 4: ...duct Do not set up or operate the product until you are familiar with all operating instructions and warnings Do not allow anyone else to operate the product until they are also familiar with all oper...

Страница 5: ...an immediate hazard that will result in death or severe injury WARNING Calls attention to a hazard or unsafe practice that could result in death or injury CAUTION Calls attention to a hazard or unsaf...

Страница 6: ...not currently in use Quick Nut Secures the wheel to the Shaft Not all components visible in the photo above Tire Cover Covers the wheel while in motion Power On Off Removes power from the Balancer An...

Страница 7: ...r imbalance separately and addressed separately called Dynamic Balancing Clip On Weights Metal weights that are held in place on the Wheel by clipping them to the Inner or Outer Edge Older Clip On Wei...

Страница 8: ...ess visible Q What kind of plug comes with the Balancer A The Balancer comes from the factory with a plug for 110 VAC power However it may be converted to 220 VAC Refer to Connecting to Power for comp...

Страница 9: ...mm Min Current 25kW Drive System Type Electric Belt Drive Noise 70dB Net Weight 112kg 246 lbs No Shaft fixture or external scale Gross Weight 308 7 lbs 140kg Dimensions 48 4 in wide by 41 3 in deep by...

Страница 10: ...ource available at the installation location Make arrangements for an electrician if required 4 Make sure you have the necessary Tools 5 Make sure there is adequate clearance around and above the DB 7...

Страница 11: ...icensed certified Electrician CAUTION Certain parts of installing the Wheel Balancing Machine are difficult for one person Dannmar strongly recommends having two or more people work together to instal...

Страница 12: ...pace around it Refer to Clearance for more information Access You need some space to move Wheels to and from the Wheel Balancing Machine Danger When the Wheel Balancing Machine is in use especially du...

Страница 13: ...ncing Machine is required WARNING The Clearance values shown below allow enough space to operate the Wheel Balancing Machine However for safety purposes only the Operator should be within 30 feet of t...

Страница 14: ...Do not lift the Balancer by the Shaft Housing you will damage it 2 At the bottom of the carton push the metal tabs all the way down on all four sides Pull the carton off over the Balancer You may have...

Страница 15: ...ith SCHS M6 x 25 with a Washer Split Ring Lock Washer and M6 Hex Nut The parts Tray and Display is integrated into one assembly It is attached to the Balancer cabinet through six M6 x 20 Hex Socket He...

Страница 16: ...or the Wheel Balancing Machine 1 Make sure you are wearing OSHA approved publication 3151 Personal Protective Equipment leather gloves steel toed work boots back belts hearing protection and ANSI appr...

Страница 17: ...n the base the Anchor Bolt eventually stops going down into the hole as the Expansion Sleeve contacts the sides of the hole this is normal 6 Hammer or mallet the Anchor Bolt the rest of the way down i...

Страница 18: ...2 Pole 3 Wire plug The DB 70 does not come with this plug You must supply your own Do not change the 110 VAC plug to a 220 VAC plug unless you are a licensed certified Electrician The colors of the t...

Страница 19: ...le vapors The unit must not be located in a recessed area or below floor level Installing the Tire Cover The Tire Cover is a large molded plastic cover with a steel tube frame designed to protect the...

Страница 20: ...ing risks Only trained authorized supervised personnel may be within 30 feet of the Wheel Balancing Machine while it is in use Do not assume you are going to be safe using the Wheel Balancing Machine...

Страница 21: ...or greater than that of the Wheel Balancing Machine Cords rated for less current than the Wheel Balancing Machine could overheat If used arrange the extension cord so that it will not be tripped over...

Страница 22: ...e Outer Display Window and slowly rotate the wheel until all the lights to the left of the Window are lit Laser Not required on the DB 70 System Status Indicators Located under the Outer Display Windo...

Страница 23: ...A1 January 2021 Combination Key Functions Press Keys Function F A Changes weight display from grams to ounces F B Changes width display from millimeters to inches F D Manually inputs the D2 value of...

Страница 24: ...type of wheel Mounting a Wheel on the Shaft When you want to balance a Wheel the first step is to mount it on the Shaft Important All Wheels should be mounted so that the inside the side of the Wheel...

Страница 25: ...ely leather gloves steel toed work boots back belts hearing protection and ANSI approved eye protection safety glasses face shield or goggles 2 Determine which mounting method you want to use 3 Move t...

Страница 26: ...e Inner Measurement Arm The three measurements are Inner Distance The distance from the side of the Balancer to the Inner Edge of the Wheel Measured by the Inner Distance Arm To measure and input the...

Страница 27: ...caliper and then enter this value using the and buttons above and below the B key on the Control Panel Note If you start balancing a Wheel without entering one or more measurements the Balancer will u...

Страница 28: ...balance mode utilizes adhesive balance correction weights on the inner plane behind the wheel spokes and on the outer plane ALU 2 The ALU 2 balance mode clamps balance correction weights on the inner...

Страница 29: ...display should be flashing and a will appear in the Inner Display Window 5 Select the balance mode based on the wheel Press R until the DYNAMIC weight position is displayed as shown here 6 Input the...

Страница 30: ...the inner correction weight s Hold the wheel in place using the brake and clamp the weight s at the 12 o clock position on the inside wheel rim Clamp the weights using the Wheel Weight Tool 15 Manuall...

Страница 31: ...the Tire Cover switch is off then lower the Tire cover and manually start the test using the start button on the control panel WARNING Stay clear and do not touch the Wheel or the Tire while it is rot...

Страница 32: ...wheel using an ALU mode 1 Make sure you are dressed appropriately leather gloves steel toed work boots back belts hearing protection and ANSI approved eye protection safety glasses face shield or gog...

Страница 33: ...the Balancer beeps This automatically determines the distance from the side of the Balancer to the wheel and the wheel diameter a1 and d1 then places the parameters into the Balancer s memory You may...

Страница 34: ...5 for example you need to add that amount of Weight to the Inner Plane j To add Weight break off the appropriate number of Adhesive Weight sections k Turn the Wheel watching the indicators to the righ...

Страница 35: ...s in place d Mount the Wheel on the Balancer Refer to Mounting a Wheel for mounting instructions if needed e Turn the Balancer Off and then back On to reset if required The display should be flashing...

Страница 36: ...e the Wheel n When all of the Indicators are lit and the Balancer beeps press the Brake Pedal to hold the Wheel at that position o Pull the backing off the Adhesive Weights then add the Weight at Top...

Страница 37: ...t When using Adhesive Weights it is extremely important to clean the Wheel the cleaner the Wheel the longer the Adhesive Weight stays in place d Mount the Wheel on the Balancer Refer to Mounting a Whe...

Страница 38: ...measurements are correct you are done entering measurements j Close the Tire Cover the Wheel spins briefly WARNING Stay clear and do not touch the Wheel or the Tire while it is rotating The Balancer...

Страница 39: ...o clock high on the Center Plane for ALU3 If you are adding Adhesive Weight with multiple sections center them on Top Dead Center s Release the Brake Pedal t Lower the Tire Cover to spin the Wheel aga...

Страница 40: ...otating j The Balancer will automatically rotate and test the wheel for balance unless the Tire Cover switch is in the off position If the Tire Cover switch is off then lower the Tire cover and manual...

Страница 41: ...essed appropriately leather gloves steel toed work boots back belts hearing protection and ANSI approved eye protection safety glasses face shield or goggles b Visually inspect the Balancer to make su...

Страница 42: ...uter wheel edge These values are rounded to the nearest 25 oz Press F to view the actual unbalanced weight without rounding If either window displays 0 0 no corrective weights are required on that pla...

Страница 43: ...NSI approved eye protection safety glasses face shield or goggles If you find any issues fix them If there are issues you cannot fix refer to Troubleshooting b Visually inspect the Balancer to make su...

Страница 44: ...n Pull the backing off the Adhesive Weights then add the Weight at Top Dead Center on the Wheel 12 o clock high on the Inner Plane a1 position If you are adding Adhesive Weight with multiple sections...

Страница 45: ...he cycle 6 Stop the rotation after test 7 Manually rotate the wheel and note where Center Plane correction is supposed to be placed at top dead center When all the indicators are lit hold the wheel in...

Страница 46: ...h the Optimize To Optimize a Wheel 1 When you see a weight correction of over 30 grams during a balance raise the Tire Cover then rotate the Wheel until the indicators next to the Inner Window are all...

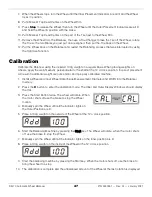
Страница 47: ...the 12 o clock position Incorrect placement will result in additional weight call outs and or an improperly calibrated machine 1 Install a Wheel and input Wheel Data Inside Measurement Diameter and W...

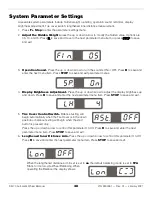
Страница 48: ...nus 4 Display Brightness Adjustment Press the up or down arrow to adjust the display brightness up and down Press R to save and enter the next parameter menu item Press STOP to save and exit 5 Tire Co...

Страница 49: ...ur organization has Lockout Tagout policies make sure to implement them before beginning Maintenance To maintain your Wheel Balancer Daily Make sure the unit is clean and dry clean it after each use W...

Страница 50: ...Make sure the Balancer is anchored see Anchoring the Balancer for more information Perform a calibration Perform the calibration with a steel Wheel of the most commonly used size Note It is good prac...

Страница 51: ...rse Check motor wiring Err 05 Tire cover has not been lowered If the cover is in the lowered position adjust or replace the microswitch Err 06 User has pressed the Stop key Press the stop key again to...

Страница 52: ...DB 70 Automatic Wheel Balancer 52 P N 5900261 Rev A1 January 2021 Labels A...

Страница 53: ...DB 70 Automatic Wheel Balancer 53 P N 5900261 Rev A1 January 2021 B C E...

Страница 54: ...Cross Recessed Pan Head Screw M3 x 25 104 Hex Nut M3 105 Hex Socket Head Screw M6 x 20 106 Spacer 8 107 5530304 SHCS M8 x 20 108 Washer 8 Split Lock 109 Clip Reed Nut M6 110 SHCS M6 x 25 111 Washer 6...

Страница 55: ...Number Description 201 Hexagon Bolt M10 x 40 202 Washer 10 203 Motor Pulley 204 Photoelectric Tooth 205 Washer 4 Split Lock 206 SHCS M4 x 12 207 Spindle Bushing Welding Parts 208 Snap Ring 30 209 Bear...

Страница 56: ...00261 Rev A1 January 2021 Pressure Sensor Assy Pressure Sensor Assy Parts List Part Number Description 221 Hexagon Bolt M10 x 40 222 Washer 10 223 Motor Pulley 224 5327140 Photoelectric Tooth 225 5327...

Страница 57: ...anuary 2021 Motor Assy Motor Assy Parts List Part Number Description 231 5327092 Motor 232 Motor Cabinet 233 Pad 8 234 HHB M8 x 30 235 5327145 Flat Key 5 x 5 x 30 236 5327144 Motor Belt Pulley 237 SHC...

Страница 58: ...A1 January 2021 Encoder Encored Board Part Encoder Board Parts List Part Number Description 251 Cross recessed Pan Head Screw M3 x 10 252 Washer M4 253 Encoder Encored Board 254 Encoder Encored Brack...

Страница 59: ...pring 304 Tire Cover 5327145 305 Stop Collar 5327144 306 Washer M4Rotating Shaft 2 Welding 307 Travel Switch Seat Welding 308 SHCS M4 x 20 309 Nut M4 310 Cross Recessed Pan Head Screw M3 x 16 311 Tire...

Страница 60: ...1 Main Board Part Mainboard Part Parts List Part Number Description 401 CPU Board Box Cover 402 Cross Recessed Pan Head Tapping Screw ST 2 2 x 6 5 5324147 403 Brake resistance 404 Digital Tube CPU 405...

Страница 61: ...DB 70 Automatic Wheel Balancer 61 P N 5900261 Rev A1 January 2021 Inner Distance Arm Assy...

Страница 62: ...oss Recessed Pan Head Screw M4 x 10 508 Raster Mounting 1 509 Nut M3 510 Article Grating 511 Grating Bending Ruler Rod 512 Cross Recessed Pan Head Self Acting Screw ST2 2 x 6 5 513 Raster Mounting 2 5...

Страница 63: ...ion Weight 702 Cone 1 703 Cone 2 704 Cone 3 705 Cone 4 5328286 706 Weight removal tool 5327061 707 Quick Nut Cup 5327172 708 Quick Nut Cover 5327073 709 Quick Release Nut 5327720 710 Allen Wrench 5346...

Страница 64: ...r 64 P N 5900261 Rev A1 January 2021 Wiring Assy Wiring Assy Parts List Part Number Description 801 Power Line 802 Gauge Wire 803 Cover Switch Wire 804 Measuring Arm Harness Draw the Ruler to Connect...

Страница 65: ...DB 70 Automatic Wheel Balancer 65 P N 5900261 Rev A1 January 2021 Wiring...

Страница 66: ...DB 70 Automatic Wheel Balancer 66 P N 5900261 Rev A1 January 2021 Maintenance Log...

Страница 67: ...DB 70 Dynamic Wheel Balancing Machine 67 P N 5900261 Rev A1 January 2021 Maintenance Log...

Страница 68: ...1645 Lemonwood Drive Santa Paula CA 93060 USA 2021 BendPak Inc All rights reserved Dannmar com...

Отзывы: