background image


2.1  Handling
The Touring Rack is equipped with two sliding doors allowing

quick and easy access to the front and rear panels of the devices.
1. Unlock the door lock mechanism.
2. Open the door.
3. Push the door into its park position.

2.2  Cooling and placement

NOTICE!
Risk of malfunction due to overheating!

Make sure both the front and rear doors are opened and

pushed into their park positions to provide sufficient cooling.

When using the d&b Z5600.552 Touring rack assembly, make

sure to provide sufficient space of 0.5 m (1.6 ft) at the front and

rear of the touring rack to ensure adequate cooling airflow.

CAUTION!
Risk of personal injury and/or damage to

material due to possible tipping over!

To avoid possible tipping over, do not move stacked touring racks.

D40 Touring rack assemblies as well as D40 and D20 Touring

racks can be stacked or positioned side by side.

When combining D40 Touring rack assemblies with Z3010 D12

Touring rack assemblies or any other rack assemblies that produce

an opposing airflow, observe the following restrictions:
▪ Do 

not stack D12 Touring racks or any other rack assemblies

with opposing airflow on top of the D40 Touring rack.

▪ D40 and theD12 Touring rack assemblies can be positioned

side by side.

2  Handling, cooling and placement


d&b Z5600.552 Manual 1.2 en

7

Содержание Z5600.552

Страница 1: ...D Z5600 552 Manual 1 2 en ...

Страница 2: ...larly check the d b website for the latest version of this document When reselling this product hand over this document to the new owner If you supply d b products please draw the attention of your customers to this document Enclose the relevant documents with the systems If you require additional documents for this purpose you can order them from d b d b audiotechnik GmbH Co KG Eugen Adolff Str 1...

Страница 3: ...electric shock Do not expose the rack assembly to rain or moisture Keep water or other liquids away Do not place liquid filled containers for example beverages on top of the rack assembly Do not operate the rack assembly while it is wet or standing in liquid 6 Do not use the rack assembly if its mains power cord is damaged or frayed Protect the power cord from being walked upon or pinched particul...

Страница 4: ...MP 3 4 CH OUTPUTS 9 3 3 Front panel 9 3 3 1 MAINS 9 3 3 2 AUXILIARY MAINS OUTPUTS 20A 9 3 3 3 AMPLIFIER MAINS OUTPUTS 10 3 3 4 4 CH OUTPUTS NL8 10 3 3 5 12 CH OUTPUT 11 4 Z5604 I O Panel 12 4 1 Intended use 12 4 2 Overview 12 4 2 1 INPUT 12 4 2 2 INPUT LINK 12 4 2 3 Remote network option 12 5 DN1 Ethernet switch 13 5 1 Overview 13 5 2 Mains connection 13 5 3 Front panel 13 5 3 1 ETH 9 ETH 11 13 5 ...

Страница 5: ...udio signals 1 2 Scope of supply Before starting up please verify the shipment for completeness and proper condition of the items If there is any sign of obvious damage do not operate the rack assembly and contact your local dealer from whom you received it Note Depending on the ordered rack assembly variant the rack assembly comprises the following components Pos Qty d b Code Description 1 1 Z560...

Страница 6: ...Dimensions and weight Height x width x depth 710 x 600 x 715 mm 28 x 23 6 x 28 2 Total weight 1x DN1 included 110 kg 242 lb d b Z5600 552 Manual 1 2 en 6 ...

Страница 7: ...ear of the touring rack to ensure adequate cooling airflow CAUTION Risk of personal injury and or damage to material due to possible tipping over To avoid possible tipping over do not move stacked touring racks D40 Touring rack assemblies as well as D40 and D20 Touring racks can be stacked or positioned side by side When combining D40 Touring rack assemblies with Z3010 D12 Touring rack assemblies ...

Страница 8: ... controls and may lead to electric shock Connect the unit to mains power supplies with protective earth only If there is any sign of obvious damage to the power cord and or NEMA mains connector do not use the unit and replace it before further use Do not connect or disconnect the NEMA mains connector under load or live Please ensure the NEMA mains connector is properly connected and locked Please ...

Страница 9: ...MAINS When the rack is connected to the onsite mains power supply the three mains indicators display the presence of the onsite mains supply lines phase conductor L1 L2 L3 3 3 2 AUXILIARY MAINS OUTPUTS 20A Four auxiliary mains outputs powerCON TRUE 1 TOP sockets are provided One socket is mounted on the front and three sockets on the rear panel One of these sockets is used to apply mains supply fo...

Страница 10: ...ct any loudspeaker cabinets neither passive nor active systems to these connectors otherwise there is a risk of damaging the loudspeaker components or the amplifier Each of the 4 CH OUTPUTS connectors represents the 4 CHANNEL OUTPUT of the respective D40 amplifier Each connector carries the output signals of all four channels of the amplifier with the following pin assignment 1 Channel A pos neg 2...

Страница 11: ...combines a 12 amplification channels cable 24 lines 4 mm2 with an LKA25 F M connector For this reason the connector carries the output signal of twelve 12 amplifier channels Pin equivalents of the LKA25 connectors and the corresponding 4 CHANNEL OUTPUT NL8 connectors of the respective amplifier are listed in the following table 12 CH OUTPUT AMP 1 2 3 LKA25 NL8 Amplifier LKA25 NL8 Amplifier LKA25 N...

Страница 12: ...s to be fed to the amplifier 4 2 2 INPUT LINK The INPUT LINK section represents the link output connectors of the last third sixt amplifier and allows the linking of further system racks 4 2 3 Remote network option You can daisy chaining the rack assemblies within a remote network using the enclosed rack link cable Z5333 001 For remote purposes via Ethernet OCA it is strongly recommended to use th...

Страница 13: ... accessible at any time to disconnect the unit in case of malfunction or danger Before connecting the device to mains voltage check that the mains voltage and frequency correspond to the specifications on the rating label above the mains connector socket on the rear panel of the unit A mains connector socket 1 is fitted on the rear panel and an appropriate power cord 1 1 is supplied 5 3 Front pane...

Страница 14: ...eave the Configuration mode and switch back to normal display mode Note Without an DHCP server in LinkLocal IP mode IP adress range in primary mode 169 254 xxx IP adress range in secondary mode 172 31 xxx Reset mode The remote reset function resets all settings related to remote communication to factory defaults To reset the DN1 device to defaults proceed as follows 1 Select and hold the MODE butt...

Страница 15: ...vity max 1 Gbit Network activity max 100 Mbit Primary AVB network detected Device in PRI network mode Secondary AVB network detected Device in SEC network mode Active PoE supply LED off Normal operation No active connection No AVB network information No PoE enabled device connected LED flashing Traffic PoE Error 5 4 Rear panel ETH 1 ETH 8 The DN1 device provides a RJ45 8 port panel at the rear of ...

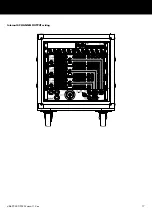
Страница 16: ...Mains power connection and internal mains supply distribution 6 Rack wiring diagrams d b Z5600 552 Manual 1 2 en 16 ...

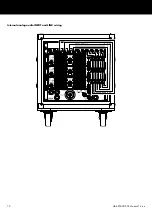
Страница 17: ...Internal 4 CHANNEL OUTPUT wiring d b Z5600 552 Manual 1 2 en 17 ...

Страница 18: ...Internal analog audio INPUT and LINK wiring d b Z5600 552 Manual 1 2 en 18 ...

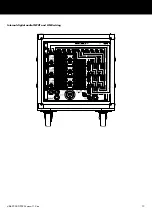
Страница 19: ...Internal digital audio INPUT and LINK wiring d b Z5600 552 Manual 1 2 en 19 ...

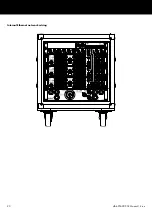
Страница 20: ...Internal Ethernet network wiring d b Z5600 552 Manual 1 2 en 20 ...

Страница 21: ......

Страница 22: ...D2760 US 01 06 2022 d b audiotechnik GmbH Co KG www dbaudio com ...

Отзывы: