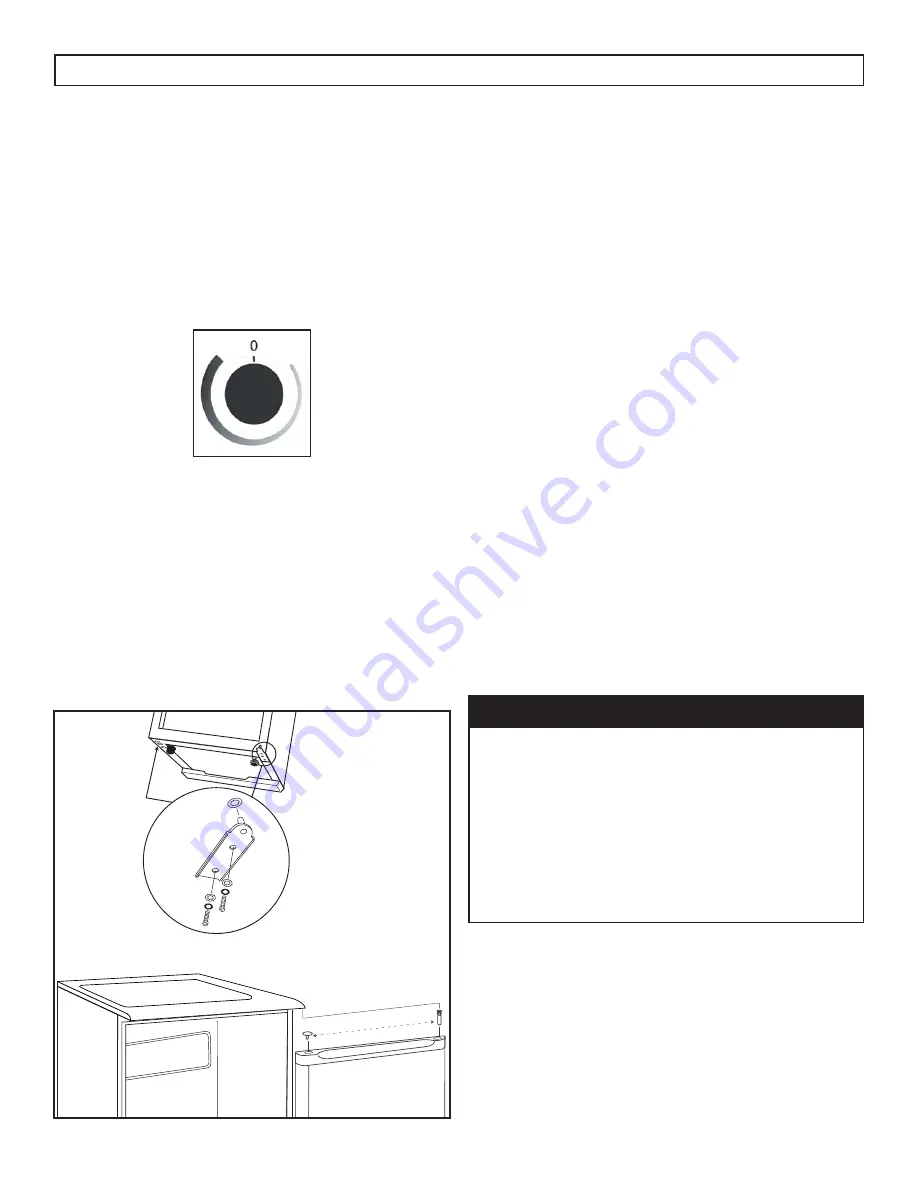
TEMPERATURE SELECTION
The temperature of the appliance can be
adjusted by turning the knob on the graduated
blue thermostat dial. The temperature may vary
depending on the quantity of food stored and the
frequency that the door is opened.
The thicker, darker blue side of the dial is the coldest
setting. The thinner, lighter blue side of the dial is
the warmest setting. To stop the cooling function,
turn the control knob to the “0” position.
9
DEFROSTING THE APPLIANCE
This appliance is equipped with a semi-automatic
defrost system. Defrosting should be activated any
time the ice build up inside the freezer compartment
reaches 6 mm (1/4”) thick.
To activate the defrost cycle, push the red
button located in the center of the thermostat
dial. Activating the defrost cycle will disable
the refrigerator function until the temperature
surrounding the evaporator inside the appliance
reaches approximately 10°C (50°F). The
refrigerator will automatically resume normal
functioning once the defrost cycle is complete.
• Remove all food before starting the defrost cycle.
• Remember to protect your fl oors or counters
during the defrosting process by putting towels
or a pan under the appliance in case of leaking.
• Leaving the refrigerator door partially open can
help the defrosting process. You must remember
to close the door before regular operation
resumes.
• Ensure that the drip tray is under the evaporator
to collect melted water.
Note:
If the red button is pushed accidentally, it is
not possible to stop the defrosting process. You must
let the defrost cycle run its course before using the
refi rgerator again.
IMPORTANT
Never use sharp or pointed instruments to
remove ice from the freezer compartment.
The freezer compartment contains refrigerated
gas lines. If these lines are accidentally pierced it
will render the refrigerator inoperable and void
the manufacturer’s warranty.
Do not allow the refrigerator to continue
operation if the freezer compartment is pierced.
OPERATING INSTRUCTIONS
DOOR REVERSAL INSTRUCTIONS
If the appliance is placed on its back or side for any
length of time during this process, it must be allowed
to remain upright for 6 hours before plugging it in
to avoid damage to the internal components.
Note:
The upper hinge pin must be unscrewed from
the worktop and screwed into the hole on the other
side of the worktop before replacing the door on the
chassis.


