M4x12mm
M5x12mm
M6x12mm
E
10
5
3
4
6
7
8
9
10
11
1
90
2-9Kg
4
2
1
F
D
A B
/
1
2
2
3
32
!
3
5
6
C
4
7
8
9
1
2
3
4
5
2
4
Installation
guide
B(8PCS)
C(3PCS)
D(16PCS)
E(1PC)
F(1PC)
4x4
5x5
A(8PCS)
Allen Key
Allen Key
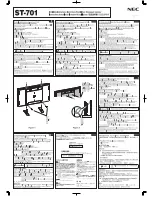
1.Support arm (1PC)
2.Base Mounting Plate (1PC)
3.Protection pad (1PC)
4.Protection pad (1PC)
5.Perforated plate (1PC)
6.Long screw (1PC)
7.Protection pad (1PC)
8.Pressure plate (1PC)
9.Handwheel (1PC)
10.Mount Plate (2PCS)
11.Clip (2PCS)
STEP 1
The Preparation Before Monitor Installation
1.Make sure there are VESA holes 100x100mm or 75x75mm in the monitor. If not, cannot be installed.
2.Remove the original fixed base of monitor.Be careful not to scratch the screen.
75x75mm,100x100mm
STEP 2-A
Option1: Clamp
Tighten
For desk thickness:
20-30mm
DESK
Desktop
Caution
STEP 2-B
Option2: Grommet
Notice: Keep the counterbore
side down
For desk thickness: 25-100mm
Tighten
Available hole size:8.5-70mm
Desktop
STEP 3
Connect the plate and monitor
monitor
Use washer if needed
(D)
Use the allen key (F) to tighten the screw
Tighten
STEP 4
Install the monitor to the arm
Hang the monitor on the plate
from top to bottom and ensure
it is tightened
Connection plate
Lock
Item No.: TGDMARM
1
1
C
E


