


9
Remote Login
Commissioning
►
Connect the recorder to the network.
►
Connect the recorder and relevant peripherals to the voltage supply.
►
Switch on the peripherals and the recorder.
The recorder is available for remote configuration with the software NetConfig 2 via Ethernet after the start (up to approx. 5
minutes). Use the following access data:
Mode
Group login
IP address
192.168.2.230 (can be changed with the software IP-Finder without login)
Password
Serial number (e.g. DAE-12345678)
Note that the definition of the passwords and of the network parameters is necessary for remote access (e. g. Dallmeier
PView
7
).
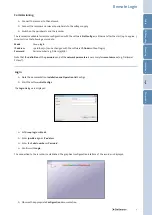
Login
►
Note the documentation Installation and Operation NetConfig 2.
►
Start the software NetConfig 2.
The
Login
dialogue is displayed.
►
Observe the appropriate Configuration documentation.
►
Set Group login as
Mode
.
►
Enter 192.168.2.230 as
IP address
.
►
Enter the Serial number as
Password
.
►
Confirm with
Login
.
The connection to the recorder is established. The graphical configuration interface of the recorder is displayed.
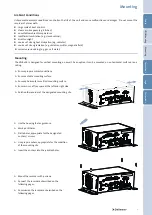
Saf
ety
H
DD Moun
ting
Moun
ting
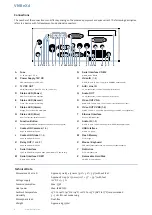
Login
C
onnec
tions
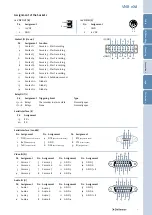
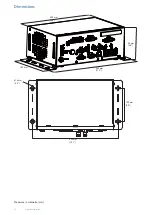
Dimensions


