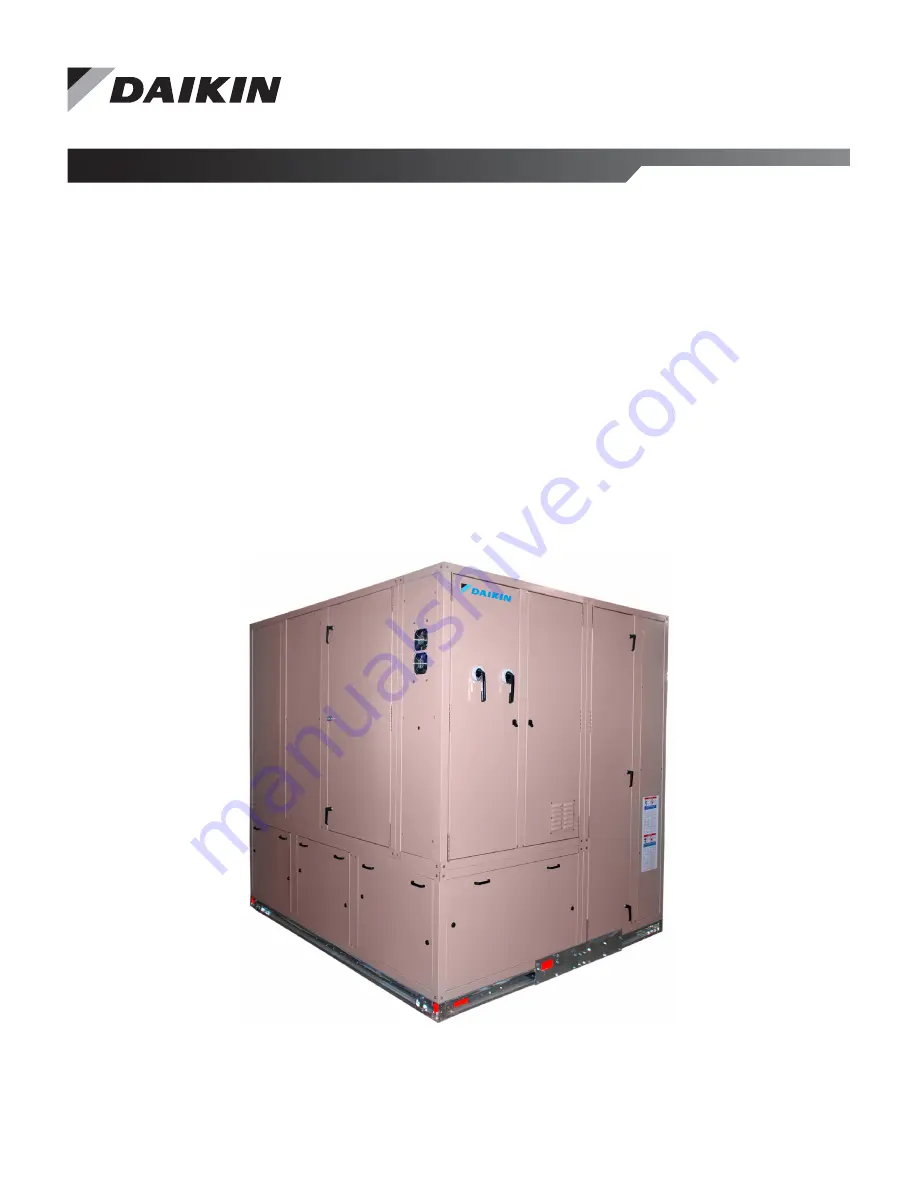
manualshive.com logo in svg
background image

Original Instruction

Installation Manual 

IM 1032-2

Group: 

Applied Air Systems

Part Number: 

IM 1032

Date: 

December 2013

Self-Contained Air Conditioning Systems

Type SWP 

Vintage H 

Refrigerant R-410A 

Capacity 20 through 130 tons

Содержание SWP Series

Страница 1: ...struction Installation Manual IM 1032 2 Group Applied Air Systems Part Number IM 1032 Date December 2013 Self Contained Air Conditioning Systems Type SWP Vintage H Refrigerant R 410A Capacity 20 throu...

Страница 2: ...ariable Frequency Drive 33 Disconnect Switch 33 Dual Power Supply 33 Heating Coil Control 33 Spring Return Actuators 33 System Check Test and Start 34 General 34 Pre Start Up 34 Start Up 35 Variable A...

Страница 3: ...er VFDs Daikin Applied 208 460V OM 844 Daikin Applied 575V OM 895 Non Daikin Applied See vendor manuals Figure 1 Nomenclature Optional Variable Frequency Drivers VFD are offered For a description of o...

Страница 4: ...remain in place while the unit is being moved to its final location Units are provided with lifting lugs for rigging with a crane If units are lifted by crane use slings or cable to protect against ch...

Страница 5: ...leaning of the condenser tubes and economizer coil access to expansion valves and other control components and to allow for possible fan shaft or compressor removal Table 2 Recommended Clearances Loca...

Страница 6: ...sassembled into four pieces A unit not originally intended to be disassembled will have R410A refrigerant factory charge that must be properly recovered before disassembly Figure 4 illustrates the fou...

Страница 7: ...in the section where their respective sensor is located 5 The top panel of the Control Panel Box should be removed to allow two eye bolts with nuts to be installed and used for rigging Connect the li...

Страница 8: ...s section with the coil sections same plates connecting fan coil and condenser compressor sections Remove the double galvanized steel plates connecting the base sections together to split the coil acc...

Страница 9: ...er circuit 6 Lift the supply fan section taking care to align the splice joint to seat into the mating gasket of the coil access section to provide an air tight seal All corners of the unit sections m...

Страница 10: ...piped for a common condenser water supply and a common condenser water return connection 3 Make field piping connections to factory provided piping locating them as indicated on the unit submittal dr...

Страница 11: ...k of the unit Right hand connections are standard left hand connections are optional Long term Storage Project delays or site conditions can require the storage of Daikin Applied Self Contained Air Co...

Страница 12: ...mulations of dirt insect nests etc can contribute to problems if not cleaned out thoroughly prior to start up In addition thermal cycling will have tended to loosen mechanical and electrical connectio...

Страница 13: ...ze2 24 5 27 0 36 5 44 0 Note 1 Maximum size coil to fit in unit Smaller size coils can be used for these units 2 Maximum fan diameter Units may have previous smaller size Table 5 Single Compressor Cir...

Страница 14: ...ly accessible position within sight 50 feet of the unit A factory mounted non fused disconnect is available Return Air and Outside Air Sensors All units are provided with a return air sensor It is con...

Страница 15: ...e phase power supply 2 Allowable voltage tolerances a 60 Hertz Nameplate 208 V Min 187 V Max 229 V Nameplate 230 V Min 207 V Max 253 V Nameplate 460 V Min 414 V Max 506 V Nameplate 575 V Min 518 V Max...

Страница 16: ...3 Disconnect switch DS1 DS2 Power block PB1 PB2 If the optional disconnect switch is provided the switch handle is visible and accessible without removing any safety or access panels Low voltage compo...

Страница 17: ...erruption occurs check circuits to determine the cause of the interruption If a fault condition exits examine the controller If damaged replace it to reduce the risk of fire or electrical shock Figure...

Страница 18: ...k with another trained experienced technician nearby Terminals All field wiring terminals are spring clamp type which offer several advantages over traditional screw type terminals Spring connections...

Страница 19: ...water flow to the condensers and observe the cutout point on a high pressure gauge The high pressure control should open at 500 psig and close at 380 psig After testing the high pressure control check...

Страница 20: ...phase voltage monitor is located on the load side of the power block with a set of contacts wired to the 115 volt control circuit to shut down the unit whenever phase voltages are outside the specifi...

Страница 21: ...MP30 Manual motor protector inverter bypass supply fan Main control box MP1 8 Motor protector compressors 1 8 On compressors OAE Outside air enthalpy sensor Field installed in outside duct OAT Outside...

Страница 22: ...Figure 19 Main Power Schematic Variable Volume IM 1032 2 Self Contained Air Conditioning System 22 www DaikinApplied com Typical Wiring Diagrams...

Страница 23: ...Figure 19 continued Main Power Schematic Variable Volume Typical Wiring Diagrams www DaikinApplied com 23 IM 1032 2 Self Contained Air Conditioning Systems...

Страница 24: ...Figure 20 Control Input Schematic Variable Volume IM 1032 2 Self Contained Air Conditioning System 24 www DaikinApplied com Typical Wiring Diagrams...

Страница 25: ...Figure 20 continued Control Input Schematic Variable Volume Typical Wiring Diagrams www DaikinApplied com 25 IM 1032 2 Self Contained Air Conditioning Systems...

Страница 26: ...Figure 21 Inverter Output Schematic IM 1032 2 Self Contained Air Conditioning System 26 www DaikinApplied com Typical Wiring Diagrams...

Страница 27: ...Figure 21 continued Inverter Output Schematic Typical Wiring Diagrams www DaikinApplied com 27 IM 1032 2 Self Contained Air Conditioning Systems...

Страница 28: ...Figure 22 Condenser Output Independent Refrigeration Circuit IM 1032 2 Self Contained Air Conditioning System 28 www DaikinApplied com Typical Wiring Diagrams...

Страница 29: ...Figure 22 continued Condenser Output Independent Refrigeration Circuit Typical Wiring Diagrams www DaikinApplied com 29 IM 1032 2 Self Contained Air Conditioning Systems...

Страница 30: ...Figure 22 continued Condenser Output Independent Refrigeration Circuit continued IM 1032 2 Self Contained Air Conditioning System 30 www DaikinApplied com Typical Wiring Diagrams...

Страница 31: ...Figure 23 Electric Heat Schematic Typical Wiring Diagrams www DaikinApplied com 31 IM 1032 2 Self Contained Air Conditioning Systems...

Страница 32: ...nd seal the cabinet NOTE To avoid confusion between high and low tubing use two different tubing colors and record this information along with the sensing point location on the master building bluepri...

Страница 33: ...emperatures as low as 40 F The valve is a two way regulating valve controlled via MicroTech III to maintain refrigerant head pressure Variable Frequency Drive As an option a variable frequency drive V...

Страница 34: ...eck belt tension and alignment 7a Check all factory and field installed Victaulic coupling connections for tightness to avoid water leaks Although all factory connections are tight before shipment shi...

Страница 35: ...s and crack valves off the backseat position one turn forward Verify that the unit has not lost its refrigerant charge due to shipping damage or leaks Verify that the compressor crankcase heaters are...

Страница 36: ...of refrigerant and oil However in the event of a leak in the system some added charge may be required In an undercharged situation any of the following may occur If a circuit is slightly undercharged...

Страница 37: ...3 1 50 5 00 RELIEF VALVE ISOLATION VALVE FILTER DRIER SIGHT GLASS ISOLATION VALVE EXPANSION VALVE SUCTION VALVE DISCHARGE VALVE COMPRESSOR NO 1 CONDENSER EQUALIZER CAPILLARY EVAPORATOR A A RELIEF VALV...

Страница 38: ...2 3 8 19 2 N A 24 3 8 19 2 N A 27 3 8 19 2 22 30 1 2 41 7 55 33 1 2 41 7 55 36 1 2 41 7 55 40 1 2 41 7 55 44 1 2 41 7 55 49 1 2 41 7 55 54 1 2 41 7 55 60 3 4 115 150 Drive Sheave Alignment Check the d...

Страница 39: ...eck the tightness of all setscrews on the fan hub and bearing sleeves and retighten belts NOTE If after all tension adjustments the belts slip or squeal when starting increase tension slightly Replace...

Страница 40: ...ighten all power connections every six months 2 Clean the evaporator or economizer coils mechanically or with cold water if necessary Usually any fouling is only matted on the entering air face of the...

Страница 41: ...enser bank more often 5 Check for any dissolved metals 6 TAN Total Acid Number 0 10 No action Between 0 10 and 0 19 Replace anti acid filters and recheck after 1 000 running hours Continue to replace...

Страница 42: ...O D copper tubes with a nominal wall thickness of 0 0028 inches 7 Do not remove gasket D Figure 32 8 Carefully clean the gasket seating with a solvent to remove adhesive residue Remove P N 910116708...

Страница 43: ...ow installation instructions can result in improper installation which can cause bearing performance problems as well as serious personal injury Before attempting to install or remove bearings read in...

Страница 44: ...an antifreeze solution using a small circulating pump and thoroughly drain again Check the freezing point of the antifreeze before proceeding to the next coil Due to a small amount of water always rem...

Страница 45: ...dle are on the left side of the door rotate 1 4 turn counterclockwise 2 Rotate the door handle 1 4 turn clockwise and then 1 4 turn counterclockwise to release any internal pressure or vacuum and open...

Страница 46: ...t I O Remote Connect 1 Pk 193409901 MT3 Conn 2 Pin Spring Top Entry 193410302 MT3 Conn 3 Pin Spring Top Entry 193410303 MT3 Conn 4 Pin Spring Top Entry 193410304 MT3 Conn 5 Pin Spring Top Entry 193410...

Страница 47: ...ipment warranty order the replacement compressor through the Daikin Applied Parts Department Minneapolis MN To order 1 Contact the Daikin Applied Parts Department for compressor availability 2 Send a...

Страница 48: ...r local Daikin Applied Representative for warranty details Refer to Form 933 430285Y To find your local Daikin Applied Representative go to www DaikinApplied com Warranty Return Material Procedure Def...

Страница 49: ...area for service and operation Yes No N A D Are the fan drives properly aligned and belts adjusted Yes No N A E Does the fan turn freely Yes No N A F Are all setscrews on pulleys bearings and fans tig...

Страница 50: ...IV General A Are all control lines secure to prevent excessive vibration and wear Yes No N A B Are all gauge ports shut off valve caps and packings tight after start up Yes No N A C Are VAV boxes set...

Страница 51: ...s representative for more information Refrigerant Type GWP1 Value R410A 1975 1 Global warming potential Disposal of Material This unit is made of metal and plastic parts For its protection during tran...

Страница 52: ...ndard terms and conditions of sale including Limited Product Warranty Consult your local Daikin Applied representative for warranty details Refer to Form 933 430285Y To find your local Daikin Applied...

Отзывы: