background image

4

 | 

User safety instructions

Installer and user reference guide

21

RYYQ+RYMQ+RXYQ
VRV IV+ heat pump
4P546228-1C – 2021.11

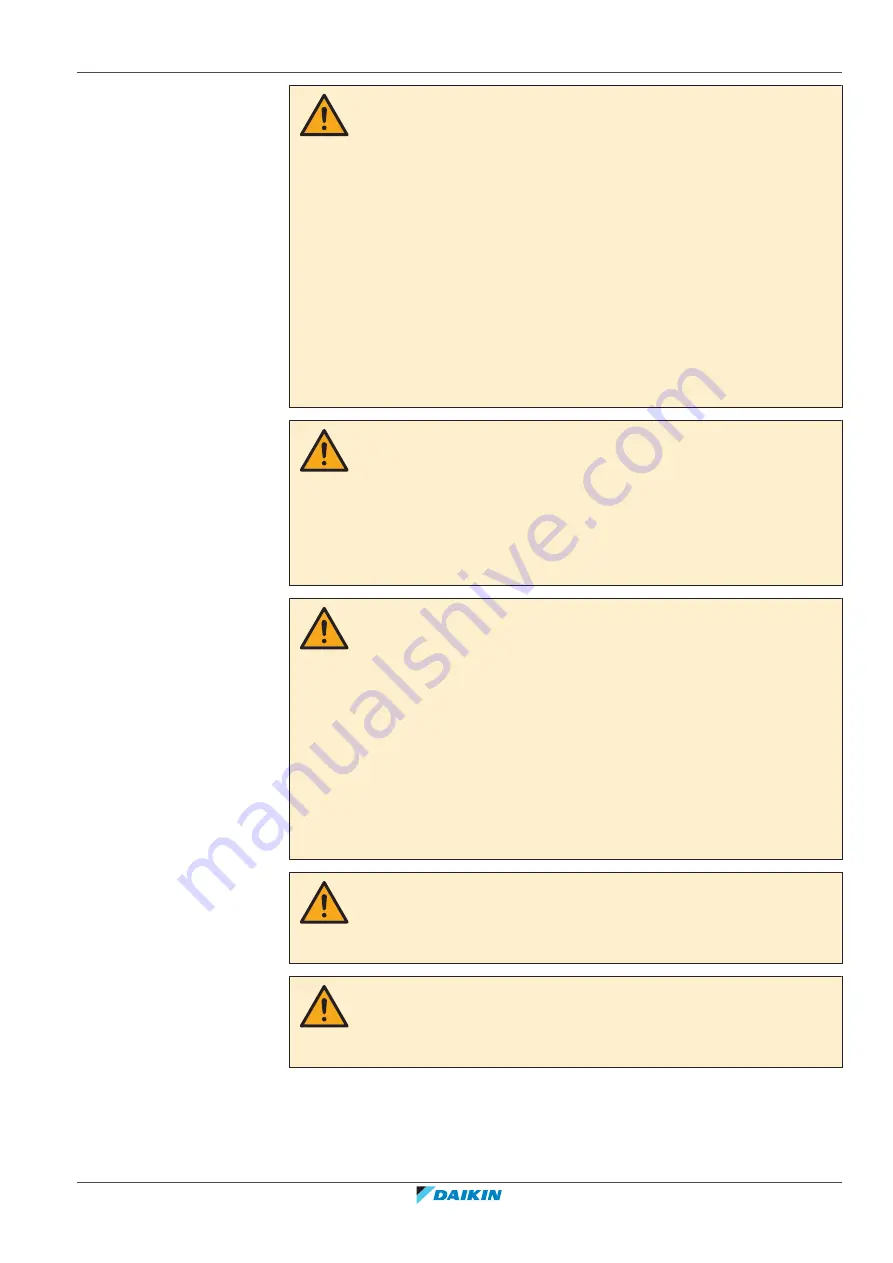
WARNING

Do NOT modify, disassemble, remove, reinstall or repair
the unit yourself as incorrect dismantling or installation
may  cause  an  electrical  shock  or  fire.  Contact  your
dealer.

In case of accidental refrigerant leaks, make sure there
are  no  naked  flames.  The  refrigerant  itself  is  entirely
safe, non-toxic and non-combustible, but it will generate
toxic  gas  when  it  accidentally  leaks  into  a  room  where
combustion  air  from  fan  heaters,  gas  cookers,  etc.  is
present.  ALWAYS  have  qualified  service  personnel
confirm  that  the  point  of  leakage  has  been  repaired  or
corrected before resuming operation.

WARNING
Stop  operation  and  shut  OFF  the  power  if  anything
unusual occurs (burning smells etc.).

Leaving  the  unit  running  under  such  circumstances  may
cause  breakage,  electrical  shock  or  fire.  Contact  your
dealer.

WARNING

The refrigerant in the system is safe and normally does not
leak. If the refrigerant leaks in the room, contact with a fire
of a burner, a heater or a cooker may result in a harmful
gas.
Turn  off  any  combustible  heating  devices,  ventilate  the
room  and  contact  the  dealer  where  you  purchased  the
unit.
Do  NOT  use  the  system  until  a  service  person  confirms
that the portion where the refrigerant leaks is repaired.

CAUTION

NEVER  expose  little  children,  plants  or  animals  directly  to
the airflow.

CAUTION

Do  NOT  touch  the  heat  exchanger  fins.  These  fins  are
sharp and could result in cutting injuries.

Содержание RYYQ8U7Y1B

Страница 1: ...Y1B RYYQ12U7Y1B RYYQ14U7Y1B RYYQ16U7Y1B RYYQ18U7Y1B RYYQ20U7Y1B RYMQ8U5 U7Y1B RYMQ10U5 U7Y1B RYMQ12U5 U7Y1B RYMQ14U5 U7Y1B RYMQ16U5 U7Y1B RYMQ18U5 U7Y1B RYMQ20U5 U7Y1B RXYQ8U5 U7Y1B RXYQ10U5 U7Y1B RXY...

Страница 2: ...t changeover remote control switch 29 7 4 3 To use the dry program WITH cool heat changeover remote control switch 29 7 5 Adjusting the air flow direction 30 7 5 1 About the air flow flap 30 7 6 Setti...

Страница 3: ...ons 54 15 1 Overview About the units and options 54 15 2 Identification label Outdoor unit 54 15 3 About the outdoor unit 55 15 4 System layout 55 15 5 Combining units and options 56 15 5 1 About comb...

Страница 4: ...rical wiring 109 18 1 2 Field wiring Overview 111 18 1 3 About the electrical wiring 111 18 1 4 Guidelines when knocking out knockout holes 112 18 1 5 About electrical compliance 113 18 1 6 Safety dev...

Страница 5: ...22 1 1 To prevent electrical hazards 152 22 2 About service mode operation 153 22 2 1 To use vacuum mode 153 22 2 2 To recover refrigerant 153 23 Troubleshooting 155 23 1 Solving problems based on err...

Страница 6: ...ration manual Installation and operation instructions Format Paper in the box of the outdoor unit Installer and user reference guide Preparation of the installation reference data Detailed step by ste...

Страница 7: ...inor or moderate injury NOTICE Indicates a situation that could result in equipment or property damage INFORMATION Indicates useful tips or additional information Symbols used on the unit Symbol Expla...

Страница 8: ...per installation or attachment of equipment or accessories could result in electrical shock short circuit leaks fire or other damage to the equipment ONLY use accessories optional equipment and spare...

Страница 9: ...it Make sure the area is well ventilated Do NOT block any ventilation openings Make sure the unit is level Do NOT install the unit in the following places In potentially explosive atmospheres In place...

Страница 10: ...ase them directly into the environment Use a vacuum pump to evacuate the installation NOTICE After all the piping has been connected make sure there is no gas leak Use nitrogen to perform a gas leak d...

Страница 11: ...ible consequence Incorrect refrigerant amount 2 1 4 Electrical DANGER RISK OF ELECTROCUTION Turn OFF all power supply before removing the switch box cover connecting electrical wiring or touching elec...

Страница 12: ...h leakage protector CAUTION When connecting the power supply connect the earth cable first before making the current carrying connections When disconnecting the power supply disconnect the current car...

Страница 13: ...connected securely Make sure all covers are closed before starting up the unit NOTICE ONLY applicable if the power supply is three phase and the compressor has an ON OFF starting method If there exist...

Страница 14: ...he service cover is removed DANGER RISK OF BURNING SCALDING DANGER RISK OF ELECTROCUTION WARNING Take sufficient precautions in case of refrigerant leakage If refrigerant gas leaks ventilate the area...

Страница 15: ...unit to a utility pipe surge absorber or telephone earth Incomplete earthing may cause electrical shock Install the required fuses or circuit breakers Secure the electrical wiring with cable ties so t...

Страница 16: ...stress relief and the terminal block itself MUST be as such that the current carrying wires are tautened before the earth wire is in case the power supply is pulled loose from the stress relief CAUTIO...

Страница 17: ...For the user Installer and user reference guide 17 RYYQ RYMQ RXYQ VRV IV heat pump 4P546228 1C 2021 11 For the user...

Страница 18: ...and above and persons with reduced physical sensory or mental capabilities or lack of experience and knowledge if they have been given supervision or instruction concerning use of the appliance in a...

Страница 19: ...is means that the batteries may NOT be mixed with unsorted household waste If a chemical symbol is printed beneath the symbol this chemical symbol means that the battery contains a heavy metal above a...

Страница 20: ...on Fingers may become caught or the unit may break down CAUTION Do NOT insert fingers rods or other objects into the air inlet or outlet Do NOT remove the fan guard When the fan is rotating at high sp...

Страница 21: ...been repaired or corrected before resuming operation WARNING Stop operation and shut OFF the power if anything unusual occurs burning smells etc Leaving the unit running under such circumstances may c...

Страница 22: ...irect expansion indoor units air to air applications Hydrobox air to water applications HXY080 125 only AHU air to air applications EKEXV kit is required Aircurtain Biddle air to air applications Comb...

Страница 23: ...ated throughout this operation manual when certain features have exclusive model rights or not g c g g h g g c c c d f e b i a a VRV IV Heat pump outdoor unit b Refrigerant piping c VRV direct expansi...

Страница 24: ...are dangerous to touch and appliance problems may happen For checking and adjusting the internal parts contact your dealer This operation manual offers a non exhaustive overview of the main functions...

Страница 25: ...low direction 30 7 5 1 About the air flow flap 30 7 6 Setting the master user interface 31 7 6 1 About setting the master user interface 31 7 6 2 To designate the master user interface VRV DX and Hydr...

Страница 26: ...ding on the type of indoor unit refer to dedicated installation operation manual for more information 7 2 Operation range Use the system in the following temperature and humidity ranges for safe and e...

Страница 27: ...tion freezing of the outdoor unit s air cooled coil increases over time restricting the energy transfer to the outdoor unit s coil Heating capability decreases and the system needs to go into defrost...

Страница 28: ...system WITHOUT cool heat changeover remote control switch 1 Press the operation mode selector button on the user interface several times and select the operation mode of your choice Cooling operation...

Страница 29: ...speed cannot be set by the user interface The system does not go into operation if the room temperature is low 20 C 7 4 2 To use the dry program WITHOUT cool heat changeover remote control switch To s...

Страница 30: ...5 Press the ON OFF button on the user interface once again Result The operation lamp goes out and the system stops operating NOTICE Do not turn off power immediately after the unit stops but wait for...

Страница 31: ...multi flow corner ceiling suspended and wall mounted Avoid operating in the horizontal direction It may cause dew or dust to settle on the ceiling or flap 7 6 Setting the master user interface 7 6 1...

Страница 32: ...ult The display showing change over under centralised control of all slave user interfaces connected to the same outdoor unit flashes 2 Press the operation mode selector button of the controller that...

Страница 33: ...o Maintenance in the indoor unit manual When the display shows time to clean the air filter ask a qualified service person to clean the filters Refer to Maintenance in the indoor unit manual Keep the...

Страница 34: ...re is set higher lower cooling heating compared to basic operation The focus under high sensible mode is comfort feeling for the customer The selection method of indoor units is important and has to b...

Страница 35: ...al detergent squeeze it well and wipe the panel clean Wipe it with another dry cloth In this chapter 9 1 Maintenance after a long stop period 35 9 2 Maintenance before a long stop period 36 9 3 About...

Страница 36: ...l warming potential GWP value 2087 5 NOTICE Applicable legislation on fluorinated greenhouse gases requires that the refrigerant charge of the unit is indicated both in weight and CO2 equivalent Formu...

Страница 37: ...ng or installation may cause an electrical shock or fire Contact your dealer In case of accidental refrigerant leaks make sure there are no naked flames The refrigerant itself is entirely safe non tox...

Страница 38: ...e used if power fluctuation is outside the allowable range Bumps and vibrations are frequent Dust salt harmful gas or oil mist such as sulphurous acid and hydrogen sulfide may be present in the air Th...

Страница 39: ...ration lamp flashes and the malfunction code appears Notify your installer and report the malfunction code If the system does NOT operate properly except for the above mentioned cases and none of the...

Страница 40: ...ossible but cooling and heating do not work 43 10 2 4 Symptom The fan speed does not correspond to the setting 43 10 2 5 Symptom The fan direction does not correspond to the setting 43 10 2 6 Symptom...

Страница 41: ...door Movement detector or floor temperature sensor malfunction indoor User interface thermistor malfunction indoor PCB malfunction outdoor Current leakage detector was activated outdoor High pressure...

Страница 42: ...utocharge operation related Fin thermistor malfunction Autocharge operation related Autocharge operation related Autocharge operation related Capacity setting malfunction outdoor Abnormal low pressure...

Страница 43: ...his is a slave user interface When the cool heat changeover remote control switch is installed and the display shows change over under centralized control this is because cool heat changeover is contr...

Страница 44: ...ise ceases 10 2 9 Symptom Noise of air conditioners Indoor unit A zeen sound is heard immediately after the power supply is turned on The electronic expansion valve inside an indoor unit starts workin...

Страница 45: ...This is the case immediately after the main power supply switch is turned on and means that the user interface is in normal condition This continues for 1 minute 10 2 16 Symptom The compressor in the...

Страница 46: ...n Installer and user reference guide 46 RYYQ RYMQ RXYQ VRV IV heat pump 4P546228 1C 2021 11 11 Relocation Contact your dealer for removing and reinstalling the total unit Moving units requires technic...

Страница 47: ...ses hydrofluorocarbon Contact your dealer when discarding this unit NOTICE Do NOT try to dismantle the system yourself dismantling of the system treatment of the refrigerant oil and other parts MUST c...

Страница 48: ...3 Technical data Installer and user reference guide 48 RYYQ RYMQ RXYQ VRV IV heat pump 4P546228 1C 2021 11 13 Technical data In this chapter 13 1 Eco Design requirements 48 13 1 Eco Design requirement...

Страница 49: ...For the installer Installer and user reference guide 49 RYYQ RYMQ RXYQ VRV IV heat pump 4P546228 1C 2021 11 For the installer...

Страница 50: ...w About the box This chapter describes what you have to do after the box with the outdoor unit is delivered on site It contains information about Unpacking and handling the outdoor unit Removing the a...

Страница 51: ...nit A forklift can only be used for transport as long as the unit remains on its pallet as shown above 14 3 To unpack the outdoor unit Remove the packaging material from the unit Take care not to dama...

Страница 52: ...LATION OF ADDITIONAL REFRIGERANT CHARGING AMOUNT 4 AFTER FILLING IN THIS TABLE PLEASE PUT IT ON THE SWITCH BOX COVER m x 0 18 m x 0 37 kg OUTDOOR UNIT m x 0 26 m x 0 12 m x 0 059 m x 0 022 ADDITIONAL...

Страница 53: ...6 20 a Only for RYMQ models 14 6 To remove the transportation stay Only for 14 20 HP NOTICE If the unit is operated with the transportation stay attached abnormal vibration or noise may be generated T...

Страница 54: ...57 15 5 4 Possible options for the outdoor unit 58 15 1 Overview About the units and options This chapter contains information about Identification of the outdoor unit Where the outdoor unit fits in t...

Страница 55: ...s chosen some functionality will or will not exist It will be indicated throughout this installation manual and brought to your attention Certain features have exclusive model rights These units are i...

Страница 56: ...V IV heat pump system can be combined with several types of indoor units and is intended for R410A use only For an overview which units are available you can consult the product catalogue for VRV IV A...

Страница 57: ...ected via F1 F2 RXYQ22 54 consists of 2 or 3 RXYQ8 20 units RYYQ22 54 consists of 2 or 3 RYMQ8 20 units RYYQ8 20 units cannot be combined RYMQ8 20 units cannot be used as standalone outdoor unit Non c...

Страница 58: ...17 Cool heat selector In order to control the cooling or heating operation from a central location the following option can be connected Description Model name Cool heat changeover switch KRC19 26A Co...

Страница 59: ...nstall the heater tape PCB kit Description Model name Heater tape kit for 8 12 HP EKBPH012TA Heater tape kit for 14 20 HP EKBPH020TA See also 16 1 2 Additional installation site requirements of the ou...

Страница 60: ...selected according the applicable legislation Do NOT install the unit in the following places In potentially explosive atmospheres In places where there is machinery that emits electromagnetic waves...

Страница 61: ...cause any damage to the installation space and surroundings When installing the unit in a small room take measures in order to keep the refrigerant concentration from exceeding allowable safety limit...

Страница 62: ...in cold climates NOTICE When operating the unit in a low outdoor ambient temperature be sure to follow the instructions described below To prevent exposure to wind and snow install a baffle plate on...

Страница 63: ...gainst leakage according to local regulations or standards The following standards may be applicable if local regulations are not available This system uses R410A as refrigerant R410A itself is an ent...

Страница 64: ...ply 1 Calculate the amount of refrigerant kg charged to each system separately Formula A B C A Amount of refrigerant in a single unit system amount of refrigerant with which the system is charged befo...

Страница 65: ...made Formula F G H F Total volume of refrigerant in the refrigerant system G Size m3 of smallest room in which there is an indoor unit installed H Maximum concentration level kg m3 4 Calculate the ref...

Страница 66: ...ot need to be opened See 19 2 3 To access the field setting components 4123 16 2 3 To open the electrical component box of the outdoor unit NOTICE Do NOT apply excessive force when opening the electro...

Страница 67: ...the unit must be at least 100 mm wide 100 mm 100 mm NOT allowed Allowed preferred installation The height of the foundation must at least be 150 mm from the floor In heavy snowfall areas this height...

Страница 68: ...rain waste water from around the unit During heating operation and when the outdoor temperatures are negative the drained water from the outdoor unit will freeze up If the water drainage is not taken...

Страница 69: ...iping 91 17 3 1 About checking the refrigerant piping 91 17 3 2 Checking refrigerant piping General guidelines 92 17 3 3 Checking refrigerant piping Setup 93 17 3 4 To perform a leak test 93 17 3 5 To...

Страница 70: ...consideration see 17 1 5 About the piping length 475 17 1 2 Refrigerant piping insulation Use polyethylene foam as insulation material with a heat transfer rate between 0 041 and 0 052 W mK 0 035 and...

Страница 71: ...6 12 7 420 x 640 15 9 640 x 920 34 9 19 1 920 41 3 Example Downstream capacity for E capacity index of unit 1 Downstream capacity for D capacity index of unit 1 capacity index of unit 2 E Piping betw...

Страница 72: ...is NOT allowed The pipe thickness of the refrigerant piping shall comply with the applicable legislation The minimal pipe thickness for R410A piping must be in accordance with the table below Pipe mm...

Страница 73: ...o 17 1 3 To select the piping size 470 When using refnet joints at the first branch counted from the outdoor unit side choose from the following table in accordance with the capacity of the outdoor un...

Страница 74: ...dules in addition to the conventional gas and liquid piping This equalising pipe does not exist for RYYQ8 20 or RXYQ8 54 units The equalising pipe connections for the different RYMQ modules are mentio...

Страница 75: ...indoor units H2 Difference in height between indoor and indoor units H3 Difference in height between outdoor and outdoor units H4 Difference in height between outdoor and BP unit H5 Difference in hei...

Страница 76: ...7 8 g t u r s H1 H2 Multi outdoor Branch with refnet joint Example 2 2 a j k b 1 2 3 4 5 6 7 8 c d e f g h t u r s B A H1 H3 H2 Multi outdoor Branch with refnet joint and refnet header Example 2 3 a b...

Страница 77: ...s Conditional extension up till 90 m is possible without additional option kit In case the outdoor location is higher than indoor extension is possible up till 90 m and following 2 conditions must be...

Страница 78: ...than the pipe size of the main pipe then the pipe size of the main pipe has to be increased as well Increase the pipe size as follows 9 5 12 7 12 7 15 9 15 9 19 1 19 1 22 2 22 2 25 4 a 28 6 31 8 a 34...

Страница 79: ...2 3 4 5 6 7 8 H1 H2 Branch with refnet header 1 7 VRV DX indoor units 8 Hydrobox unit HXY080 125 Maximum allowable length Between outdoor and indoor units Actual piping length 135 m Example 1 a b c d...

Страница 80: ...3 2 1 H2 H6 Header BP box 1 5 RA DX indoor units 6 7 VRV DX indoor units Maximum allowable length Between outdoor unit and indoor unit Actual piping length 100 m Example a b g l 100 m Equivalent leng...

Страница 81: ...t branch and BP unit or VRV DX indoor unit If the piping diameter of the sized up piping exceeds the diameter of the piping before the first branch kit than the latter also requires a liquid piping an...

Страница 82: ...here are restrictions on the refrigerant pipe connection order between outdoor units during installation in case of a multiple outdoor unit system Install according to following restrictions The capac...

Страница 83: ...E Make sure the field piping and connections are NOT subjected to stress WARNING During tests NEVER pressurise the product with a pressure higher than the maximum allowable pressure as indicated on th...

Страница 84: ...e the knockout holes on the bottom frame and route the piping under the bottom 17 2 4 To route the refrigerant piping Installation of refrigerant piping is possible as front connection or side connect...

Страница 85: ...the figure 1 1 1 1 2 2 25 4 25 4 NOTICE Be sure to use the supplied accessory pipes when carrying out piping work in the field Be sure that the field installed piping does not touch other pipes the bo...

Страница 86: ...kit For installation of the refrigerant branching kit refer to the installation manual delivered with the kit Mount the refnet joint so that it branches either horizontally or vertically Mount the re...

Страница 87: ...nd or particles entering the pipe 17 2 9 To braze the pipe end NOTICE Precautions when connecting field piping Add brazing material as shown in the figure 1 1 1 1 2 2 25 4 25 4 When brazing blow throu...

Страница 88: ...g insulation foam from heat when brazing 17 2 10 Using the stop valve and service port To handle the stop valve Take the following guidelines into account Make sure to keep all stop valves open during...

Страница 89: ...lve cap NOTICE Pay attention that mentioned torque range is applicable for opening 19 1 25 4 mm stop valves only To close the stop valve 1 Remove the stop valve cover 2 Insert a hexagon wrench into th...

Страница 90: ...16 6 mm 19 1 19 21 8 mm 25 4 17 2 11 To remove the spun pipes WARNING Any gas or oil remaining inside the stop valve may blow off the spun piping If these instructions are NOT followed correctly it ma...

Страница 91: ...ontinuing with the connection of the field piping in case the recovery was not complete 17 3 Checking the refrigerant piping 17 3 1 About checking the refrigerant piping Refrigerant piping works are f...

Страница 92: ...sture air or nitrogen in the refrigerant piping If there is a possibility of moisture being present in the refrigerant piping for example water may have entered the piping first carry out the vacuum d...

Страница 93: ...e State of valve Valve A Open Valve B Open Valve C Open Valve D Open Liquid line stop valve Close Gas line stop valve Close Equalising line stop valve Close NOTICE The connections to the indoor units...

Страница 94: ...copper flare 17 3 5 To perform vacuum drying NOTICE The connections to the indoor units and all indoor units should also be leak and vacuum tested Keep if existing all field supplied field valves to t...

Страница 95: ...C for liquid piping and polyethylene foam which can withstand a temperature of 120 C for gas piping Reinforce the insulation on the refrigerant piping according to the installation environment Ambien...

Страница 96: ...malfunction code is present see 23 1 Solving problems based on error codes 4155 NOTICE Make sure all connected indoor units are recognised see 1 10 1 38 and 1 39 in 19 2 7 Mode 1 Monitoring settings...

Страница 97: ...tact your local dealer NOTICE The refrigerant charge of the system must be less than 100 kg This means that in case the calculated total refrigerant charge is equal to or more than 95 kg you must divi...

Страница 98: ...ted to the outdoor unit Parameter C Example with multiple outdoor units 550 200 300 125 125 125 125 50 500 12 HP 8 HP Action 1 Determine the connection ratio Total outdoor unit capacity class 500 Tota...

Страница 99: ...see the technical engineering data Other combinations than those mentioned in the table are not allowed Indoor units Total CR a CR per type b VRV DX RA DX LT Hydrobox AHU VRV DX 50 130 50 130 VRV DX...

Страница 100: ...t to reach R Q Step 2 3 Open valves C D and B to the liquid and equalising line Charge the equalising line to maximally 0 05 MPa then close valve C and disconnect its connection to the manifold Contin...

Страница 101: ...alve A Charge remaining amount of refrigerant P kg R Q P Depending on ambient conditions the unit will decide to perform autocharge operation in heating or cooling mode Close valve A Push BS3 to stop...

Страница 102: ...t run If following codes appear e 2 indoor temperature out of range and e 3 outdoor temperature out of range In this case perform automatic charging procedure again t0X will appear Push BS1 Charging i...

Страница 103: ...R410A N2 C D b c e a g h f d A B a Pressure reducing valve b Nitrogen c Weighing scales d Refrigerant R410A tank siphon system e Vacuum pump f Liquid line stop valve g Gas line stop valve h Equalisin...

Страница 104: ...n connecting the charge hose After adding the refrigerant do not forget to close the lid of the refrigerant charging port The tightening torque for the lid is 11 5 to 13 9 N m In order to ensure unifo...

Страница 105: ...2 is not pushed within 5 minutes a malfunction code will appear If Then Heating operation will be flashing Push BS2 to restart the procedure Cooling operation Malfunction code will appear Push BS1 to...

Страница 106: ...repeated INFORMATION When a malfunction is detected during the procedure e g in case of closed stop valve a malfunction code will be displayed In that case refer to 23 1 Solving problems based on err...

Страница 107: ...e retrying autocharge procedure Check if the gas side stop valve is opened correctly Check if the valve of the refrigerant cylinder is opened Check if the air inlet and outlet of the indoor unit are n...

Страница 108: ...peel off the applicable language and stick it on top of a b Factory refrigerant charge see unit name plate c Additional refrigerant amount charged d Total refrigerant charge e Quantity of fluorinated...

Страница 109: ...114 18 2 To route and fix the transmission wiring 116 18 3 To connect the transmission wiring 117 18 4 To finish the transmission wiring 118 18 5 To route and fix the power supply 118 18 6 To connect...

Страница 110: ...nt cable length in the unit NOTICE The distance between the high voltage and low voltage cables should be at least 50 mm NOTICE Do NOT operate the unit until the refrigerant piping is complete Running...

Страница 111: ...c Earth connection d Outdoor unit e Indoor unit f User interface g Indoor power supply wiring sheathed cable 230 V h Transmission wiring sheathed cable 16 V i Outdoor power supply wiring sheathed cabl...

Страница 112: ...e f g g d c a Outdoor unit b Indoor unit c Main line d Branch line 1 e Branch line 2 f Branch line 3 g No branch is allowed after branch h Central user interface etc A Outdoor indoor transmission wiri...

Страница 113: ...necessary that the equipment is connected ONLY to a supply with a system impedance Zsys less than or equal to Zmax EN IEC 61000 3 12 provided that the short circuit power Ssc is greater than or equal...

Страница 114: ...ed safety devices i e a main switch a slow blow fuse on each phase and an earth leakage protector in accordance with the applicable legislation For standard combinations Selection and sizing of the wi...

Страница 115: ...1000 m If the total transmission wiring exceeds these limits it may result in communication error For non standard combinations Calculate the recommended fuse capacity Formula Calculate by adding the...

Страница 116: ...ansmission wiring possibility 1 a b Transmission wiring possibility 2 a Fix to pipe insulation with tie wraps c Tie wrap Fix to factory mounted low voltage wiring d Tie wrap a Knockout hole has to be...

Страница 117: ...nstallation F1 F2 F1 F2 Q1 Q2 Q1 Q2 A1P d d e f b a c Q1 Q2 a Unit A master outdoor unit b Unit B slave outdoor unit c Unit C slave outdoor unit d Master slave transmission Q1 Q2 e Outdoor indoor tran...

Страница 118: ...e below a b c d e a Liquid pipe b Gas pipe c Insulator d Transmission wiring F1 F2 e Finishing tape 18 5 To route and fix the power supply The power supply wiring can be routed from the front and left...

Страница 119: ...gth of the conductors between the power supply stress relief and the terminal block itself MUST be as such that the current carrying wires are tautened before the earth wire is in case the power suppl...

Страница 120: ...ch both cables to the power supply terminal as indicated below L1 L2 L2 N 18 7 To check the insulation resistance of the compressor NOTICE If after installation refrigerant accumulates in the compress...

Страница 121: ...4 1 About automatic leak detection 142 19 4 2 To manually perform a leak detection 143 19 1 Overview Configuration This chapter describes what you have to do and know to configure the system after it...

Страница 122: ...EKPCCAB is required The installer can prepare the configuration off site on PC and afterwards upload the configuration to the system See also 19 2 9 To connect the PC configurator to the outdoor unit...

Страница 123: ...ion cover of the electrical component box front plate see figure You can see the three push buttons and the three 7 segment displays and DIP switches 2 a b c a Front plate b Main PCB with 3 7 segment...

Страница 124: ...ted as indicated 8 10 min Ready for operation blank display indication as indicated 7 segment display indications Off Blinking On In case of malfunction the malfunction code is displayed on the indoor...

Страница 125: ...display indication is in the default situation normal operation 2 Push BS1 one time Result Mode 1 is accessed 3 Push BS2 10 times Result Mode 1 setting 10 is addressed 4 Push BS3 one time the value wh...

Страница 126: ...de 2 is accessed 3 Push BS2 18 times Result Mode 2 setting 18 is addressed 4 Push BS3 1 time the value which is returned depending on the actual field situation is the status of the setting In the cas...

Страница 127: ...n optional accessory is required 1 2 Shows the status of power consumption limitation operation Power consumption limitation reduces the power consumption of the unit compared to nominal operating con...

Страница 128: ...monitoring settings For the content or reason behind the malfunction code see 23 1 Solving problems based on error codes 4 155 where most relevant malfunction codes are explained Detailed information...

Страница 129: ...connected to the system 1 40 1 41 Shows 1 40 The current cooling comfort setting 1 41 The current heating comfort setting See 19 3 Energy saving and optimum operation 4136 for more details about this...

Страница 130: ...on and advice about the impact of these settings see 19 3 Energy saving and optimum operation 4136 2 12 Enable the low noise function and or power consumption limitation via external control adaptor D...

Страница 131: ...e see 17 4 2 About charging refrigerant 496 For details concerning the calculation of additional refrigerant charge amount see 17 4 3 To determine the additional refrigerant amount 497 For guidance co...

Страница 132: ...s or to vacuum the system it is necessary to apply a setting which will open required valves in the refrigerant circuit so the reclaim of refrigerant or vacuuming process can be done properly 2 21 Des...

Страница 133: ...with setting 2 22 2 27 Stop time automatic low noise operation approximately 1 6h00 2 7h00 3 default 8h00 2 30 Power consumption limitation level step 1 via the external control adaptor DTA104A61 62 I...

Страница 134: ...erence 0 default Function not active 1 Follows 2 30 setting 2 Follows 2 31 setting 2 35 Height difference setting 2 35 Description 0 In case the outdoor unit is installed in the lowest position indoor...

Страница 135: ...ese settings see 19 3 Energy saving and optimum operation 4136 2 83 Master user interface allocation in case VRV DX indoor units and RA DX indoor units are used at the same time By changing setting 2...

Страница 136: ...nce in 2 85 days 2 Leak detection planned every 2 85 days 2 88 Gathering detailed refrigerant information during test run for leak detection functionality For more details see 20 4 About the test run...

Страница 137: ...igerant temperature to match the required load which is also related to the outdoor ambient conditions E g when your system is operating in cooling you do not need as much cooling under low outdoor am...

Страница 138: ...re to different values in order to achieve requested conditions more quickly Powerful Overshoot during heating operation or undershoot during cooling operation is allowed compared to the requested ref...

Страница 139: ...hoot during heating operation or undershoot during cooling operation is allowed compared to the requested refrigerant temperature in order to achieve the required room temperature very fast The oversh...

Страница 140: ...ration 2 82 0 This setting is used in conjunction with setting 2 9 19 3 3 Example Automatic mode during cooling A B E 100 50 Te C D 3 C 6 C 35 C F A Actual load curve B Virtual load curve initial capa...

Страница 141: ...B Operation start C Operating time D Mild E Quick F Powerful 19 3 4 Example Automatic mode during heating A B 100 70 E Tc C D 49 C 46 C F 2 C A Virtual load curve default automatic mode peak capacity...

Страница 142: ...m test run was executed see 20 Commissioning 4145 including the detailed refrigerant situation check The leak detection operation can be automated By changing parameter 2 85 to chosen value the interv...

Страница 143: ...onditions The additional refrigerant charge needs to be inputted in the system s logic The system test run has to be re executed Executing the leak detection function one time at site can also be done...

Страница 144: ...during leak detection operation Restart leak detection operation Indicates an indoor unit which is not compatible with leak detection functionality is installed e g RA DX indoor unit Hydrobox Result o...

Страница 145: ...the test run 149 20 7 Operating the unit 150 20 1 Overview Commissioning After installation and once the field settings are defined the installer is obliged to verify correct operation Therefore a tes...

Страница 146: ...ulfilled the unit MUST be closed Power up the unit after it is closed You read the complete installation and operation instructions as described in the installer and user reference guide Installation...

Страница 147: ...sheets cardboard or any other material Additional refrigerant charge The amount of refrigerant to be added to the unit shall be written on the included Added refrigerant plate and attached to the rea...

Страница 148: ...operation will drop It is recommended in such a case to perform the test operation again on another more favourable moment In case no or information was displayed during the autocharging procedure it...

Страница 149: ...check Stop valve check Pipe length check Refrigerant amount check In case 2 88 0 detailed refrigerant situation check Pump down operation Unit stop Note During the test operation it is not possible to...

Страница 150: ...or unit for detailed malfunction codes related to indoor units 20 7 Operating the unit Once the unit is installed and test operation of outdoor unit and indoor units is finished the operation of the s...

Страница 151: ...please make sure the following is clear for the user Make sure that the user has the printed documentation and ask him her to keep it for future reference Inform the user that he can find the complete...

Страница 152: ...use vacuum mode 153 22 2 2 To recover refrigerant 153 22 1 Maintenance safety precautions DANGER RISK OF ELECTROCUTION DANGER RISK OF BURNING SCALDING NOTICE Risk of electrostatic discharge Before per...

Страница 153: ...ion to the fan It is dangerous to inspect the unit while the fan is running Make sure to turn off the main switch and to remove the fuses from the control circuit located in the outdoor unit 22 2 Abou...

Страница 154: ...circuit Do NOT use the unit s automatic pump down function with which you can collect all refrigerant from the system into the outdoor unit Possible consequence Self combustion and explosion of the co...

Страница 155: ...ction code which is displayed on the outdoor unit will indicate a main malfunction code and a sub code The sub code indicates more detailed information about the malfunction code The malfunction code...

Страница 156: ...splay or transmission wiring between the outdoor unit and the indoor unit Electronic expansion valve malfunction main Y1E A1P X21A Check connection on PCB or actuator Electronic expansion valve malfun...

Страница 157: ...1P X19A Check connection on PCB or actuator Compressor casing temperature sensor malfunction R8T short circuit A1P X19A Check connection on PCB or actuator Compressor casing temperature sensor malfunc...

Страница 158: ...0A Check connection Transmission outdoor unit inverter FAN1 transmission trouble A1P X20A X28A X40A Check connection Transmission outdoor unit inverter FAN2 transmission trouble A1P X20A X28A X40A Che...

Страница 159: ...are connected to F1 F2 line Bad wiring between outdoor and indoor units Check indoor unit amount and total capacity connected System mismatch Wrong type of indoor units combined R410A R407C RA Hydrob...

Страница 160: ...unit are not obstructed Freeze up prevention indoor unit Close valve A immediately Push BS1 to reset Retry autocharge procedure Automatic charging nearly finished Prepare for autocharge stopping Auto...

Страница 161: ...46228 1C 2021 11 24 Disposal NOTICE Do NOT try to dismantle the system yourself dismantling of the system treatment of the refrigerant oil and other parts MUST comply with applicable legislation Units...

Страница 162: ...diagram Outdoor unit 164 25 3 Wiring diagram Outdoor unit 167 25 1 Service space Outdoor unit Make sure the space around the unit is adequate for servicing and the minimum space for air inlet and air...

Страница 163: ...the wall heights of sides A C have no impact on service space dimensions Refer to the figure above for impact of wall heights of sides B D on service space dimensions In case of an installation site w...

Страница 164: ...rvice port refrigerant charge g Expansion valve main Y1E s Stop valve liquid h Expansion valve subcool heat exchanger Y2E t Stop valve gas i Expansion valve storage vessel Y4E u Stop valve equalising...

Страница 165: ...oling Y3E Piping diagram RYMQ8 12 R8T R3T R6T R5T R7T R1T R21T a m k e d f l o p t u s r j h c sv sv M INV M1C M1F S1NPH S1NPL S1PH HPS R4T g x w a Compressor M1C m Solenoid valve oil1 Y3S b Compresso...

Страница 166: ...n valve main Y1E s Stop valve liquid h Expansion valve subcool heat exchanger Y2E t Stop valve gas i Expansion valve storage vessel Y4E u Stop valve equalising gas j Subcool heat exchanger v Heat accu...

Страница 167: ...valve sub Y5S e Fan motor M1F M2F q Electrical component box f Accumulator r Service port refrigerant charge g Expansion valve main Y1E s Stop valve liquid h Expansion valve subcool heat exchanger Y2E...

Страница 168: ...for RYYQ model 8 Only for RYYQ RYMQ model 9 For 8 12 HP Connector X1A M1F is white connector X2A M2F is red 9 For 14 20 HP Colours see below 10 Colours see below Symbols Field wiring Terminal block Co...

Страница 169: ...S K11R A1P Magnetic relay Y5S L1R Reactor M1C Motor compressor M1F Motor fan PS A1P A3P Switching power supply Q1DI Earth leakage circuit breaker field supply Q1LD A1P Earth current detector field sup...

Страница 170: ...Solenoid valve subcool Z C Noise filter ferrite core Z F A2P A5P Noise filter with surge absorber Connectors for optional accessories X10A Connector drainpan heater X37A Connector power adapter X66A C...

Страница 171: ...tor fan PS A1P A3P A6P Switching power supply Q1DI Earth leakage circuit breaker field supply Q1LD A1P Earth current detector field supply R24 A4P A7P Resistor current sensor R300 A3P A6P Resistor cur...

Страница 172: ...sub cool Y3E Electronic expansion valve liquid cooling Y4E Electronic expansion valve storage vessel Y1S Solenoid valve main Y2S Solenoid valve accumulator oil return Y3S Solenoid valve oil 1 Y4S Sol...

Страница 173: ...application explaining how to install configure and maintain it Operation manual Instruction manual specified for a certain product or application explaining how to operate it Maintenance instructions...

Страница 174: ......

Страница 175: ......

Страница 176: ...4P546228 1C 2021 11 Copyright 2018 Daikin Verantwortung f r Energie und Umwelt...

Отзывы: