


13
6-4 Leak test and vacuum drying
The units were checked for leaks by the manufacturer.
Confirm that the valves are firmly closed before pressure test or vacu-
uming.
To prevent entry of any impurities and ensure sufficient pressure resis-
tance, always use the special tools dedicated for R410A.
Air tight test and vacuum drying
•
Air tight test: Make sure to use nitrogen gas.
(For the service port location, refer to the “Cau-
tion” label attached on the front panel [right] of
the outdoor unit.)
(Refer to figure)
1.
[Service precautions]
Label location
2.
Electric parts box lid
3.
[Caution]
Label location
Pressurize the liquid, suction gas and
discharge gas pipes to 551 psi
(do not pressurize more than 551 psi). If the pressure does not drop
within 24 hours, the system passes the test. If the pressure drops,
check where the nitrogen leaks from.
•
Vacuum drying: Use a vacuum pump which can evacuate to
–14.6 psi.
1.
Evacuate the system from the liquid, suction gas and discharge
gas pipes by using a vacuum pump for more than 2 hours and
bring the system to –14.6 psi. After keeping the system under that
condition for more than 1 hour, check if the vacuum gauge rises
or not. If it rises, the system may either contain moisture inside or
have leaks.
2.
Following should be executed if there is a possibility of moisture
remaining inside the pipe (if piping work is carried out during the
raining season or over a long period of time rainwater may enter
the pipe during work).
After evacuating the system for 2 hours, pressurize the system to
7.25psi (vacuum break) with nitrogen gas and evacuate the sys-
tem again using the vacuum pump for 1 hour to –14.6 psi (vac-
uum drying). If the system cannot be evacuated to –14.6 psi
within 2 hours, repeat the operation of vacuum break and vac-
uum drying.
Then, after leaving the system in vacuum for 1 hour, confirm that
the vacuum gauge does not rise.
NOTE
Make sure to perform air tight test and vacuum drying using the service
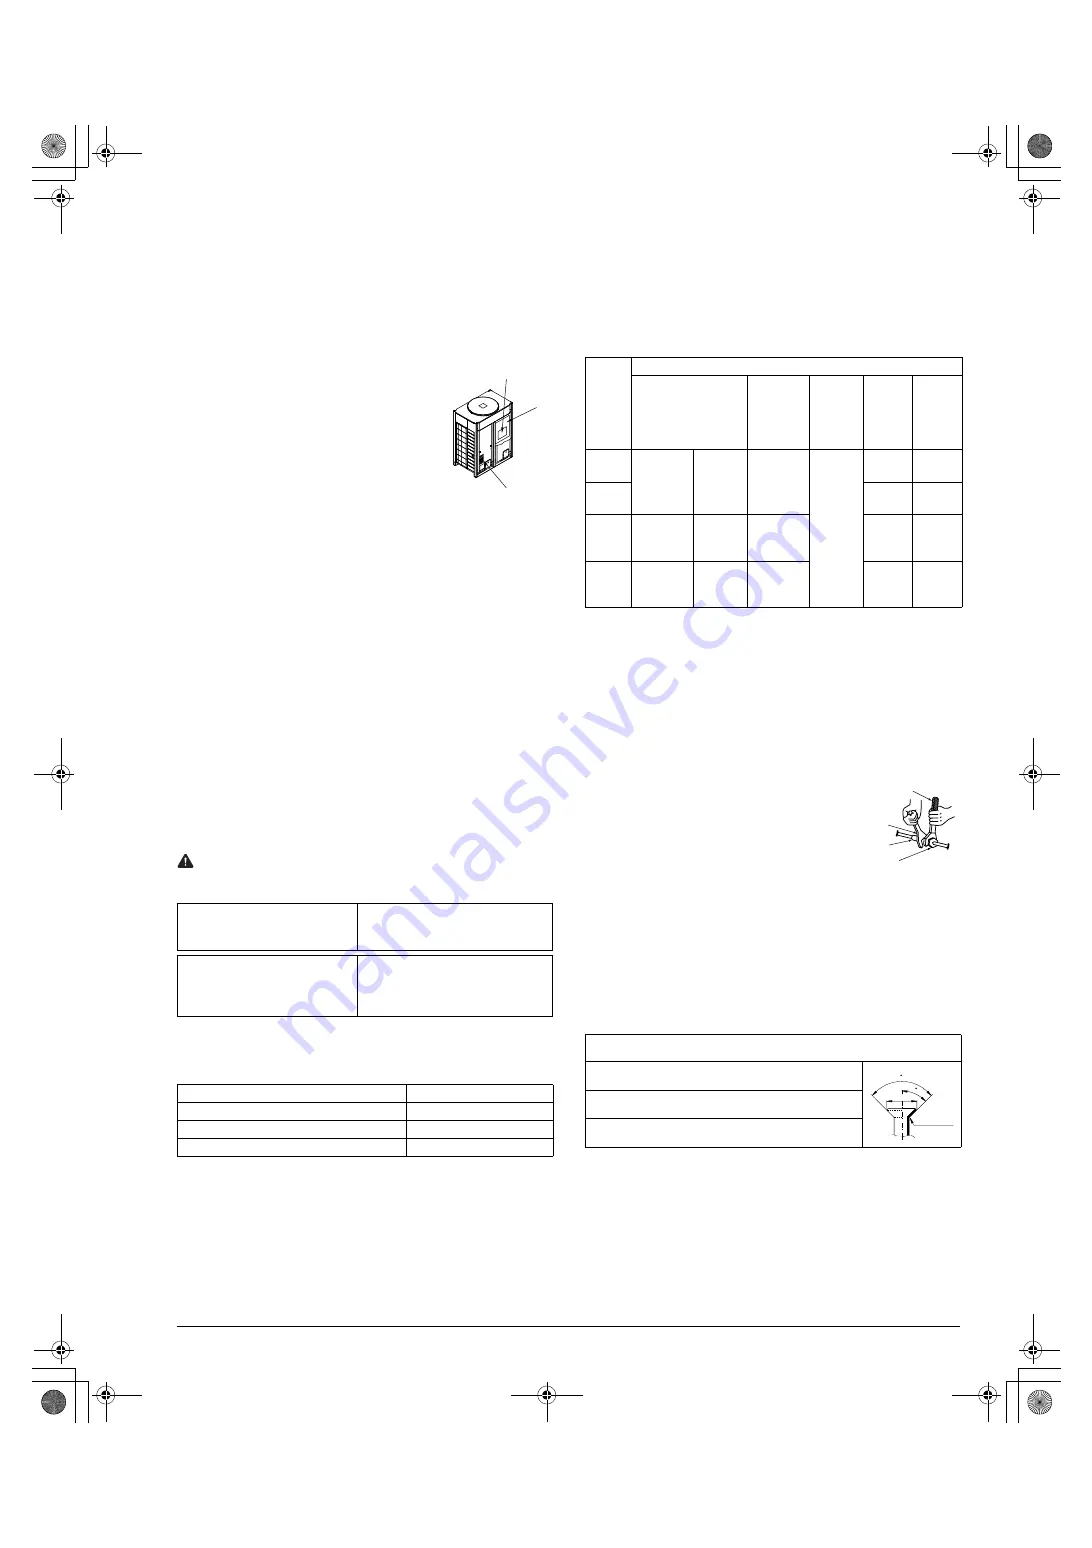
ports of the stop valve shown in the table below.
Stop valve operation procedure
Introduction
Confirm the sizes of the stop valves connected to the system referring
to the table below.
Opening stop valve
1.
Remove the cap and turn the valve counterclockwise with the hexa-
gon wrench.
2.
Turn it until the shaft stops.
Do not apply excessive force to the stop valve. Doing so may break
the valve body, as the valve is not a backseat type. Always use the
special tool.
3.
Make sure to tighten the cap securely.
Closing stop valve
1.
Remove the cap and turn the valve clockwise with the hexagon
wrench.
2.
Securely tighten the valve until the shaft contacts the main body
seal.
3.
Make sure to tighten the cap securely.
∗
For the tightening torque, refer to the table below.
Tightening torque
(Refer to figure 22)
1.
Service port
2.
Cap
3.
Hexagon hole
4.
Shaft
5.
Seal
〈〈〈〈
Caution
〉〉〉〉
•
Always use a charge hose for service port connection.
•
After tightening the cap, check that no refrigerant leaks are present.
•
When loosening a flare nut, always use two wrenches in combina-
tion. When connecting the piping, always use a spanner and torque
wrench in combination to tighten the flare nut.
•
When connecting a flare nut, coat the
flare (inner and outer faces) with ether
oil or ester oil and hand-tighten the nut
3 to 4 turns as the initial tightening.
FLARE SHAPE and FLARENUT TIGHTENING TORQUE
〈〈〈〈
Precautions when connecting pipes
〉〉〉〉
•
See the following table for flare part machining dimensions.
•
When connecting the flare nuts, apply refrigerant oil to the inside and
outside of the flares and turn them three or four times at first.
(Use ester oil or ether oil.)
•
See the following table for tightening torque.
(Applying too much torque may cause the flares to crack.)
•
After all the piping has been connected, use nitrogen to perform a
gas leak check.
One outdoor unit installed
Liquid line stop valve
Discharge gas line stop valve
Suction gas line stop valve
Multiple outdoor units installed
Liquid line stop valve
Discharge gas line stop valve
Suction gas line stop valve
Oil-equalizing line stop valve
Q96 type
Liquid line stop valve
φ
3/8”
Suction gas line stop valve
φ
7/8”
Discharge gas line stop valve
φ
3/4”
1
3
2
Stop
valve
size
Tightening torque ft.-Ibf (Turn clockwise to close)
Shaft (valve body)
Cap
(valve lid)
Service
port
Flare nut
Suction
gas line
piping
attached to
unit (1)
φ
1/4”
3.98-4.87
Hexagon
wrench
4 mm
9.96-12.17
8.48-10.25
10.3-
12.5
-
φ
3/8”
24.1-
29.4
-
φ
3/4”
9.96-12.17
Hexagon
wrench
6mm
17.33-20.28
71.6-
87.8
-
φ
7/8”
19.91-24.34
Hexagon
wrench
10mm
26.55-32.45
-
16.23-
20.65
pipe size (in.)
tightening
torque (ft.-Ibf)
A (in.)
flare shape (in.)
φ
3/8
”
24.1 - 29.4
0.504 - 0.520
φ
1/2
”
36.5 - 44.5
0.638 - 0.654
φ
5/8
”
45.6 - 55.6
0.760 - 0.776
Torque wrench
Spanner
Piping union
Flare nut
R=0.016-0.031
45 ±2
90 ±2
A
01_EN_3P114261-10Y.fm Page 13 Thursday, June 16, 2005 3:14 PM


