Installation and operation manual
9
EUWAC5~10FZ
Packaged air-cooled water chillers
4PW14037-1D
Water leaks
Check the evaporator and the external water circuit on water
leaks.
Drain disposal
Put the service covers in place so that the unit is completely
closed, and start up the unit. After a few hours of operation,
check if the condensing water is evacuated properly through the
drain and that it does not flow over from the drain pan on the
floor.
It may happen that the drain pan outlet is obstructed or that the
condenser fans create a vacuum so that the condensing water
remains in the drain pan and flows over. In this case, the drain
disposal should be lowered. The level difference of 75 mm
indicated in the chapter “
” is a minimum.
3
If the unit does not start after a few minutes, consult the actual
operational information available in the list of direct parameters.
Also refer to the chapter
Switching the EUWAC unit off
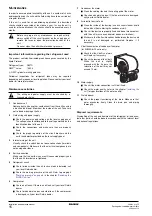
To switch the EUWAC unit off, proceed as follows:
1
When the on/off digital input user parameter
h7
is set to
0
(=No)
and the unit is on, press the
I
key for approximately 5 seconds
to switch the unit off.
The
I
LED and the
T
LED are extinguished.
2
When the on/off digital input user parameter
h7
is set to
1
(=Yes), switch the unit off using the remote on/off switch or the
I
key.
The
I
LED and the
T
LED are extinguished.
Adjusting the cooling temperature setpoint
The EUWAC units enable definition and modification of the cooling
temperature setpoint. The default, limit and step values for the cool-
ing setpoint are:
■
Default value
12
.
0
°C
■
Limit values
7
.
0
to
25
.
0
°C
■
Step value
0
.
1
°C
To adjust the cooling temperature setpoint, proceed as follows:
1
Press the
R
key for approximately 5 seconds to enter the list of
direct parameters.
The direct parameter code
r1
defining the cooling temperature
setpoint appears on the display.
2
Press the
R
key.
The actual cooling temperature setpoint appears on the display.
3
Press the
A
or
Z
key to raise, respectively lower the
temperature setting.
4
Press the
R
key to return to parameter code
r1
.
5
To save the adjusted temperature setpoint, press the
E
key. To
cancel the modification wait approximately 40 seconds.
In the first case, the controller saves the changes, leaves the list
of direct parameters and returns to its normal operation,
displaying the inlet water temperature.
In the second case the display starts flashing. Approximately
40
seconds later, the controller leaves the list of direct
parameters without saving the modified parameter. The inlet
water temperature reappears on the display.
Consulting actual operational information
The actual operational information that can be consulted in the list of
direct parameters consists of:
■
r6
: outlet water temperature,
■
c9
: total running hours of the compressor,
■
cv
: total running hours of the pump.
To consult the actual operational information, proceed as follows:
1
Press the
R
key for approximately 5 seconds to enter the list of
direct parameters.
The direct parameter code
r1
defining the cooling temperature
setpoint appears on the display.
2
Depending on the information to be consulted, select parameter
code
r6
,
c9
or
cv
using the
A
and/or
Z
key.
3
Press the
R
key to consult the actual value of the selected
parameter.
4
Press the
R
key to return to the parameter codes.
5
To consult other actual operational information, repeat from
instruction 2 onwards.
6
To return to normal operation, press the
E
key or wait
approximately 40 seconds.
In the first case, the controller immediately leaves the list of
direct parameters and returns to normal operation displaying the
inlet water temperature.
In the second case, the display will start flashing. Approximately
40 seconds later, the controller leaves the list of direct
parameters. The inlet water temperature reappears on the
display.
Resetting alarms
When an alarm is detected, the following happens:
■
the buzzer is activated (if enabled by means of user
parameter
p4
),
■
the alarm relay is energized,
■
the display starts flashing, alternately showing the alarm code
and the inlet water temperature.
The following alarm codes may appear on the screen:
■
a1
: indicates an anti-freeze alarm,
■
e1
: indicates that the NTC probe used to measure the inlet
water temperature is defective,
■
e2
: indicates that the NTC probe used to measure the outlet
water temperature is defective,
■
ee
,
ep
: indicates that the EEPROM on the controller PCB inside
the unit is defective,
NOTE
In case of remote on/off control (
h7
=
1
), it is recom-
mended to install an on/off switch near the unit in
series with the remote switch. The unit can then be
switched off from either place.
NOTE
By pressing any button while the display is flashing
and cancelling of all changes is in progress, the can-
celling process is stopped, the display stops flashing
and the user can continue to change the settings.
NOTE
To reset the timers
c9
and
cv
, refer to chapter


