background image

Cybersecurity  Recommendations


I


Cybersecurity Recommendations 

Mandatory actions to be taken towards cybersecurity


1. Change Passwords and Use Strong Passwords:


The number one reason systems get “hacked” is due to having weak or default passwords. It is 
recommended to change default passwords immediately and choose a strong password whenever 
possible. A strong password should be made up of at least 8 characters and a combination of special 
characters, numbers, and upper and lower case letters. 

2. Update Firmware


As is standard procedure in the tech-industry, we recommend keeping NVR, DVR, and IP camera 
firmware up-to-date to ensure the system is current with the latest security patches and fixes. 

“Nice to have” recommendations to improve your network security


1. Change Passwords Regularly


Regularly change the credentials to your devices to help ensure that only authorized users are able to 
access the system. 

2. Change Default HTTP and TCP Ports:


● Change default HTTP and TCP ports for systems. These are the two ports used to communicate and 
to view video feeds remotely. 
● These ports can be changed to any set of numbers between 1025-65535. Avoiding the default ports 
reduces the risk of outsiders being able to guess which ports you are using. 

3. Enable HTTPS/SSL:


Set up an SSL Certificate to enable HTTPS. This will encrypt all communication between your devices 
and recorder. 

4. Enable IP Filter:


Enabling your IP filter will prevent everyone, except those with specified IP addresses, from accessing 
the system. 

5. Change ONVIF Password:


On older IP Camera firmware, the ONVIF password does not change when you change the system’s 
credentials. You will need to either update the camera’s firmware to the latest revision or manually 
change the ONVIF password. 

6. Forward Only Ports You Need:


● Only forward the HTTP and TCP ports that you need to use. Do not forward a huge range of numbers 
to the device. Do not DMZ the device's IP address. 
● You do not need to forward any ports for individual cameras if they are all connected to a recorder on 
site; just the NVR is needed. 

7. Disable Auto-Login on SmartPSS:


Those using SmartPSS to view their system and on a computer that is used by multiple people should 
disable auto-login. This adds a layer of security to prevent users without the appropriate credentials 
from accessing the system. 

8. Use a Different Username and Password for SmartPSS:


Содержание DSS4004-S2

Страница 1: ...DSS Matrix Surveillance Platform Application Deployment Manual V1 0 0...

Страница 2: ...be changed to any set of numbers between 1025 65535 Avoiding the default ports reduces the risk of outsiders being able to guess which ports you are using 3 Enable HTTPS SSL Set up an SSL Certificate...

Страница 3: ...orwarded the HTTP and TCP ports in your router modem this feature should be turned off regardless Disabling UPnP is recommended when the function is not used in real applications 11 SNMP Disable SNMP...

Страница 4: ...or low potential hazard which if not avoided could result in slight or moderate injury Indicates a potential risk which if not avoided may result in property damage data loss lower performance or unpr...

Страница 5: ...regulations of related regions For detailed information see the paper User s Manual CD ROM QR code or our official website If there is inconsistency between paper User s Manual and the electronic ver...

Страница 6: ...neers needed All the examination and repair work should be done by the qualified service engineers We are not liable for any problems caused by unauthorized modifications or attempted repair Environme...

Страница 7: ...feguards and Warnings V 1 Checklist 1 1 1 Package 1 1 2 Port Definition 1 1 2 1 Front Panel 2 1 2 2 Rear Panel 2 2 Config System 4 2 1 Login and Initialize Config System 4 2 2 Ethernet Config 5 3 Conf...

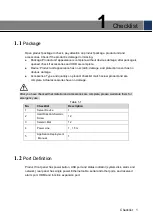
Страница 8: ...pe and quantity on product checklist match actual product and are complete Actual accessories have no damage After you have checked that material and accessories are complete please well store them fo...

Страница 9: ...white 8 Power Button Press the button to boot device Self carried power status light blue light is normally ON long press to shut down 1 2 2 Rear Panel Figure 1 2 Chart 1 2 No Port or Tag Definition...

Страница 10: ...Checklist 3 No Port or Tag Definition 7 eSATA Port Support USB2 0 USB3 0 port device input 8 RS232 Debug serial 9 Single Power AC 100V 240V 47 63Hz support hot swat...

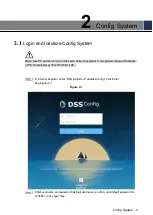
Страница 11: ...in the same network segment if not please change IP address of PC Default server IP is 192 168 1 108 In Internet Explorer enter DSS platform IP address config click Enter See Figure 2 1 Figure 2 1 En...

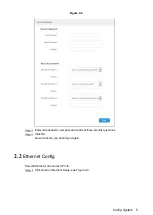
Страница 12: ...re 2 2 Enter old password new password and set three security questions Click OK Server reboots you shall log in again 2 2 Ethernet Config Select Ethernet mode and set IP info Click Guide or Network S...

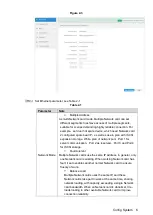
Страница 13: ...ile plan of network port Port 1 for server communication Port 2 as reserved Port 3 and Port 4 for ISCSI storage Fault tolerant Multiple Network cards use the same IP address in general only one Networ...

Страница 14: ...shall set binding of Network card Click Add Bind Card select Network card you want to bind and set two bound cards Default Network card Select default Network card this card will be default port forw...

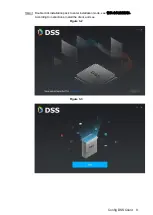
Страница 15: ...nfig DSS Client 3 1 Download and Install Client In Internet Explorer enter DSS platform IP address and click Enter See Figure 3 1 Figure 3 1 Click to download installation pack Client installation pac...

Страница 16: ...Config DSS Client 9 Double click installation pack to enter installation mode see According to instructions install the client and see Figure 3 2 Figure 3 3...

Страница 17: ...ord is 123456 At first time login you shall initialize username and password WEB server default port is 443 If incorrect please go to LAN WAN mapping page to view port no After you select member passw...

Страница 18: ...lient 11 System shows password setup page see Figure 3 5 Figure 3 5 Enter new password and confirm password click Next See Figure 3 6 Figure 3 6 Select 3 questions and set answer click OK to enter cli...

Отзывы: