background image

General  Configuration    7


General Configuration 

Power up the camera and connect it to XVR device with coaxial cable, and then the live view 

screen is displayed. The following instructions will guide you to configure your camera. 


The number of the coaxial port on XVR will display at the lower left corner of each window 

to indicate the corresponding camera. 


Interfaces of different XVR might vary, and the actual product shall prevail. 

4.1 

Opening Main Menu 

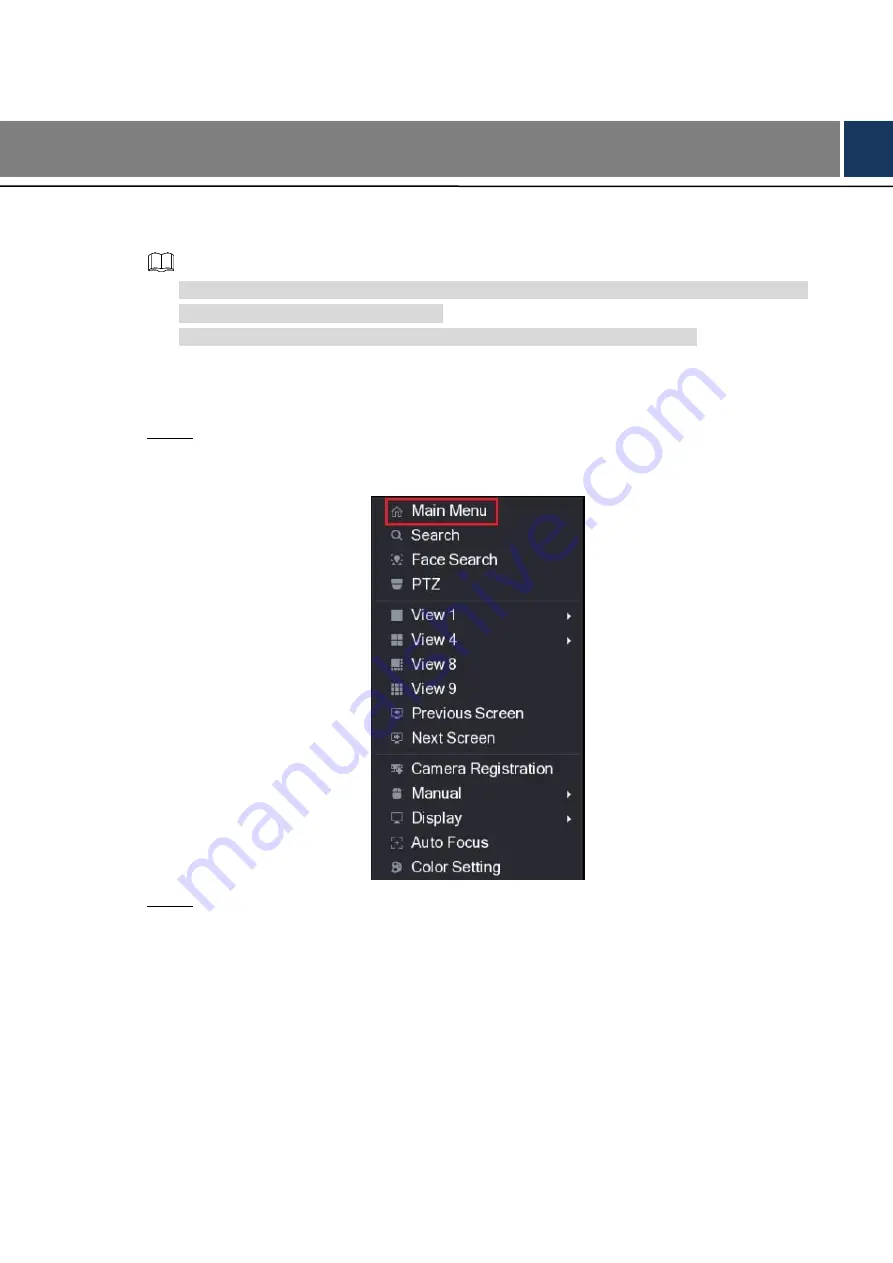
  In the live view screen interface, right-click anywhere on the screen. 

Step 1

The shortcut menu is displayed. See Figure 4-1. 

 Shortcut menu 

Figure 4-1


  Click 

Main Menu

Step 2

The 

Main Menu 

interface is displayed. See Figure 4-2. 

Содержание DH-HAC-EW2501

Страница 1: ...sheye Camera User s Manual V1 0 0 Questo manuale d istruzione fornito da trovaprezzi it Scopri tutte le offerte per Dahua Pro DH HAC EW2501 o cerca il tuo prodotto tra le migliori offerte di Videosorv...

Страница 2: ...he guide may cause harmful interference to radio communication For class A device these limits are designed to provide reasonable protection against harmful interference in a commercial environment Op...

Страница 3: ...evision Content Release Date 1 V1 0 0 First release July 23 2018 Privacy Protection Notice As the device user or data controller you might collect personal data of others such as face fingerprints car...

Страница 4: ...am and supplementary documentation There still might be deviation in technical data functions and operations description or errors in print If there is any doubt or dispute please refer to our final e...

Страница 5: ...no liability or responsibility for all the fires or electrical shock caused by improper handling or installation Environment Do not aim the device at strong light to focus such as lamp light and sun l...

Страница 6: ...ly sources for the device otherwise it might damage the device When the camera is in the condition of PoC power supply do not connect any other device between the camera and PoC transceiver including...

Страница 7: ...uards and Warnings IV 1 Introduction 1 1 1 General 1 1 2 Features 1 2 Design 2 2 1 Dimension 2 2 2 Cable 2 3 Installation 4 3 1 Installing Model A 4 3 2 Installing Model B 6 4 General Configuration 7...

Страница 8: ...ance and zero lag transmission of the signal They are applicable to cover the high definition monitoring needs for locations like financial center telecom site supermarket hotel government school and...

Страница 9: ...Design 2 2 Design 2 1 Dimension Model A mm inch Figure 2 1 Model B mm inch Figure 2 2 2 2 Cable Cable type might vary with different cameras and the actual product shall prevail...

Страница 10: ...e to supply power as instructed in the Manual Device abnormity or damage could occur if power is not supplied correctly Video output Connects to XVR to output video signal Audio input Connects to soun...

Страница 11: ...the installation of model A see 3 1 Installing Model A for the installation of model B see 3 2 Installing Model B 3 1 Installing Model A Model A installation Figure 3 1 Table 3 1 Installation item li...

Страница 12: ...able tray on the bottom of Step 4 the device Align the cable outlet holes on the device and the mounting plate and then push to Step 5 attach the device to the mounting plate See Figure 3 3 Attaching...

Страница 13: ...tioning map and then insert the expansion bolts in the screw holes Loosen the locking screws on the dome and then take off the dome Step 2 Adjust the location of the pedestal according to cable outlet...

Страница 14: ...of the coaxial port on XVR will display at the lower left corner of each window to indicate the corresponding camera Interfaces of different XVR might vary and the actual product shall prevail 4 1 Ope...

Страница 15: ...ew screen 4 2 Setting Audio Input Audio signal acquisition is available on select models In the Main Menu interface Figure 4 2 select CAMERA ENCODE Encode Step 1 The Encode interface is displayed See...

Страница 16: ...t In the Audio Source list select HDCVI Click Save to save the settings Step 5 The Encode interface is displayed Figure 4 3 In the Encode interface Figure 4 3 click Apply Step 6 4 3 Operating OSD Menu...

Страница 17: ...of the buttons in the MENU OPERATION panel see Table 4 1 Table 4 1 Menu operation panel function Button Function Button Function Enter or confirm an item Select item Exit OSD menu Change item value If...

Страница 18: ...siccant Maintaining Lens and Mirror Surface The lens and mirror surface are covered with antireflection coating which could be contaminated or damaged and result in lens scratches or haze image when b...

Отзывы: