background image

2

This appliance must be earthed. In the event
of an electrical short circuit, earthing
reduces the risk of electric shock by
providing an escape wire for the electric
current. This appliance is equipped with a
cord having a earthing wire with a earthing
plug. The plug must be plugged into an
outlet that is properly installed and earthed.

WARNING

Improper use of the earthing plug can result
in a risk of electric shock.
Consult a qualified electrician or serviceman
if the earthing instructions are not
completely understood, or if doubt exists as
to whether the appliance is properly earthed.
If it is neceswsary to use an extension cord,
use only a 3-wire extension cord that has a
3-blade earthing plug, and a 3-slot
receptacle that will accept the plug on the
appliance. The marked rating of the
extension cord should be equal to or greater
than the electrical rating of the appliance.

1. Steady, flat location

This oven should be set on a steady, flat
surface. This oven is designed for counter
top use only.

2. Leave space behind and side

All air vents should be kept a clearance.
If all vents are covered during operation,
the oven may overheat and, eventually,
oven failure.

3. Away from radio and TV sets

Poor television reception and radio interference
may result if the oven is located close to a TV,
Radio antenna, feeder and so on.
Position the oven as far from them as possible.

4. Away from heating appliance and

water taps
Keep the oven away from hot air, steam or
splash when choosing a place to position it,
or the insulation might be adversely
affected and breakdowns occur.

5. Power supply

• Check your local power source. This oven

requires a current of approximately 15
amperes, 220V~240V 50Hz.

• Power supply cord is about 0.8 meters long.
• The voltage used must be the same as

specified on this oven. Using a higher
voltage may result in a fire or other
accident causing oven damage. Using
low voltage will cause slow cooking.
We are not responsible for damage resulting
from use of this oven with a voltage of
ampere fuse other than those specified.

•  If the supply cord is damaged. It must

be replaced by the manufacturer or its
service agent or similarly qualified
person in order to avoid a hazard.

6. Examine the oven after unpacking for

any damage such as:
A misaligned door, Broken door, A dent in
cavity. If any of the above are visible, DO NOT
INSTALL, and notify dealer immediately. 

7. Do not operate the oven if it is colder

than room termperature.
(This may occur during delivery in cold
weather.) Allow the oven to become
room temperature before operating.

8. The minimum height of free space

necessary above the top surface of the
oven is 100mm.

EARTHING
INSTUCTIONS

INSTALLATION

SAVE THESE INSTRUCTIONS

Содержание KOR-63DB9S

Страница 1: ...ating this oven please read these instructions completely POWER BEVERAGE 1 BREAD 2 SOUP 3 BAKED POTATO 4 FRESH VEGETABLE 5 FROZEN VEGETABLE KOR 63DB9S AUTO COOK DEFROST CLOCK 10MIN 1MIN 10SEC 1HOUR 10...

Страница 2: ...ing surfaces d The oven should not be adjusted or repaired by any one except properly qualified service personnel TABLE OF CONTENTS PRECAUTIONS TO AVOID POSSIBLE EXPOSURE TO EXCESSIVE MICROWAVE ENERGY...

Страница 3: ...ce may result if the oven is located close to a TV Radio antenna feeder and so on Position the oven as far from them as possible 4 Away from heating appliance and water taps Keep the oven away from ho...

Страница 4: ...ll the oven so as not to block the outlet This section includes useful information about oven operation 1 Plug power supply cord into a standard 3 pronged 10 Amp 230V AC 50Hz power outlet 2 After plac...

Страница 5: ...ing Display Cooking time power level indicators and present time are displayed One touch Used to cook or reheat specific quantities of food Time set pad Used to set the cooking time and the present ti...

Страница 6: ...efrosting time The display will show what you touched 3 Touch START pad Note Your oven can be programmed for 59 minutes 99 seconds 59 99 When you touch START pad the DEFROST indicator starts blinking...

Страница 7: ...in M W cook When M W cook ends END indicator will blink SPEEDY COOK allows you to reheat for 30 seconds at 100 full power by simply touching the SPEEDY COOK pad By repeatedly touching the SPEEDY COOK...

Страница 8: ...es 50 seconds Press LESS MORE to decrease increase the cooking time in multiples of 1 minute The overall cooking time can be increased to a maximum of 59 minutes AUTO COOK allows you to cook or reheat...

Страница 9: ...ll be activated automatically To cancel press and hold LESS for 5 seconds and display will turn on 1 Press STOP CLEAR pad You can restart the oven by touching START pad Touch STOP CLEAR once more to e...

Страница 10: ...ge and food containers Containers such as margarine tubs can melt in the microwave Metal utensils These can damage your oven Remove all metal before cooking Stirring Stir foods such as casseroles and...

Страница 11: ...l to protect thinner or unevenly shaped part from beginning to cook Microwave energy will not penetrate the foil Some rules apply to the use of foil Do not let the foil pieces touch each other or the...

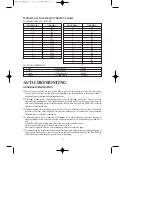
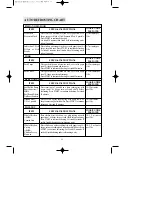
Страница 12: ...ver Press START to continue defrosting Let stand 5 minutes then finish with cold running water about 5 minutes Place pork strips on a microwave rack cover with paper towel At beeps separate and turn o...

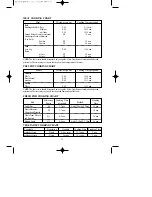
Страница 13: ...ken Whole P 80 12 14 min Breast boned P 80 10 12 min portions P 80 11 13 min Turkey Whole P 80 13 15 min NOTE The above times should be regarded only as a guide Allow for difference in individual tast...

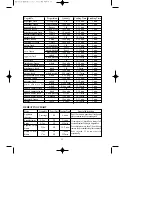
Страница 14: ...kg 8 10 min 5 min onions fresh whole peeled 8 10 small 13 17 min 5 min pea pods snow peas frozen whole 6 oz pkg 7 8 min 3 min peas and carrots 10 oz pkg 9 11 min 3 min parsnips fresh cubed 1 lb 9 10 m...

Страница 15: ...50 5 6 min Frozen vegetables 6 oz P 50 8 12 min 10 oz P 50 10 14 min Cheese cake 17 oz P 50 4 5 min Brownies 13 oz P 50 2 4 min Pound cake 103 4 oz P 50 11 2 3 min Coffee cake 11 12 oz P 50 3 5 min A...

Страница 16: ...dance with the following code Green and yellow Earth Blue Neutral Brown Live As the colours of the wires in the mains lead of this appliance may not correspond with the coloured markings identifying t...

Страница 17: ...y cause the wood to dry out and crack 5 Aluminum foil may be used in very small pieces for shielding only Any aluminum foil used should never be closer than 2 5 cm from side walls of oven 6 Plastic mo...

Отзывы: