background image

Please place your televideo

Horizontally on a flat, steady base so that air can circulate around it for ventilation.

Away from humidity and heat, magnetic fields, such as those from loudspeakers
etc. and with no heavy objects placed on top.

4

I N I T I A L

i n s t a l l a t i o n

Connecting up the televideo

Fitting the remote control’s batteries

Switch off all components when connecting or disconnecting cables.

Plug the aerial cable into “ANT” socket of the televideo.

Make sure the rating of the household mains supply matches the rating
shown on the back of the televideo.
Now plug in the mains lead.

Fit the batteries, size 1.5V AAA as shown above

Protect your environment by returning used batteries to your dealer. Since
batteries contain toxic substances they require special disposal methods.

Make sure the batteries are always of the same type and age, and remove
them from the remote control if you are not using it for a long period.

1

Remove the battery
cover on the reverse
side of the remote con-
trol.

2

Install two batter-
ies(“AAA” size)into the
remote control.

3

Replace the battery
cover

Содержание GB14H3T2

Страница 1: ...100 GB INSTRUCTION MANUAL GB14H3T1 GB20H4T1 GB14H3T2 GB20H4T2 CUSTOMER SERVICES HELPLINE 01189 252 577...

Страница 2: ...video only with a soft lint free cloth do not use aggressive or alcohol based cleaning agents Unplug the set from the mains You disconnect the power supply if the televideo appears to be working incor...

Страница 3: ......

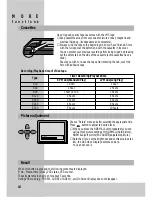
Страница 4: ...ing OTR When recording time overlaps 10 Timer programme Auto tracking PDC VPS 11 Timer recording using Videoplus 12 More functions Index Resetting the counter to zero Mute Child lock 13 Cassettes Pict...

Страница 5: ...trol To reset the counter data VHS Index Search System TXT Page Hold Index Page PR up down Tracking up down while PB mode TXT Page Up Down Volume up down Select main menu To select on screen displays...

Страница 6: ...ext step NOTE The televideo closes the menus automatically after approx 1 minute if no entry is made VW Select CB Adjust MENU Previous VIDEO AUDIO PR REC REW FF STAND BY REC T REC PLAY STOP EJECT I ON...

Страница 7: ...et of the televideo Make sure the rating of the household mains supply matches the rating shown on the back of the televideo Now plug in the mains lead Fit the batteries size 1 5V AAA as shown above P...

Страница 8: ...y the main ON OFF switch AUTO CLOCK SETTING OPTION If you want to set automatically the clock data you must change the auto column from No to Yes then ensure the Pr No column has a channel with uncorr...

Страница 9: ...right on the UHF Band Please wait until the Edit menu appears VW Select CB Access MENU Previous Install Auto setup Manual tuning Fine tuning Edit VW Select CB Access MENU Previous Country Set UK Irela...

Страница 10: ...ition the cursor to Pr No to delete and press the CLEAR button While this is being carried out the Please wait appears and the deleted Pr No will transfer to programme No 99 and is changed to skip Yes...

Страница 11: ...er the front panel or the remote controller Still while playback by using the K button We cannot guarantee the quality of picture in this mode A smaller picture may be seen while switching from the Se...

Страница 12: ...2 34 G REV SP 00 12 34 B PLAY SP 00 12 34 Note This televideo has the function of NTSC playback SP tape only Don t use NTSC SLP tape Although you can see the picture and sound we can not guarantee pic...

Страница 13: ...preset times If you happen to overlap the preset programs the End time has priority and the overlapped programmes cannot be recorded Your televideo is switched on by the main power switch on the front...

Страница 14: ...wish to record from a satellite receiver select under Pr the satellite programme location or AV depending on the connection with the aerial cable or a SCART cable NB Leave the satellite tuner switche...

Страница 15: ...V guide For timer recordings clock date and stations must be set correctly page 5 Load a cassette with its safety tab in place see page 10 and with sufficient free space for the recording RECORDING c...

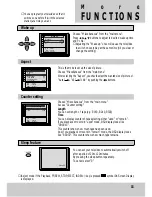
Страница 16: ...he mute button once turns the sound off The sound returns if button is pressed once more Choose Miscellaneous from the main menu and select Lock You can prevent use of the Televideo with the remote co...

Страница 17: ...o Present time Clock VCR status VCR counter These items remain on screen for about 5 seconds During VCR mode e g FF REW CUE REV INDEX etc On Screen Display does not disappear Type Timer Recording Play...

Страница 18: ...Wake up Wake up No Time 06 00 Pr 01 Aspect This is the mode to set up the size of picture Choose Miscellaneous from the main menu After selecting the Aspect you should select the wanted size of pictur...

Страница 19: ...er subpages Pressing the HOLD button again the current subpage appears CALLINGUPSUBPAGEDIRECTLY Pressing the SUBPAGE button Page No appears at the bottom of the screen Enter the subpage number that yo...

Страница 20: ...rear Set the other video machine to playback and your Televideo machine to record Picture and sound of the selected station is always available on the EURO AV socket e g to record with another VCR On...

Страница 21: ...k But in SCART Fast SW mode when you insert the tape without tab it will not playback and only load If you insert the SCART plug in playback status it will change to scart mode and VCR will revert to...

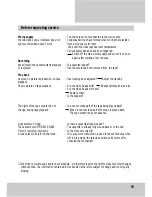
Страница 22: ...here a cassette already loaded The cassette is already fully wound back or to the end Is the clock set correctly If no play or record function is used for about 5minutes when left in Stop mode the tel...

Отзывы: