background image

1. Safety Precautions

1. Safety Precautions

WARNING: TO PREVENT FIRE OR ELECTRIC SHOCK, DO NOT EXPOSE 
THIS APPLIANCE TO RAIN OR MOISTURE.

  CAUTION :TO REDUCE THE RISK IF ELECTRIC SHOCK, DO NOT

REMOVE COVER (OR BACK). NO USER SERVICEABLE PARTS 
INSIDE.
REFER SERVICING TO QUALIFIED SERVICE PERSONNEL.

THIS SYMBOL IS INTENDED TO ALERT THE USER TO THE 
PRESENCE OF UNINSULTED "DANGEROUS VOLTAGE"


WITHIN THE PRODUCT'S ENCLOSURE THAT MAY BE 
SUFFICIENT  MAGNITUDE TO CONSTITUTE A RISK OF 
ELECTRIC SHOCK TO PERSONS.

THIS SYMBOL IS INTENDED TO ALERT THE USER TO THE
PRESENCE OF IMPORTANT OPERATING  AND MAINTENANCE 
(SERVICING) INSTRUCTIONS IN THE LITERATURE 
ACCOMPANYING THE APPLIANCE.

CAUTION

  TO PREVENT ELECTRIC SHOCK, DO NOT USE THIS POLARIZED AC    
  PLUG WITH AN EXTENSION CORD, RECEPTACLE  OR OTHER OUTLET  
  UNLESS THE BLADES CAN BE FULLY INSERTED TO PREVENT BLADE 
  EXPOSURE.

LASER SAFETY

  THIS UNIT EMPLOYS A  LASER. ONLY QUALIFIED SERVICE  PERSONNEL 
  SHOULD REMOVE THE COVER OR ATTEMPT TO SERVICE THIS DEVICE 
  DUE  TO POSSIBLE EYE INJURY.

  CAUTION : USE OF ANY CONTROLS, ADJUSTMENTS,  OR PROCEDURES 
  OTHER THAN THOSE SPECIFIED HEREIN MAY RESULT IN HAZARDOUS
  RADIATION EXPOSURE.

CAUTION : TO PREVENT  ELECTRIC SHOCK, MATCH WIDE BLADE OF 
PLUG TO WIDE SLOT, FULLY INSERT.

ATTENTION :  POUR EVITER  LES CHOCS  ELECTRIQUES, INTRODUIRE 
LA LAME LA PLUS LARGE DE LA FICHE DANS LA BORNE CORRESPON-
DANTE   DE LA   PRISE ET  POUSSER JUSQU'AU FOND.

Important Safety Instructions

- All the safety and operating instructions should be read before   

the appliance is operated.

- The safety and operating instructions should be retained for 

future reference.

- All warnings on the appliance and in the operating instructions 

should be adhered to.

- All operating and use instructions should be followed.
1.  Water and Moisture - The appliance should not be used near 

water - for example, near a bathtub, washbowl, kitchen sink,

laundry tub, in a wet basement, or near a swimming pool,
and the like.

2.  Carts and Stands - The appliance

should be used only with a cart or
stand that is recommended by th
manufacturer.

3.  An appliance and cart combination 

should be moved with care. Quick 
stops, excessive force, and uneven
surfaces may cause the appliance 
and cart combination to overturn.

4.  Wall or Ceiling Mounting - The appli-

ance should be mounted to a wall or

 ceiling only as recommended by the manufacturer.

5.  Ventilation - The appliance should be situated so that its 

location or position does not interfere with its proper 
ventilation.  For example, the appliance should not be situated 
on a bed, sofa, rug, or similar surface that may block the 
ventilation openings; or, placed in a built-in installation, such 
as a bookcase or cabinet that may impede the flow of air 
through the ventilation openings.

6.  Heat - The appliance should be situated away from heat 

sources such as radiators, heat registers, stoves, or other 
appliances (including amplifiers) that produce heat.

7.  Power Sources - The appliance should be connected to a 

power supply only of the type described in the operating 
instructions or as marked on the appliance.

8.  Grounding or Polarization - The precautions that should be 

taken so that the grounding or polarization means of an 
appliance is not defeated.

9.  Power - Cord Protection - Power-supply cords should be 

routed so that they are not likely to be walked on or pinched 
by items placed upon or against them, paying particular 
attention to cords at plugs, convenience receptacles, and the 
point where they exit from the appliance.

10.Protective Attachment Plug - If the appliance is equipped with 

an attachment plug having overload protection.  This is a 
safety feature. See Instruction Manual for replacement or 
resetting of protective device. If replacement of the plug is 
required, be sure the service technician has used a 
replacement plug specified by the manufacturer that has the 
same overload protection as the original plug.

11.Cleaning - The appliance should be cleaned only as 

recommended by the manufacturer.

12.Power Lines - An outdoor antenna should be located away 

from power lines.

CAUTION

RISK OF ELECTRIC SHOCKS

DO NOT OPEN

PORTABLE CART 

Figure 2

13.Outdoor Antenna Grounding - If an outside antenna is 

connected to the receiver be sure the antenna system is 
grounded so as to provide some protection against voltage 
surges and built-up static charges. Article 810 of the National 
Electrical Code, ANSI/NFPA 70, provides information with 
regard to proper grounding of the mast and supporting
structure, grounding of the lead-in wire to an antenna-dis
charge unit, size of grounding conductors,location of antenna-
discharge unit, connection to grounding electrodes and 
requirements for the grounding electrode.  See Figure 1.

14.Non-use Periods - The power cord of the appliance should be 

unplugged from the outlet when left unused for a long period 
of time.

15.Object and Liquid Entry - Care should be taken so that objects 

do not fall and liquids are not spilled into the enclosure through 
openings. 

16.Damage Requiring Service - The appliance should be 

serviced by qualified service personnel when:
  a) The power-supply cord or the plug has been damaged; or
  b) Objects have fallen, or liquid has been spilled into the
      appliance; or
  c) The appliance has been exposed to rain; or
  d) The appliance does not appear to operate normally or 
      exhibits a marked change in performance; or
  e) The appliance has been dropped, or the enclosure 
      damaged.

 17.Servicing - The user should not attempt to service the 

appliance beyond that described in the operating instructions. 
All other servicing should be referred to qualified service 
personnel.

ANTENNA DISCHARGE UNIT

(NEC SECTION 810-20)

ANTENNA LEAD

IN WIRE

POWER SERVICE GROUNDING

ELECTRODE SYSTEM

(NEC ART 250 PART H)

GROUND CLAMP

ELECTRIC

SERVICE

EQUIPMENT

GROUNDING CONDUCTORS

(NEC SECTION 810-21)

GROUND CLAMPS

EXAMPLE OF ANTENNA 

GROUNDING 

NEC - NATIONAL ELECTRICAL CODE

3

4

Содержание DV - 115

Страница 1: ...N COMPONENT OUTPUT Cb OUTPUT DATA WAVEFORM IN COMPONENT OUTPUT Y OUTPUT DATA WAVEFORM IN COMPONENT OUTPUT 7 INTERNAL BLOCK DIAGRAM OF ICS 8 IC VOLTAGE CHART 9 SCHENATIC DIAGRAM BLOCK DIAGRAM FRONT SCHEMATIC DIAGRAM 1 DV 115 FRONT SCHEMATIC DIAGRAM 2 DV 125 FRONT SCHEMATIC DIAGRAM DSP SCHEMATIC DIAGRAM MPEG SCHEMATIC DIAGRAM MAIN SCHEMATIC DIAGRAM 1 POWER SCHEMATIC DIAGRAM 2 AMP SCHEMATIC DIAGRAM 3...

Страница 2: ...oves or other appliances including amplifiers that produce heat 7 Power Sources The appliance should be connected to a power supply only of the type described in the operating instructions or as marked on the appliance 8 Grounding or Polarization The precautions that should be taken so that the grounding or polarization means of an appliance is not defeated 9 Power Cord Protection Power supply cor...

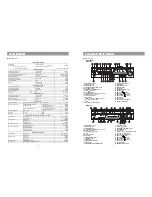
Страница 3: ...B Frequency Response Only Dolby 3dB 1W 120 6KHz Input Sen Impedance Composite Video Video1 Video2 1Vp p 75 ohms 0 5dB Output Level Impedance C Video Video1 Rec Monitor 1Vp p 75 ohms 0 5dB S Video DVD Only Y 1Vp p 75 ohms negative sync 0 5dB C 0 286Vp p 75 ohms 0 5dB Component Out DVD Only Y 1Vp p 75 ohms negative sync 0 5dB Cr Cb 0 7Vp p 75 ohms 0 5dB Frequency Response 5MHz 6NHz 0 3dB 0 3dB Cross...

Страница 4: ...ULTI FUNCTION indicator 18 SPEAKER CONFIGURATION indicator 2 Location of Users Controls Model DV 115 Remote Controller 1 STANDBY ON button 2 DVD FUNCTION button 3 TUNER FUNCTION button 4 SPEAKER SETUP button 5 INPUT SELECTOR TV TAPE VIDEO 1 VIDEO 2 button 6 SET UP button 7 SEARCH button 8 MENU PBC RETURN button 9 Number buttons 10 CLEAR button 11 PLAY button 12 PAUSE button 13 VOLUME buttons 14 FA...

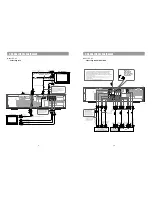
Страница 5: ...ipment Model DV 115 Connecting to TV Scart Cable Optional 3 Connecting to Equipment Model DV 115 Connecting to AUDIO VIDEO 9 10 Remove the protective caps before making connections When not in use be sure to replace them ...

Страница 6: ...ptional Center speaker AS 18UD C Optional Front speakers AS 18UD F Optional Right ch Left ch Surround speakers AS 18UD R Optional Right ch Left ch Press and hold the lever Insert the stripped end of the cord Release the lever to replace it RED BLACK BLACK Audio Input BLACK BLACK BLUE WHITE WHITE Model DV 115 Connecting to Recording Equipment 11 ...

Страница 7: ...SC LOAD LOADING DOOR CLOSE 3 READ THE DISC LOAD DOWNLOAD FROM CDROM 4 COMPLETED THE READ LOAD or NO DISPLAY DOWNLOAD FROM CDROM DOOR OPEN 5 COMPLETED THE UPDATE LOAD LOADING DOOR CLOSE 6 SET THE KEY UNLOCK TUN PRESET OPEN DISAPPEAR LOCK MARK LOADING DOOR CLOSE NOTE AFTER COMPLETED POWER OUT AND IN AGAIN AFTER DOOR OPEN EJECT THE UPDATE DISC CAUTION WHILE DOOR OPEN IF CD DOOR IS CLOSED BY TOUCH OR ...

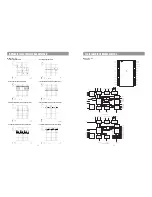
Страница 8: ... XTI MCKO2 MCKO1 R AVDD AVSS CDTI CDTO CCLK CSN Serial Control Mode System Control Clock Recovery Clock Generator DAIF Decoder AC 3 MPEG Detect Error Detect DEM Audio I F 96kHz Detect X tal Oscillator RX1 V DVDD DVSS AUTO ERF P S H TVDD LRCK BICK SDTO DAUX FS96 XTO XTI MCKO2 MCKO1 R AVDD AVSS CM1 CM0 OCKS1 OCKS0 OCKS0 PDN OCKS1 CM0 CM1 DIF0 DIF1 DIF2 4 Parallel Control Mode 6 Waveforms of Major Ch...

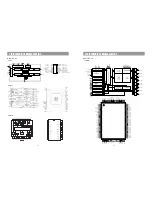
Страница 9: ...1 X0 X3 BU4052BCF ZR36710a Video Encoder Audio DAC Digital Video Bus Digital Audio Bus Analog Video Output Analog Audio Output SDRAM DVD DSP Controller Host Controller DVD Disc User Interface DVD Control Signals ZR36710 Audio ADC Data Analog Audio Input TV Speakers Microphone 1 41 81 121 VDD C_6 C_5 C_4 C_3 GND C_1 C_0 C_2 VDD AOUT_0 AIN AOUT_1 S PDIF ALRCLK ABCLK Y_0 C_7 Y_2 Y_1 Y_3 VDD GND Y_6 Y...

Страница 10: ...1 PF5 A42 PF4 A43 PF3 A44 PF2 A45 PF1 A46 PF0 A47 PD7 A48 PD6 A49 PD5 A50 G2 A2 G3 A3 G4 A4 G5 A5 G6 A6 G7 A7 G8 A8 G9 A9 G10 A10 G11 A11 G12 A12 V DD G13 A13 G14 A14 G15 A15 A16 A17 A18 A19 A20 7 Internal Block Diagram of ICs Model DV 115 Volume Control Interpolation Filter DAC Analog Filter Control Port Volume Control Interpolation Filter Analog Filter Serial Port SCL CCLK MUTEC AD0 CS AOUTA AOU...

Страница 11: ... Internal Block Diagram of ICs Model DV 115 HY57V161610DTC 8 Column Addr Latch Counter Burst Length Counter Refresh Interval Timer Refresh Counter DQ0 DQ1 DQ2 DQ3 DQ4 DQ5 DQ6 DQ7 DQ8 DQ9 DQ10 DQ11 DQ12 DQ13 DQ14 DQ15 Address Register I O Control Test Mode Mode Register Self Refresh Counter Column Decoder Sense AMP I O gates 512Kx16 Bank 0 Column Decoder Sense AMP I O gates 512Kx16 Bank 1 RAS CAS C...

Страница 12: ... IC402 ZR36710 PIN PLAY STOP PIN PLAY STOP PIN PLAY STOP PIN PLAY STOP 1 0 0 0 0 41 0 0 0 0 81 0 0 0 0 121 0 0 0 0 2 0 0 0 0 42 0 7 0 0 82 1 0 0 6 122 0 0 0 0 3 2 8 2 8 43 0 4 0 0 83 3 3 3 3 123 0 0 0 0 4 2 8 2 8 44 0 5 0 0 84 1 7 1 7 124 1 7 1 7 5 2 8 2 8 45 0 4 0 0 85 3 3 3 3 125 0 0 0 0 6 2 8 2 8 46 0 5 0 0 86 3 3 3 3 126 1 5 1 5 7 3 3 3 3 47 0 4 0 0 87 0 0 0 0 127 0 0 0 0 8 3 3 3 3 48 3 3 3 3 ...

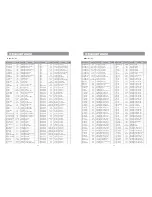
Страница 13: ...1JBA 50V CH 100PF J 1608 48 C ELECTRO C550 CEXF1H109E 50V RM 1MF 5X11 TP 100 C ELECTRO C634A B L R CEXF1H100E 50V RM 10MF 5X11 TP 49 C CHIP CERA C552 HCQK101JBA 50V CH 100PF J 1608 101 C ELECTRO C634C W CEXF1H479E 50V RM 4 7MF 5X11 TP LOCATION PART CODE PART DESC REMARKS PART DESC REMARKS NO PART NAME NO PART NAME LOCATION PART CODE 13 Electrical Parts List Model DV 115 LOCATION PART CODE PART DES...

Страница 14: ...CBK103KBA 50V X7R 0 01MF K 1608 60 R CHIP R949 950 HRFT472JBA 1 10 4 7K OHM J 1608 13 Electrical Parts List Model DV 115 LOCATION PART CODE PART DESC REMARKS PART DESC REMARKS NO PART NAME NO PART NAME LOCATION PART CODE 61 R CHIP R951 HRFT103JBA 1 10 10K OHM J 1608 12 C ELECTRO C718 CEXF1E472E 25V RM 4700MF 16X31 5 62 R CHIP R952 HRFT224JBA 1 10 220K OHM J 1608 13 C ELECTRO C719 CEXF1E102E 25V RM...

Страница 15: ...N PART CODE PART DESC REMARKS PART DESC REMARKS NO PART NAME NO PART NAME LOCATION PART CODE 168 R METAL FILM R767 RN 4Z101J 1 4 100 OHM J 38 DIODE SW CHIP D909 910 DZDS160 KDS160 169 R CARBON FILM R772L R 777L R RD AZ471J 1 6 470 OHM J 39 IC CHIP IC901 1NJM4558M NJM4558M 170 R CARBON FILM R778L R 783L R RD AZ275J 1 6 2 7M OHM J 40 IC IC902 1ES56033 ES56033 171 R CARBON FILM R784L R 785L R RD AZ10...

Страница 16: ...LECTRO C486 CEXF1C221E RM 16V 220MF 6 3X11 TAT 100 R CHIP R457 HRFT000 BA 1 10 0 OHM 1608 49 C CHIP CERA C487 HCQK221JBA 50V CH 220PF J 1608 101 R CHIP R458 466 HRFT472JBA 1 10 4 7K OHM J 1608 50 C CHIP CERA C488 HCQK330JBA 50V CH 33PF J 1608 102 R CHIP R469 471 HRFT472JBA 1 10 4 7K OHM J 1608 51 C CHIP CERA C489 HCQK221JBA 50V CH 220PF J 1608 103 R CHIP R472 HRFT103JBA 1 10 10K OHM J 1608 52 CLEC...

Отзывы: