Screen Adjustment
36
Position
Access
MENU
Exit
Aspect
H-Position
V-Position
Phase
Auto
16:9
-3
0
2
Sound
Function
Install
Picture
Screen
Position
Access
MENU
Exit
Aspect
H-Position
V-Position
Phase
Auto
16:9
-3
0
2
Sound
Function
Install
Picture
Screen
Note.
• During the Auto Adjust, you must not alter the screen on the monitor.
• During the moving picture, Auto Adjust is able to incorrectly work. So you must execute Auto Adjust in
still image.
• Auto Adjust works incorrectly on a part graphic card or picture.
• When Auto Adjust is not correctly working, you can adjust with H/V position, and phase.
•
When input signal is HD(576P,720P,1080i), Auto Adjust doesn't work.
Adjustment of the screen in the PC mode
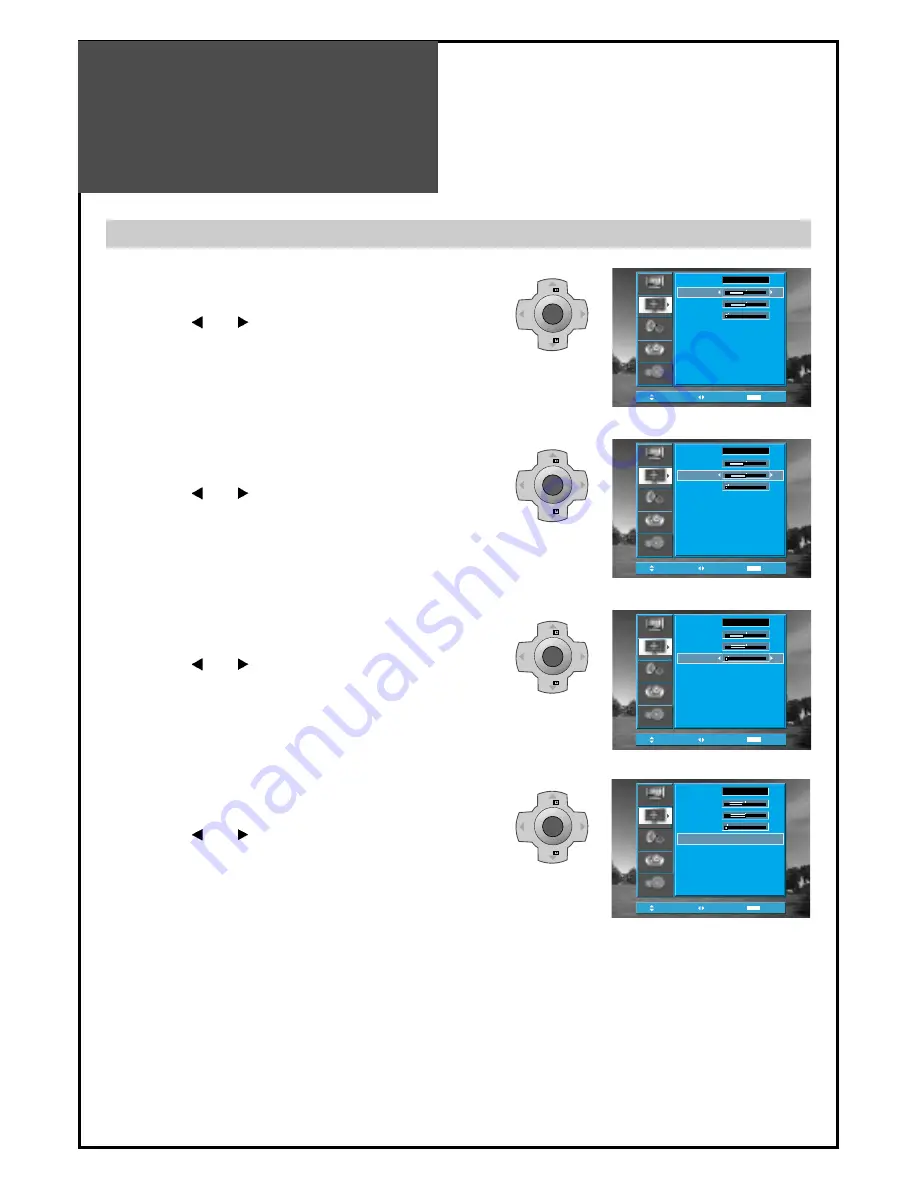
1. Adjustment of the H-Position
• Move to H-Position in the Screen menu.
• Press the ” VOL ” buttons to adjust the horizontal
position of displayed image.
2. Adjustment of the V-Position
• Move to V-Position in the Screen menu.
• Press the ” VOL ” buttons to adjust the vertical
position of displayed image.
MENU
V
O
L
V
O
L
PR
PR
Position
Access
MENU
Exit
Aspect
H-Position
V-Position
Phase
Auto
16:9
-3
0
2
Sound
Function
Install
Picture
Screen
MENU
V
O
L
V
O
L
PR
PR
3. Adjustment of the Phase
• Move to Phase in the Screen menu.
• Press the ” VOL ” buttons to adjust the phase to get
a clear picture.
4. Auto Adjustment
• Move to Auto in the Screen menu.
• Press the ” VOL ” buttons to detect optimal
resolution automatically.
Position
Access
MENU
Exit
Aspect
H-Position
V-Position
Phase
Auto
16:9
-3
0
2
Sound
Function
Install
Picture
Screen
MENU
V
O
L
V
O
L
PR
PR
MENU
V
O
L
V
O
L
PR
PR
Содержание DLP-26C3SMB
Страница 50: ...48586223E109 R0 ...


