


17
18
CHANNEL MEMORY(SET UP)
MANUAL MEMORY(channel add/delete)
1. TO ADD A CHANNEL
If you want to add to the memory a channel the TV did not store during AUTO PROGRAM,
follow these steps.
Press the 10-Digit Keypad button to select a channel you want to view.
Press "A/D" button on the Remote Control.
The channel is added to memory and the color of the channel number changes from red
to green.
2. TO DELETE CHANNEL
You can exclude the channels of your choice from the memorized channel.
Follow these steps to delete the channel in the TV's memory.
Press CH /
buttons or Press the 10-Digit keypad button to select a channel you want
to delete.
Press "A/D" button on the Remote Control.
The channel is removed from the memory, and the color of the channel number changes
from green to red.
CATV 12
CHANNEL DELETED
CATV 12
CHANNEL ADDED
CH ADDING
CH DELETING
COLOR
: GREEN
COLOR
: RED
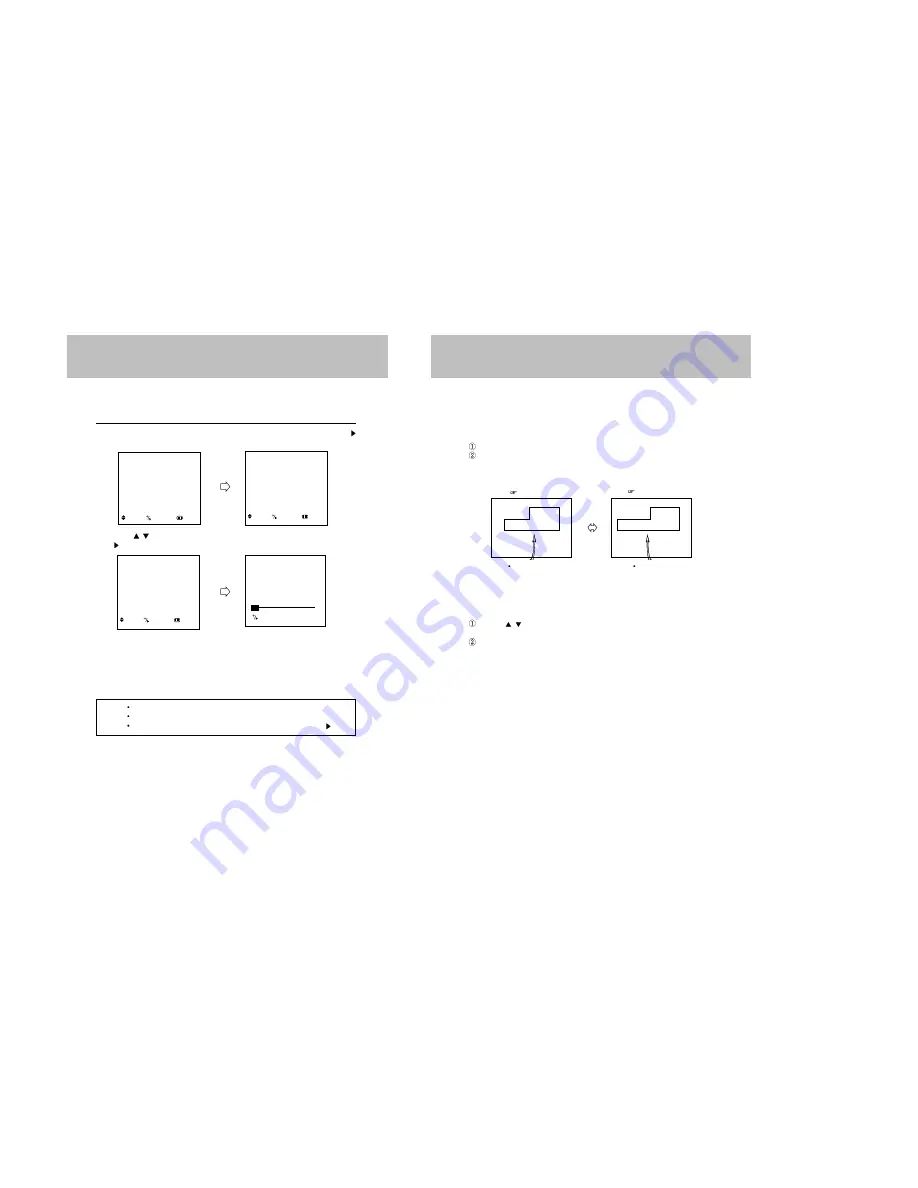
CHANNEL MEMORY(SET UP)
AUTO PROGRAM
This function allows the channels to be memorized automatically to match the TV broadcasts
and cable channels in your area.
1. Press TV MENU button and move the cursor to "SET UP" option and press VOL + or
button, then the "SET UP" menu is displayed.
2. Press CH /
buttons to place cursor on the "AUTO PROGRAM" option and press VOL +
or
button.
When tuned to a channel in which TV program is broadcasted, this channel is memorized and
the color changes from magenta to green.
After every channels were memorized, "SET UP" menu is displayed.
3. When you have finished "AUTO PROGRAMMING", press TV MENU button repeatedly until
the menus disappear.
NOTES
If the broadcast signal is weak, the channel will not be memorized.
In this case, perform the MANUAL MEMORY procedure.(Refer to the next page)
If you wish to stop this procedure during the operation, Press VOL + or
button.
SET UP
ANTENNA
CATV 2
AUTO PROGRAM
FINE TUNE
0
: MOVE
: SELECT
: PREV.
SET UP
ANTENNA
CATV 2
AUTO PROGRAM
FINE TUNE
0
: MOVE :
SELECT
:
PREV.
AUTO PROGRAMMING 2
: STOP
MENU
PICTURE
SOUND
TIME
SETUP
FUNCTION
LANGUAGE ENGLISH
: MOVE
: SELECT
: EXIT
Содержание DDQ-9H1SC
Страница 21: ...42 41 Searching for a specific screen song during playback Searching for a specific screen song during playback...
Страница 22: ...44 43 Changing the audio subtitle language Setting a custom view...
Страница 23: ...46 45 Selecting a menu and 3D Changing the size and angle of the screen...
Страница 24: ...48 47 Setting the Language Using the Setup Menu...
Страница 25: ...50 49 Setting the VIDEO Setting the Language...
Страница 26: ...52 51 Setting the Audio Setting the SPEAKERS...
Страница 27: ...54 53 Setting rating level and password CUSTOM settings...
Страница 28: ...56 55 Operation with an MP3 disc C 001 T 008 Operation with an MP3 disc...
Страница 29: ...58 57 Use of JPEG DISC Use of JPEG DISC...
Страница 32: ...64 63 MEMO...
Страница 33: ...65 MEMO...


