


21
Operating Your Oven
Cooking Tips
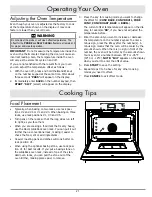
Food Placement
•
typically, when baking on two racks, use rack posi-
tions #2 and #4 or #1 and #3. when baking on three
racks, use rack positions #1, #3 and #5.
•
turn pans on the racks so that the long sides run left
to right, as you face them.
•
when you are cooking a food item that is very heavy,
use the Dacor gliderack oven rack. you can pull it out
further than a conventional rack, making it easier to
check the food, stir or add ingredients.
•
heavier roasting pans and dishes will cook better on
rack position #1.
•
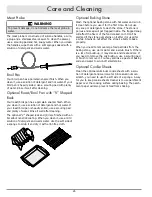
when using the optional baking stone, use rack posi-
tion #1 for best results. if you put a baking stone on
the gliderack oven rack, instead of one of the stan-
dard oven racks, you can pull the stone out of the
oven further, making pizza easier to remove.
Adjusting the Oven Temperature
Even though your oven is adjusted at the factory to cook
at the temperature shown on the display, it may cook
faster or slower than your old oven.
warning
Do not adjust the probe or self clean offset temperatures. The
offset for the
PROBE
and
SELF CLEAN
offsets must remain at 0
for proper and/or safe operation.
ImPortant
: Do not measure the temperature inside the
oven with a thermometer. opening the door will cause an
incorrect reading. also, the temperature inside the oven
will vary as the elements cycle on and off.
If you are not satisfied with the results from your oven,
you can adjust the temperature offset as follows:
1. with the oven off, press and hold the
0
and
#
keys
on the number keypad at the same time. after about
three seconds “
Pass
” will appear on the display.
2. immediately enter
6428
on the number keypad, then
start
. “
slCt
” (select) will appear on the display.
3. press the key for cooking mode you want to change
the offset for (
ConV BaKe
,
ConV BroIl
,
Pure
ConV
,
ConV roast
,
BaKe
or
BroIl
).
the current offset temperature will appear on the dis-
play, for example “
00
”, if you have not adjusted the
temperature before.
4. enter the amount you want to increase or decrease
the temperature on the number keypad. to enter a
minus sign, press the
#
key after the number(s). a
minus sign means that the oven will be cooler by the
amount shown. when there is no sign in front of the
number, the oven will be hotter by the amount shown.
you may enter a number between 35°f or -35°f
(18°c or -18°c).
note:
“
edit
” appears on the display
when you start to enter the offset value.
5. press
start
to save the setting.
6. repeat steps 3 to 5 above for any other cooking
modes you need to offset.
7. press
CanCel
to exit offset mode.
1
2
3
4
5
6
Содержание EOR series
Страница 2: ...2007 Dacor all rights reserved...
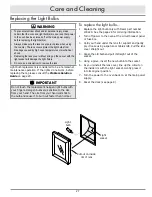
Страница 7: ...5 Getting to Know Your Oven 1 2 3 4 5 6 A K L B C D E F B J D H G N M...
Страница 34: ...32 Notes...


