background image

10

Installation Instructions

Crown Burner Assembly

Stack Burner Assembly

Spill tray

Stack 

burner

Crown 

burner

Burner cap

Burner cap

Burner ring

Burner ring

Burner head

Burner base

Burner base

Keyed hole

Ridge on bottom

of burner cap

Ridge on bottom

of burner cap

Burner Component Installation

 WARNING

Never attempt to operate the cooktop with any of the 

• 

burner parts removed.
Do not attempt to adjust the burner air mixture set-

• 

tings. All adjustments are preset at the factory.

Remove the burner parts and grates from their shipping 

• 

packages.
Install the burners as shown. When installing the burn-

• 

er components, twist each piece back and forth slightly 

until it drops completely into place. The burners will 

not operate properly unless all of the burner pieces are 

properly seated.
Gently set the grates on top of the spill trays. Make 

• 

sure that the rubber feet are positioned in the dimples. 

On model EG366, the center grate is larger than the 

other two.

STEP 1:

 Install 

burner head. 

Put locating 

tap into keyed 

hole.

STEP 1:

 Put 

burner ring on 

top of the head.

STEP 3:

 Install 

burner cap. 

Ridge on cap 

must surround 

top of ring.

STEP 3:

 Install 

burner cap. Ridge 

on cap must sur-

round top of ring.

STEP 2:

 Install 

burner ring. Line 

up ring tabs 

with head slots. 

Twist back and 

forth to assure 

proper seating.

STEP 2:

 Turn 

ring until it drops 

into place. Twist 

back and forth 

to assure proper 

seating.

Содержание EG366SCH

Страница 1: ...nstallation Instructions Epicure Cooktop Models EG366 EG486 Part No 102025 Rev M THIS APPLIANCE HAS BEEN TESTED IN ACCORDANCE WITH THE LATEST EDITION OF ANSI Z21 1 STANDARD FOR HOUSEHOLD GAS APPLIANCE...

Страница 2: ...e reference and the local building inspector s use 2007 Dacor all rights reserved If You Need Help If you have questions or problems with installation contact your Dacor dealer or the Dacor Customer S...

Страница 3: ...ANT If you smell gas Do not use or light any appliance Do not touch any electrical switch or use any electri cal devices including the telephone in your building From a neighbor s phone immediately ca...

Страница 4: ...e accom panying it This cooktop is not intended for commer cial or laboratory use DO NOT TOUCH THE SURFACES OF THE COOKTOP OR THE SURROUNDING AREAS DURING OR IMMEDIATELY AFTER USE WARNING General Safe...

Страница 5: ...liance should be installed in accordance with the National Fuel Gas Code ANSI Z223 1 NFPA 54 The gas service must be installed by a qualified profes sional Be certain that the cooktop being installed...

Страница 6: ...nd the control panel and cre ates a seamless look for the installation IMPORTANT When installing the cooktop into a lami nated or synthetic countertop radius the corners of the cutout to help avoid cr...

Страница 7: ...s 1 16 0 1 6 mm 0 unless otherwise noted Cooktop Model B C EG366 36 914 mm 36 914mm 42 1067 mm EG486 48 1219 mm 48 1219 mm 54 1372 mm Minimum Recommended Continued on following pages See note 2 2 See...

Страница 8: ...ng platform 8 W X 6 D 203 mm X 152 mm if gas and electrical are routed through bottom 1 2 13 mm countertop overhang 1 thick mounting platform Min Countertop Countertop 1 2 13 mm countertop overhang 2...

Страница 9: ...Open to below to allow for raised vent gas and electrical connections Countertop Countertop 1 2 13 mm countertop overhang 2 51 mm 1 25 mm 11 7 16 291 mm 15 381 mm 24 5 8 625 mm C L D D E B C L C L C...

Страница 10: ...86 comes with 3 14 inch grates Model EG366 comes with 2 10 inch grates and 1 14 inch grate NOTE The cooktop also includes a thread ring removal tool PN 101539 It is attached to the cooktop inside the...

Страница 11: ...ut off valve to the cooktop during any gas supply piping system pressure testing equal to or less than psi 3 5 kPa For LP gas installations the LP gas tank must have its own high pressure regulator in...

Страница 12: ...burn er components twist each piece back and forth slightly until it drops completely into place The burners will not operate properly unless all of the burner pieces are properly seated Gently set t...

Страница 13: ...s supplied with the cooktop The knobs for the center burners have the words MAX GRIDDLE on them Put the knobs with the words MAX GRIDDLE on them onto the inner center burner valve shafts Put the remai...

Страница 14: ...tion wait for at least five minutes to allow any gas to dissipate then repeat the test Once the burner lights the control knob can be rotat ed counterclockwise from HIGH to LOW to adjust the flame hei...

Страница 15: ...d installed according to these instructions and in accordance with all applicable codes See pages 3 and 4 Has the gas supply inlet pressure been measured to ensure that it does not exceed the maximums...

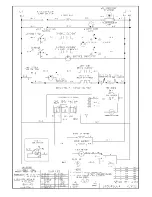
Страница 16: ...ESS O O O O O O B B B B B B B B RL BURNER IGNITOR IGNITOR RC BURNER RR BURNER IGNITOR IGNITOR FR BURNER IGNITOR FL BURNER FC BURNER IGNITOR S1 S2 S3 S4 S6 S5 B B B B BLACK WHITE FR LED HARNESS W W W W...

Страница 17: ...15 Notes...

Страница 18: ...16 Notes...

Страница 19: ......

Страница 20: ...Dacor Phone 800 793 0093 FAX 626 403 3130 www Dacor com...

Отзывы: