74
D-Link DIR-1960 User Manual
Section 4 - Configuration
Management
Time & Schedule
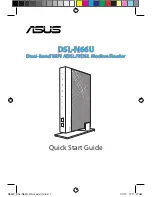
Time
The
Time
page allows you to configure, update, and maintain the correct
time on the internal system clock. From here you can set the time zone, the
Network Time Protocol (NTP) server, and enable or disable daylight saving
time.
In the Management menu on the bar on the top of the page, click
Time &
Schedule
.
To configure and manage your schedules, click
Schedule
and refer to
.
Time Configuration
Time Zone:
Select your time zone from the drop-down menu.
Time:
Displays the current date and time of the router.
Enable Daylight
Saving:
Enable or disable daylight saving time.
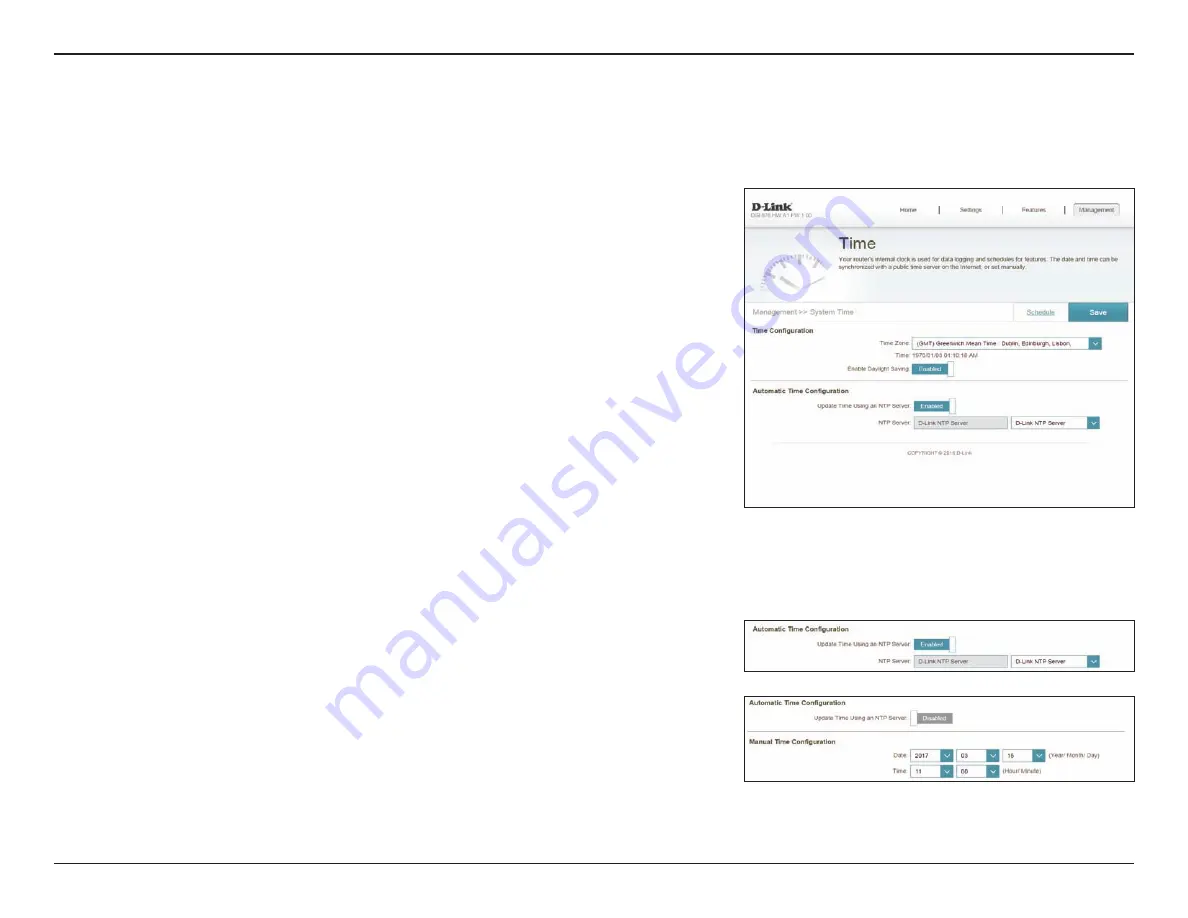
Automatic Time Configuration
Update Time
Using an NTP
Server:
Enable or disable to allow an NTP server on the Internet to synchronize
the time and date with your router. If you enable this option, select
an NTP server from the drop-down menu. To configure the router's
time and date manually, disable this option and use the drop-down
menus that appear to input the time and date.
Click
Save
when you are done.