background image

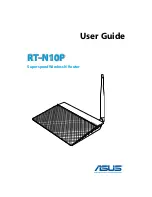
RT-N10P

Superspeed Wireless N Router

User Guide

Содержание RT-N10P

Страница 1: ...RT N10P Superspeed Wireless N Router User Guide ...

Страница 2: ...CHANTABILITY OR FITNESS FOR A PARTICULAR PURPOSE IN NO EVENT SHALL ASUS ITS DIRECTORS OFFICERS EMPLOYEES OR AGENTS BE LIABLE FOR ANY INDIRECT SPECIAL INCIDENTAL OR CONSEQUENTIAL DAMAGES INCLUDING DAMAGES FOR LOSS OF PROFITS LOSS OF BUSINESS LOSS OF USE OR DATA INTERRUPTION OF BUSINESS AND THE LIKE EVEN IF ASUS HAS BEEN ADVISED OF THE POSSIBILITY OF SUCH DAMAGES ARISING FROM ANY DEFECT OR ERROR IN ...

Страница 3: ...gure TCP IP settings 15 C Disable dial up networking 18 3 Network configuration using the web GUI 19 Logging in to the web GUI 19 Setting up the Internet connection 20 Quick Internet Setup QIS with auto detection 21 Setting up wireless security 26 Creating your Guest Network 28 Using the Traffic Manager 30 Managing QoS Quality of Service Bandwidth 30 Monitoring Traffic 32 Configuring Advanced sett...

Страница 4: ...ies 37 Device Discovery 37 Firmware Restoration 39 5 Troubleshooting 41 Troubleshooting 41 ASUS DDNS Service 45 Frequently Asked Questions FAQs 45 Appendices 47 Notices 47 Networks Global Hotline Information 61 ASUS Contact information 64 ...

Страница 5: ... inquiries and support Refer to the ASUS Support Hotline list at the back of this user manual Keep the original packaging material in case you would need future warranty services such as repair or replacement RT N10P wireless router Network cable RJ 45 Power adapter Quick Start Guide Warranty card ...

Страница 6: ...eceiving data wireless WPS Flashing WPS in progress WAN Wide Area Network Off No power or no physical connection On Has physical connection to an Ethernet network Flashing Transmitting or receiving data through Ethernet cable LAN 1 4 Local Area Network Off No power or no physical connection On Has physical connection to an Ethernet network Flashing Transmitting or receiving data through Ethernet c...

Страница 7: ... Insert the AC adapter into this port to connect your router to a power source LAN1 LAN4 Connect RJ 45 Ethernet cables to these ports to establish LAN connection WAN Connect an RJ 45 Ethernet cable to this port to establish WAN connection WPS Press this button for more than four seconds to establish a secure wireless connection with a WPS supported wireless device 4 5 6 3 2 1 1 2 3 4 5 6 ...

Страница 8: ...hooks to mount your router on concrete or wooden surfaces using two round head screws 2 Air vents These vents provide ventilation to your router Bottom panel Mounting the wireless router to a wall is not recommended as it reduces wireless performance 2 1 ...

Страница 9: ...1g or 20MHz only Wi Fi devices 2 4GHz computer peripherals Bluetooth devices cordless phones transformers heavy duty motors fluorescent lights microwave ovens refrigerators and other industrial equipment to prevent signal interference or loss For the best front to rear wireless coverage place the wireless router in an upright position For the best upward and downward wireless coverage place the wi...

Страница 10: ... install an IEEE 802 11b g n WLAN adapter to your computer to connect to the network The Ethernet RJ 45 cables used to connect the network devices should not exceed 100 meters Setting up your wireless router Use a wired connection when setting up your wireless router to avoid possible wireless setup issues Before setting up your ASUS wireless router do the following If you are replacing an existin...

Страница 11: ... to the DC In port and plug it to a power outlet Wired connection Your wireless router supports both a straight through or crossover cable when setting up a wired connection RT N10P 3 Using another network cable connect your modem to your wireless router s WAN port 4 Insert your modem s AC adapter to the DC In port and plug it to a power outlet Ensure that the LAN LED is blinking ...

Страница 12: ...ect your modem to your wireless router s WAN port 3 Insert your modem s AC adapter to the DC In port and plug it to a power outlet 4 Install an IEEE 802 11b g n WLAN adapter on your computer For details on connecting to a wireless network refer to the WLAN adapter s user manual To set up the security settings for your network refer to the section Setting up wireless security RT N10P ...

Страница 13: ...dows 7 1 Click Start Internet Explorer 2 Click Tools Internet options Connections tab LAN settings Before configuring your wireless router apply the steps described in this section to each computer on the network to avoid problems connecting to the wireless network ...

Страница 14: ...eck Use a proxy server for your LAN 4 Click OK then Apply MAC OSX 1 From your Apple Safari browser click Safari Preferences Advanced On the Proxies item click Change Settings 2 From the Network screen uncheck FTP Proxy and Web Proxy HTTP 3 Click OK then Apply ...

Страница 15: ...ork and Internet Network and Sharing Center Change adapter settings 2 On the Network Connections window click on Local Area Connection 3 On the Local Area Connection Network Status window click Properties 4 Select Internet Protocol Version 4 TCP IPv4 or Internet Protocol Version 6 TCP IPv6 then click Properties ...

Страница 16: ...16 6 Tick Obtain an IP address automatically 7 Click OK ...

Страница 17: ...17 MAC OSX 1 Click Apple Menu System Preferences Network 2 Click Ethernet on the left panel 3 On the Configure IPv4 item select Using DHCP 4 Cllick Apply ...

Страница 18: ...18 C Disable dial up networking Windows 7 1 Click Start Internet Explorer 2 Click Tools Internet Options Connections tab 3 Tick Never dial a connection 4 Click Apply then OK ...

Страница 19: ...that allows you to configure the router using any web browser such as Internet Explorer Mozilla Firefox Apple Safari or Google Chrome To log in to the web GUI 1 Launch your web browser and manually key in the wireless router s default IP address 192 168 1 1 2 On the login page key in the default user name admin and password admin ...

Страница 20: ...ection When setting up the Internet connection for the first time press the Reset button on your wireless router to reset it to its factory default settings 3 The wireless router GUI provides access to various configuration settings ...

Страница 21: ...orer Mozilla Firefox Apple Safari or Google Chrome 2 Quick Internet Setup will launch automatically Click Next If QIS failed to launch automatically manually launch your wireless router s web GUI to access the QIS page To do this follow these steps 1 On your web browser key in http 192 168 1 1 2 On the login page key in the default username admin and password admin 3 Click Quick Internet Setup on ...

Страница 22: ...strator password to prevent unauthorized access to the router Click Next 4 Select Wireless router mode Repeater mode or Access Point AP mode Click Next To set up a wireless network with Internet access use Wireless router mode ...

Страница 23: ...less router for the first time or when your wireless router is reset to its default settings If QIS failed to detect your Internet connection type click Skip to manual setting and manually configure your connection settings 5 The wireless router will attempt to identify your connection type If needed select the necessary connection type and key in any necessary information required such as your IS...

Страница 24: ...6 In the Wireless setting screen key in a network name SSID and assign a security key for your wireless connection Click Apply 7 A summary of your network settings will be displayed Click Next to continue ...

Страница 25: ...25 8 Read the Wireless Network ConnectionTutorial Click Finish ...

Страница 26: ...ireless security settings 1 Key in 192 168 1 1 on your web browser 2 On the login screen key in the default user name admin and password admin then click OK The wireless router s web GUI launches 3 On the Network Map screen the System Status area displays the SSID Service Set Identifier Authentication Method and security key settings of your wireless network ...

Страница 27: ...thod dropdown list select the encryption method for your wireless network 6 Key in your security passkey 7 Click Apply The IEEE 802 11n standard prohibits using High Throughput with WEP or WPA TKIP as the unicast cipher If you use these encryption methods your data rate will drop to IEEE 802 11g 54Mbps connection ...

Страница 28: ...vides wireless Internet connectivity for temporary visitors while restricting access to your private network To create your guest network 1 Click Guest Network on the navigation panel 2 Click Enable 3 To configure additional options click any of the items listed ...

Страница 29: ...your temporary network on the Network Name SSID field 5 Select an Authentication Method 6 Select a WEP Encryption method 7 Specify the Access time or click Limitless 8 Select Disable or Enable on the Access Intranet item 9 Click Apply ...

Страница 30: ...ic Manager Managing QoS Quality of Service Bandwidth The Quality of Service feature allows you to set the bandwidth priority and manage network traffic To set up QoS 1 Click Traffic Manager on the navigation panel and click the QoS tab 2 Click ON to enable QoS 3 Click Save ...

Страница 31: ...31 3 If you want to prioritize specific network applications and network services click User defined Priority on the upper right hand corner 4 Adjust the values as needed Click Apply ...

Страница 32: ...32 MonitoringTraffic Click the Traffic Monitor tab to view real time or historical bandwidth information of your Internet Wired and Wireless connections ...

Страница 33: ...specify the IP address range and lease time for the clients on your network To configure the DHCP server 1 Click LAN on the navigation panel 2 Click the DHCP Server tab 3 In the Enable the DHCP Server field tick Yes 4 In the IP Pool Starting Address field key in the starting IP address 5 In the IP Pool Ending Address field key in the ending IP address ...

Страница 34: ...etween 2 and 254 when specifying an IP address range An IP Pool Starting Address should not be greater than the IP Pool Ending Address 6 In the LeaseTime field specify in seconds when an assigned IP address will expire Once it reaches this time limit the DHCP server will then assign a new IP address ...

Страница 35: ...o the downloaded firmware file 4 Click Upload Upgrading the firmware Download the latest firmware from the ASUS website at http support asus com If the upgrade process fails the wireless router automatically enters rescue mode and the power LED indicator on the front panel starts flashing slowly To recover or restore the system use the Firmware Restoration utility ...

Страница 36: ...Upload Setting tab 3 Select a task from the configuration options To restore to default factory settings click Restore and click OK once prompted To save the current system settings click Save navigate to the folder where you intend to save the file and click Save To restore from a saved system settings file click Browse to locate your file then click Upload ...

Страница 37: ...s available on the wireless network and allows you to configure the device ASUS wireless router utilities can be downloaded from http support asus com After downloading and installing the setup file for the ASUS wireless utilities the Device Discovery and Firmware Restoration utilities will be added to your applications ...

Страница 38: ...et the router to Access Point mode you need to use Device Discovery to get the router s IP address To launch the Device Discovery utility Click Start All Programs ASUS Utility RT N10PWireless Router Device Discovery ...

Страница 39: ...y 1 Unplug the wireless router from its power source 2 While holding down the Reset button at the back of the wireless router plug the wireless router into a power source Release the Reset button when the Power LED at the front panel begins to flash slowly which indicates that the wireless router is in rescue mode 3 Use the following to set up your TCP IP settings IP address 192 168 1 x Subnet mas...

Страница 40: ...ess Router Normal firmware upgrades must be done through the web GUI Refer to Upgrading the firmware for more details 5 Click Browse to navigate to the firmware file then click Upload 4 From your computer s desktop click Start All Programs ASUS Utility RT N10PWireless Router Firmware Restoration ...

Страница 41: ...General tab click Delete under Browsing history 3 Tick Temporary Internet Files and Cookies Click Delete Instructions for deleting cookies and temporary Internet files vary with the web browser Disable the proxy server settings remove any dial up connections and set the TCP IP settings to obtain IP addresses automatically For more details refer to the section Before you proceed in this user manual...

Страница 42: ...r the wireless channel in use conforms to the channels available in your country area Check the encryption settings Check if the ADSL or Cable connection is connected Use a different Ethernet cable Internet is not accessible Check the status indicators on the ADSL modem and the wireless router Check if the WAN LED on the wireless router is on If the LED is off switch Ethernet cables and try again ...

Страница 43: ...use a proxy server If the ADSL LINK light blinks continuously or stays off Internet access is not possible the Router is unable to establish a connection with the ADSL network Ensure that all your cables are properly connected Disconnect the power cord from the ADSL or cable modem wait a few minutes then reconnect the cord If the ADSL light continues to blink or stays OFF contact your Internet ser...

Страница 44: ...5 255 255 0 DNS Server 1 192 168 1 1 DNS Server 2 Blank SSID ASUS How do you restore the system to its default settings Press the Reset button at the rear panel of the wireless router for more than five seconds Refer to the section Restoring Saving Uploading settings of this user manual The following are the factory default settings ...

Страница 45: ...r difficulty in using your device contact the service center Frequently Asked Questions FAQs 1 Will the registered information be lost or registered by others If you have not updated the registered information in 90 days the system automatically deletes the registered information and the domain name may be registered by others 2 I did not register the ASUS DDNS for the router I bought six months a...

Страница 46: ... You can only register one domain name for one router You can use port mapping to implement security in the network 5 After restarting the router why is it that I see a different WAN IP address in MS DOS and in the router configuration page This is normal The interval time between the ISP DNS server and ASUS DDNS results in different WAN IPs in MS DOS and in the router configuration page Different...

Страница 47: ...striction of Chemicals regulatory framework we published the chemical substances in our products at ASUS REACH website at http csr asus com english index aspx Federal Communications Commission Statement This device complies with Part 15 of the FCC Rules Operation is subject to the following two conditions This device may not cause harmful interference This device must accept any interference recei...

Страница 48: ...mful interference to radio communications However there is no guarantee that interference will not occur in a particular installation If this equipment does cause harmful interference to radio or television reception which can be determined by turning the equipment off and on the user is encouraged to try to correct the interference by one or more of the following measures Reorient or relocate the...

Страница 49: ...cient Protection requirements for electromagnetic compatibility Article 3 1b Testing for electromagnetic compatibility according to EN 301 489 1 and EN 301 489 17 has been conducted These are considered relevant and sufficient Effective use of the radio spectrum Article 3 2 Testing for radio test suites according to EN 300 328 2 has been conducted These are considered relevant and sufficient CE Ma...

Страница 50: ...c host products operated in portable exposure conditions antennas are less than 20 centimeters of a person s body This device has been certified for use in Canada Status of the listing in the Industry Canada s REL Radio Equipment List can be found at the following web address http www ic gc ca app sitt reltel srch nwRdSrch do lang eng Additional Canadian information on RF exposure also can be foun...

Страница 51: ...電信法規定作業之無線電通 信 低功率射頻電機須忍受合法通信或工業 科學及醫療用電 波輻射性電機設備之干擾 Authorised distributors inTurkey BOGAZICI BIL GISAYAR SAN VETIC A S Tel 90 212 3311000 Addrress AYAZAGA MAH KEMERBURGAZ CAD NO 10 AYAZAGA ISTANBUL CIZGI Elektronik San Tic Ltd Sti Tel 90 212 3567070 Address CEMAL SURURI CD HALIM MERIC IS MERKEZI No 15 C D 5 6 34394 MECIDIYEKOY ISTANBUL ...

Страница 52: ...of this license document but changing it is not allowed Preamble The licenses for most software are designed to take away your freedom to share and change it By contrast the GNU General Public License is intended to guarantee your freedom to share and change free software to make sure the software is free for all its users This General Public License applies to most of the Free Software Foundation...

Страница 53: ...individually obtain patent licenses in effect making the program proprietary To prevent this we have made it clear that any patent must be licensed for everyone s free use or not licensed at all The precise terms and conditions for copying distribution and modification follow pieces of it in new free programs and that you know you can do these things To protect your rights we need to make restrict...

Страница 54: ...nd the output from the Program is covered only if its contents constitute a work based on the Program independent of having been made by running the Program Whether that is true depends on what the Program does 1 You may copy and distribute verbatim copies of the Program s source code as you receive it in any medium provided that you conspicuously and appropriately publish on each copy an appropri...

Страница 55: ... Exception if the Program itself is interactive but does not normally print such an announcement your work based on the Program is not required to print an announcement These requirements apply to the modified work as a whole If identifiable sections of that work are not derived from the Program and can be reasonably considered independent and separate works in themselves then this License and its...

Страница 56: ...esponding source code to be distributed under the terms of Sections 1 and 2 above on a medium customarily used for software interchange or c Accompany it with the information you received as to the offer to distribute corresponding source code This alternative is allowed only for noncommercial distribution and only if you received the program in object code or executable form with such an offer in...

Страница 57: ...rivative works These actions are prohibited by law if you do not accept this License Therefore by modifying or distributing the Program or any work based on the Program you indicate your acceptance of this License to do so and all its terms and conditions for copying distributing or modifying the Program or works based on it 6 Each time you redistribute the Program or any work based on the Program...

Страница 58: ...ces Many people have made generous contributions to the wide range of software distributed through that system in reliance on consistent application of that system it is up to the author donor to decide if he or she is willing to distribute software through any other system and a licensee cannot impose that choice This section is intended to make thoroughly clear what is believed to be a consequen...

Страница 59: ...re Foundation write to the Free Software Foundation we sometimes make exceptions for this Our decision will be guided by the two goals of preserving the free status of all derivatives of our free software and of promoting the sharing and reuse of software generally NO WARRANTY 11 BECAUSE THE PROGRAM IS LICENSED FREE OF CHARGE THERE IS NO WARRANTY FOR THE PROGRAM TO THE EXTENT PERMITTED BY APPLICAB...

Страница 60: ...INCLUDING ANY GENERAL SPECIAL INCIDENTAL OR CONSEQUENTIAL DAMAGES ARISING OUT OF THE USE OR INABILITY TO USE THE PROGRAM INCLUDING BUT NOT LIMITED TO LOSS OF DATA OR DATA BEING RENDERED INACCURATE OR LOSSES SUSTAINED BYYOU OR THIRD PARTIES OR A FAILURE OF THE PROGRAM TO OPERATE WITH ANY OTHER PROGRAMS EVEN IF SUCH HOLDER OR OTHER PARTY HAS BEEN ADVISED OF THE POSSIBILITY OF SUCH DAMAGES END OF TER...

Страница 61: ...00 17 00 Mon Fri Norway 0047 2316 2682 09 00 18 00 Mon Fri Sweden 0046 858769407 09 00 18 00 Mon Fri Finland 00358 969379690 10 00 19 00 Mon Fri Denmark 0045 38322943 09 00 18 00 Mon Fri Poland 0048 225718040 08 30 17 30 Mon Fri Spain 0034 902889688 09 00 18 00 Mon Fri Portugal 00351 707500310 09 00 18 00 Mon Fri Slovak Republic 00421 232162621 08 00 17 00 Mon Fri Czech Republic 00420 596766888 08...

Страница 62: ...065 64157917 11 00 19 00 Mon Fri 0065 67203835 11 00 19 00 Mon Fri Repair Status Only 11 00 13 00 Sat Malaysia 0060 320535077 10 00 19 00 Mon Fri Philippine 1800 18550163 09 00 18 00 Mon Fri India 1800 2090365 09 00 18 00 Mon Sat India WL NW 09 00 21 00 Mon Sun Indonesia 0062 2129495000 09 30 17 00 Mon Fri 500128 Local Only 9 30 12 00 Sat Vietnam 1900 555581 08 00 12 00 13 30 17 30 Mon Sat Hong Ko...

Страница 63: ...972 35598555 08 30 17 30 Sun Thu Balkan Countries Romania 0040 213301786 09 00 18 30 Mon Fri Bosnia Herzegovina 00387 33773163 09 00 17 00 Mon Fri Bulgaria 00359 70014411 09 30 18 30 Mon Fri 00359 29889170 09 30 18 00 Mon Fri Croatia 00385 16401111 09 00 17 00 Mon Fri Montenegro 00382 20608251 09 00 17 00 Mon Fri Serbia 00381 112070677 09 00 17 00 Mon Fri Slovenia 00368 59045400 08 00 16 00 Mon Fr...

Страница 64: ...SA Telephone 15107393777 Fax 15106084555 Website usa asus com Online support support asus com ASUS COMPUTER GmbH Germany and Austria Address Harkort Str 21 23 D 40880 Ratingen Germany Telephone 491805010923 Fax 492102959911 Website www asus de Online contact www asus de sales Technical Support Telephone Component Networking 491805010923 Telephone System Notebook Eee LCD 491805010920 Fax 4921029599...

Страница 65: ...STeK Computer Inc Tel 886 2 2894 3447 Address 4F No 150 LI TE RD PEITOU TAIPEI 112 TAIWAN Authorised representative in Europe ASUS Computer GmbH Address HARKORT STR 21 23 40880 RATINGEN GERMANY EEE Yönetmeliğine Uygundur ...

Страница 66: ...66 ...

Отзывы: