


D-Link EasySmart Switch User Manual
7
7
Wall-mount
The Switch can be mounted on a wall. Two mounting slots are provided on the bottom of the switch for this
purpose.
Please follow the installation steps to complete wall-mount process.
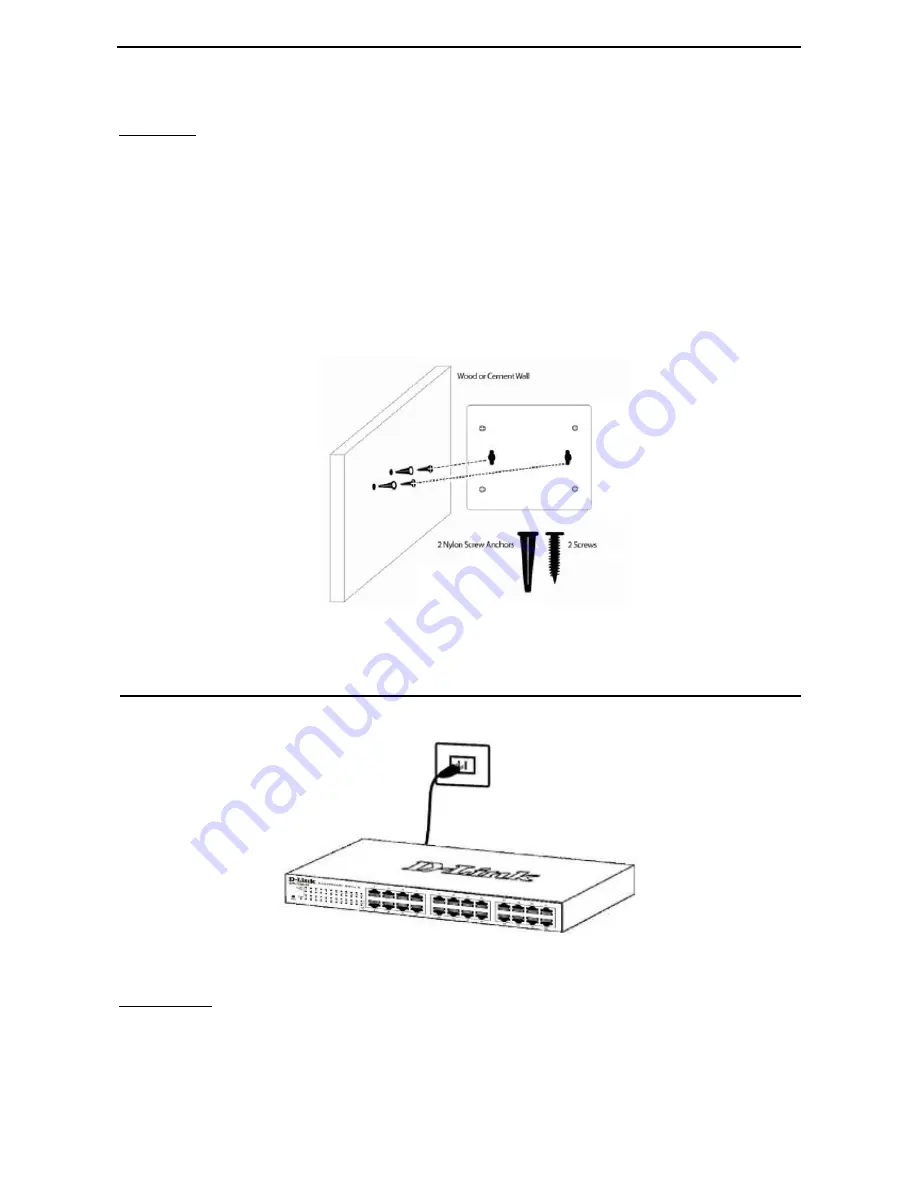
Mounting on a cement wall
Step 1: Mount the nylon screw anchors ø5 x 22L mm (included in the accessory kit ) into a cement wall
Step 2: Drive the T3 x 15L screws into the nylon screw anchors.
Step 3: Hook the mounting holes of the switch back on the screws.
Mounting on a wood wall
Step 1: Drive the T3 x 15L screws into a wood wall.
Step 2. Hook the mounting holes of the switch back on the screws.
Figure 10 –Wall mount installation
Step 3 – Plugging in the AC Power Cord
Users may now connect the AC power cord into the rear of the switch and to an electrical outlet (preferably
one that is grounded and surge protected).
Figure 11 –Plugging the switch into an outlet
Power Failure
As a precaution, the switch should be unplugged in case of power failure. When power is resumed, plug the
switch back in.
Содержание EasySmart DGS-1100-08
Страница 1: ...D G S 1 1 0 0 0 8 1 6 2 4 Ma n u a l E a s y S m a r t S w i t c h V e r 1 0 2...
Страница 39: ...D Link EasySmart Switch User Manual 36 Figure 62 Security Dynamic Forwarding Table...
Страница 43: ......
Страница 44: ......


