background image

30

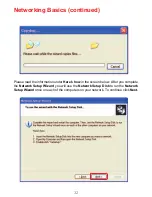
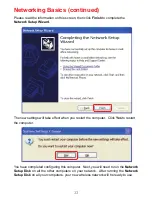
Please wait while the Network Setup Wizard applies the changes.

Networking Basics (continued)

When the changes are complete, click Next.

Please wait while the Network Setup Wizard configures the computer.
This may take a few minutes.

Содержание DWL_7100

Страница 1: ...DWL 7100AP 802 11a 802 11g 2 4 5GHz Manual Building Networks for People D Link AirPremier AG Wireless Access Point TM ...

Страница 2: ...duction 4 Wireless Basics 6 Installation Considerations 8 Getting Started 9 Using the Configuration Menu 11 Networking Basics 27 Troubleshooting 42 Technical Specifications 48 Contacting Technical Support 51 Warranty and Registration 52 ...

Страница 3: ... one included with the DWL 7100AP will cause damage and void the warranty for this product If any of the above items are missing please contact your reseller System Requirements For Configuration Package Contents At least 128MB of memory and a 500MHz processor Computer with Windows Macintosh or Linux based operating system with an installed Ethernet adapter Internet Explorer or Netscape Navigator ...

Страница 4: ...ion with other WPA compatible 802 11 products will still be much stronger than ever before Utilizing the Pre Shared Key mode of WPA the DWL 7100AP will obtain a new security key every time it connects to the 802 11 network You only need to input your encryption information once in the configuration menu No longer will you have to manually input a new WEP key frequently to ensure security With the ...

Страница 5: ... 802 11a 802 11b and 802 11g Devices Fully compatible with the IEEE 802 11a 802 11b and 802 11g standards the DWL 7100AP can connect with existing 802 11b 802 11g or 802 11a compliant wireless network adapter cards LEDs LED stands for Light Emitting Diode The DWL 7100AP Wireless Access Point has 5 Green LEDs as shown below Power LAN 10 100 WLAN 802 11a and 802 11b or 802 11g A steady light indicat...

Страница 6: ...tems support the same protocols as Ethernet adapter cards People use wireless LAN technology for many different purposes Mobility Productivity increases when people have access to data in any location within the operating range of the WLAN Management decisions based on real time information can significantly improve worker efficiency Low Implementation Costs WLANs are easy to set up manage change ...

Страница 7: ...ithout noticeable delays This technology works by transmitting high speed digital data over a radio wave utilizing OFDM Orthogonal Frequency Division Multiplexing technology OFDM works by splitting the radio signal into multiple smaller sub signals that are then transmitted simultaneously at different frequencies to the receiver OFDM reduces the amount of crosstalk interference in signal transmiss...

Страница 8: ...to be almost 3 feet 1 meter thick At a 2 degree angle it looks over 42 feet 14 meters thick Position devices so that the signal will travel straight through a wall or ceiling instead of at an angle for better reception Building materials can impede the wireless signal a solid metal door or aluminum studs may have a negative effect on range Try to position wireless devices and computers with wirele...

Страница 9: ... each computer must be in the same IP address range as all the computers in the network and the subnet mask must be exactly the same for all the computers in the network For example If the first computer is assigned an IP address of 192 168 0 2 with a subnet mask of 255 255 255 0 then the second computer can be assigned an IP address of 192 168 0 3 with a subnet mask of 255 255 255 0 etc IMPORTANT...

Страница 10: ...mierTM AG DWL AG520 wireless PCI adapter into an available PCI slot See the Quick Installation Guide included with the DWL AG520 Install the drivers for the D Link AirPremierTM AG DWL AG650 into the laptop computer See the Quick Installation Guide included with the DWL AG650 For a typical wireless setup as shown above please do the following An Infrastructure wireless network contains an access po...

Страница 11: ...elow Open the web browser Type in the IP address of the access point Note if you have changed the default IP address assigned to the DWL 7100AP make sure to enter the correct IP address Home Wizard The Home Wizard screen will appear Please refer to the Quick Installation Guide for more information regard ing the Setup Wizard UsingtheConfigurationMenu Type admin in the User Name field Leave the Pas...

Страница 12: ...SID Service Set Identifier SSID is the name designated for a specific wire less local area network WLAN The SSID s factory default setting is default The SSID can be easily changed to connect to an existing wireless network or to establish a new wireless network Wireless Band Select 802 11g or 802 11a from the pulldown menu Note In the Configuration screens that follow you will be able to configur...

Страница 13: ...rk and cannot be seen on the Internet Get IP From Select Static Manual or Dynamic DHCP as the method you will use to assign an IP address to the DWL 7100AP Apply Default Gateway This field is optional Enter in the lP address of the router on your network IP Address The IP address of the LAN interface The default IP address is 192 168 0 50 Note You will need to use the AP Manager to determine the I...

Страница 14: ...nables you to connect multiple WLANs Remote AP MAC Address Input the remoteAP MACAddresses of theAPs with which the DWL 7100AP will associate AP Repeater To extend the range of the wireless network select this option and enter the MAC address of the remote AP within your network that will have its range extended Remote APMACAddress Enter the MAC address of the remoteAP within your network that wil...

Страница 15: ...s recommended DTIM Delivery Traffic Indication Message Enter a value between 1 and 255 for the Delivery Traffic Indication Message DTIM A DTIM is a countdown informing clients of the next window for listening to broadcast and multicast messages Fragment Length This value should remain at its default setting of 2346 If you experience a high packet error rate you may slightly increase your Fragmenta...

Страница 16: ...he list from participating in the network Access Control List Input the MAC addresses into the list MAC Address Media Access ControlAddress A unique hardware address that identifies a device on a network It is assigned at the factory and cannot be changed Usually you will find this address on a sticker on the device or on the packaging Please use the following format when entering the MAC address ...

Страница 17: ...u have selected in Wep Key Type WPA click here to select WPA security features Shared Key Open System click here to select both options Shared Key in order to access the DWL 7100AP on the network the device must be listed in the Access Control List Open System the DWL 7100AP will be visible to all devices on the network Open System is the default setting Hexadecimal digits con sist of the numbers ...

Страница 18: ...ess clients among the DWL 7100APs in the network Assign each access point a different non overlapping channel e g 1 6 11 Ethernet Link Status This field displays the Ethernet Link Status Link Up indicates that there is an Ethernet LAN connection to the AP When Link Integrity is Enabled whenever the Ethernet connection between the LAN and the AP is disconnected then the wireless segment associated ...

Страница 19: ...he IP address of the router on the network Gateway Wins Status Windows Internet Naming Service is a system that deter mines the IP address of a network computer that has a dynami cally assigned IP address DNS Enter the IP address of the DNS server The DNS server trans lates domain names such as www dlink com into IP addresses Domain Name Enter the Domain Name of the DWL 7100AP Turn the Dynamic Poo...

Страница 20: ...eway Wins Status Windows Internet Naming Service is a system that determines the IP address of a network computer that has a dynamically as signed IP address DNS Assigned Static Pool Enter the IP address of the DNS server The DNS server translates domain names such as www dlink com into IP addresses Domain Name Enter the Domain Name of the DWL 7100AP Turn the Static Pool Settings ON or OFF here Af...

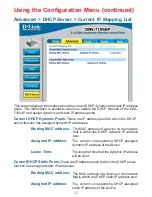
Страница 21: ...ddress This screen displays information about the current DHCP dynamic and static IP address pools This information is available when you enable the DHCP function of the DWL 7100AP and assign dynamic and static IP address pools The MAC address of a device on the network that is within the DHCP dynamic IP address pool The current corresponding DHCP assigned dynamic IP address of the device The leng...

Страница 22: ...he old password New Password Enter the new password Confirm New Password Re enter the new password Apply To save changes click Apply Apply Settings and Restart If you have made any changes to the configuration settings click Restart to apply the changes Restore to Factory Default Settings To return the DWL 7100AP to the factory default settings click Restore ...

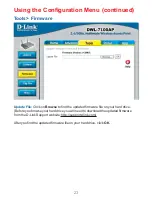
Страница 23: ...to find the updated firmware file on your hard drive Before you browse your hard drive you will need to download the updated firmware from the D Link Support website http support dlink com After you find the updated firmware file on your hard drive click OK Tools Firmware ...

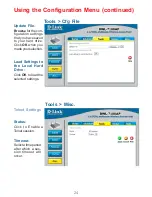
Страница 24: ...t you have saved to your hard drive Click OK when you made your selection Update File Click OK to load the selected settings Load Settings to the Local Hard Drive Status Telnet Settings Select a time period after which a ses sion timeout will occur Timeout Click to Enable a Telnet session Tools Misc ...

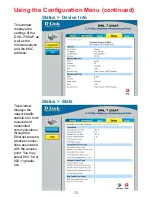
Страница 25: ...through the Ethernet port and wireless connec tions associated with the access point You may select 802 11a or 802 11g statis tics Using the Configuration Menu continued Status Stats Status Device Info This window displays the settings of the DWL 7100AP as well as the firmware version and the MAC address ...

Страница 26: ...26 The Help menu is displayed here You can also click on Help in any window for additional information Help Using the Configuration Menu continued ...

Страница 27: ...osoft Windows XP Note Please refer to websites such as http www homenethelp com and http www microsoft com windows2000 for information about networking computers using Windows 2000 Me or 98 Go to Start Control Panel Network Connections Select Set up a home or small office network Networking Basics When this screen appears click Next ...

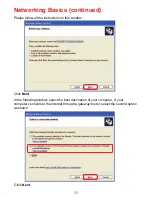
Страница 28: ...k Next In the following window select the best description of your computer If your computer connects to the internet through a gateway router select the second option as shown Click Next Please follow all the instructions in this window ...

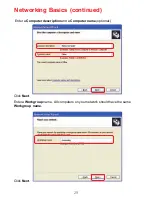
Страница 29: ...29 Enter a Computer description and a Computer name optional Networking Basics continued Click Next Enter a Workgroup name All computers on your network should have the same Workgroup name Click Next ...

Страница 30: ... while the Network Setup Wizard applies the changes Networking Basics continued When the changes are complete click Next Please wait while the Network Setup Wizard configures the computer This may take a few minutes ...

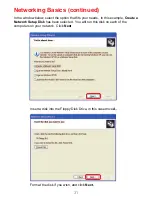
Страница 31: ...ion that fits your needs In this example Create a Network Setup Disk has been selected You will run this disk on each of the computers on your network Click Next Insert a disk into the Floppy Disk Drive in this case drive A Format the disk if you wish and click Next ...

Страница 32: ... read the information under Here s how in the screen below After you complete the Network Setup Wizard you will use the Network Setup Disk to run the Network Setup Wizard once on each of the computers on your network To continue click Next ...

Страница 33: ...ew settings will take effect when you restart the computer Click Yes to restart the computer You have completed configuring this computer Next you will need to run the Network Setup Disk on all the other computers on your network After running the Network Setup Disk on all your computers your new wireless network will be ready to use ...

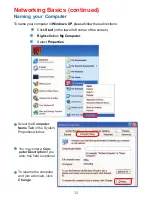
Страница 34: ...n if you wish this field is optional To rename the computer and join a domain click Change Networking Basics continued Naming your Computer To name your computer in Windows XP please follow these directions Click Start in the lower left corner of the screen Right click on My Computer Select Properties ...

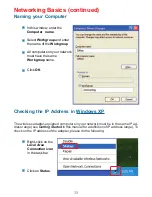
Страница 35: ...ve the same Workgroup name Click OK Checking the IP Address in Windows XP The wireless adapter equipped computers in your network must be in the same IP ad dress range see Getting Started in this manual for a definition of IP address range To check on the IP address of the adapter please do the following Right click on the Local Area Connection icon in the task bar Click on Status ...

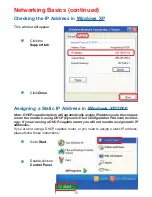
Страница 36: ...rotocol technol ogy If you are using a DHCP capable router you will not need to assign static IP addresses If you are not using a DHCP capable router or you need to assign a static IP address please follow these instructions Go to Start Double click on Control Panel Networking Basics continued This window will appear Click the Support tab Click Close Checking the IP Address in Windows XP ...

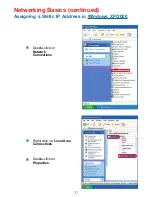
Страница 37: ...37 Networking Basics continued Assigning a Static IP Address in Windows XP 2000 Double click on Network Connections Double click on Properties Right click on Local Area Connections ...

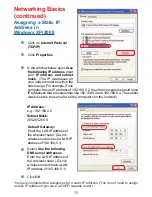
Страница 38: ... mask The IP addresses on your network must be within the same range For example if one computer has an IP address of 192 168 0 2 the other computers should have IP addresses that are sequential like 192 168 0 3 and 192 168 0 4 The subnet mask must be the same for all the computers on the network Click OK Select Use the following DNS server addresses Enter the LAN IP address of the wireless router...

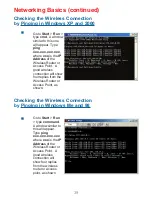
Страница 39: ...r or Access Point A good wireless connection will show four replies from the Wireless Router or Access Point as shown Checking the Wireless Connection by Pinging in Windows Me and 98 Go to Start Run type command A window similar to this will appear Type ping xxx xxx xxx xxx where xxx is the IP Address of the Wireless Router or Access Point A good wireless connection will show four replies from the...

Страница 40: ...t have identical IP addresses will not be visible on the network They must all have the same subnet mask e g 255 255 255 0 Do a Ping test to make sure that the DWL 7100AP is responding Go to Start Run Type Command Type ping 192 168 0 50 A successful ping will show four replies Troubleshooting This Chapter provides solutions to problems that can occur during the installation and operation of the DW...

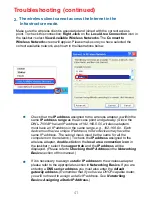
Страница 41: ... must have a unique IP address no two devices may have the same IP address The subnet mask must be the same for all the computers on the network To check the IP address assigned to the wireless adapter double click on the local area connection icon in the taskbar select the support tab and the IP address will be displayed Please refer to Checking the IP Address in the Networking Basics section of ...

Страница 42: ...stalled properly You may be using different network adapters than those illustrated here but this procedure will remain the same regardless of the type of network adapters you are using Go to Start Right click on My Computer Click Properties Select the Hardware tab Click Device Manager ...

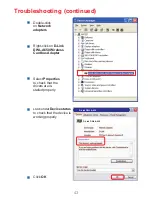
Страница 43: ...twork adapters Right click on D Link DWL A650 Wireless Cardbus Adapter Select Properties to check that the drivers are in stalled properly Look under Device status to check that the device is working properly Click OK D Link DWL A650 D Link DWL A650 ...

Страница 44: ... drop altogether Try changing the channel on your access point and wireless adapter to a different channel to avoid interference Keep your product away at least 3 6 feet from electrical devices that generate RF noise like microwaves monitors electric motors etc 6 Why can t I get a wireless connection To establish a wireless connection while enabling Encryption on the DWL 7100AP you must also enabl...

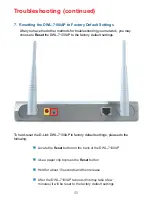
Страница 45: ...ry default settings To hard reset the D Link DWL 7100AP to factory default settings please do the following Troubleshooting continued Locate the Reset button on the back of the DWL 7100AP Use a paper clip to press the Reset button Hold for about 10 seconds and then release After the DWL 7100AP reboots this may take a few minutes it will be reset to the factory default settings ...

Страница 46: ...ting Range Indoors up to 328 feet 100 meters Outdoors up to 1 312 feet 400 meters Temperature Operating 32ºF to 149ºF 0ºC to 55ºC Storing 4ºF to 167ºF 20ºC to 75ºC Humidity Technical Specifications Web based Internet Explorer v6 or later Netscape Navigator v6 or later or other Java enabled browsers DHCP Client Environmental Conditions may adversely affect wireless signal range 95 maximum non conde...

Страница 47: ...WPA Wi Fi Protected Access 64 128 bit WEP with TKIP MIC IV Expansion Shared Key Authentication Supports Advanced Encryption Standard AES External Antenna Type Dual Non Detachable Dipole Antenna Wireless Frequency Range 2 4 2 462GHz Modulation Technology Orthogonal Frequency Division Multiplexing OFDM PBCC Complementary Code Keying CCK 54Mbps 48Mbps 36Mbps 24Mbps 18Mbps 12Mbps 11Mbps 9Mbps 6Mbps 5 ...

Страница 48: ...Receiver Sensitivity 54Mbps OFDM 10 PER 73dBm 48Mbps OFDM 10 PER 76dBm 36Mbps OFDM 10 PER 82dBm 24Mbps OFDM 10 PER 85dBm 18Mbps OFDM 10 PER 88dBm 12Mbps OFDM 10 PER 89dBm 11Mbps CCK 8 PER 91dBm 9Mbps OFDM 10 PER 90dBm 6Mbps OFDM 10 PER 91dBm 5 5Mbps CCK 8 PER 92dBm 2Mbps QPSK 8 PER 93dBm 1Mbps BPSK 8 PER 94dBm Warranty 3 year Technical Specifications continued ...

Страница 49: ...ical support through our website or by phone Tech Support for customers within the United States D Link Technical Support over the Telephone 877 453 5465 24 hours a day seven days a week D Link Technical Support over the Internet http support dlink com email support dlink com Tech Support for customers within Canada D Link Technical Support over the Telephone 800 361 5265 Monday to Friday 8 30am t...

Страница 50: ...ortion of the product Software will substantially conform to D Link s then current functional specifications for the Software as set forth in the applicable documentation from the date of original retail purchase of the Software for a period of ninety 90 days Warranty Period provided that the Software is properly installed on approved hardware and operated as contemplated in its documentation D Li...

Страница 51: ...ation modification tampering negligence misuse faulty installation lack of reasonable care repair or service in any way that is not contemplated in the documentation for the product or if the model or serial number has been altered tampered with defaced or removed Initial installation installation and removal of the product for repair and shipping costs Operational adjustments covered in the opera...

Страница 52: ...llation If this equipment does cause harmful interference to radio or television reception which can be determined by turning the equipment off and on the user is encouraged to try to correct the interference by one or more of the following measures Reorient or relocate the receiving antenna Increase the separation between the equipment and receiver Connect the equipment into an outlet on a circui...

Отзывы: