background image

6

D-Link Systems, Inc.

DVG-G1402S Install Guide

Installing the Hardware

D.


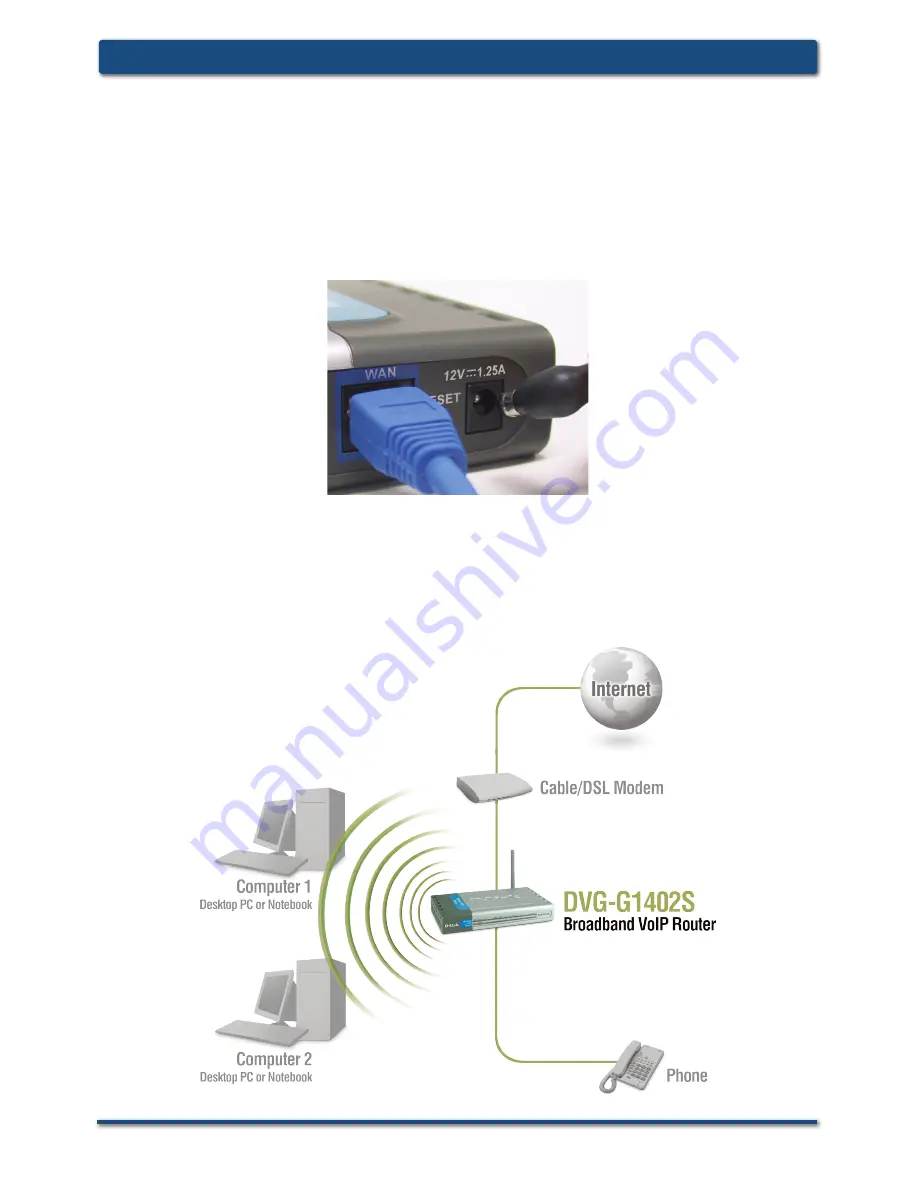
Connect  the  power  adapter  to  the  power  input  at  the  back  panel  of  the 
DVG-G1402S and then plug the other end of the power adapter to a wall 
outlet or power strip. On the front of the device, the Power LED will turn ON 
to indicate proper operation.

E.


Check  the  LED  display  on  the  front  of  the  Router  to  confirm  that  the 
connections have been made.

Once you’ve completed your DVG-G1402S installation, your network may appear 
similar to the diagram below.

Installing the Hardware (continued)

Содержание DVG-G1402S - Wireless Broadband VoIP Router

Страница 1: ...Version 1 0 DVG G1402S Wireless G VoIP Router...

Страница 2: ...12V 1 25A Power Supply It s best to use the same computer that is connected to your router for con guring the DVG G1402S Router The DVG G1402S acts as a DHCP server and will assign all the necessary...

Страница 3: ...ht will turn off if not connected to a service provider WLAN LED A steady light indicates a wireless connection A blinking light indicates that the DVG G1402S is receiving transmitting from to the wir...

Страница 4: ...cabling RJ 11 LAN Ports Connect to your Ethernet enabled computers using Ethernet cabling WAN Port Connects to your broadband modem using an Ethernet cable Reset Button This button will restore the fa...

Страница 5: ...panel of the DVG G1402S and the other end of the cable to an Ethernet Adapter or available Ethernet port on your computer C Insert a telephone cable into the Phone port then connect the cable to your...

Страница 6: ...end of the power adapter to a wall outlet or power strip On the front of the device the Power LED will turn ON to indicate proper operation E Check the LED display on the front of the Router to con r...

Страница 7: ...to your computer For Macintosh OSX refer to page 15 Windows 2000 XP Go to Start right click My Network Places select Properties Right click Local Area Connection select Properties double click Interne...

Страница 8: ...s Inc DVG G1402S Install Guide Con guration Click on Run Wizard Click Next Con guration continued Click Next Enter a NTP server or leave blank to use the default server Select your time zone from the...

Страница 9: ...Set Identi er which is the workgroup name of your Wireless Network All devices must all have the same SSID to communicate on the wireless network The SSID can be up to 32 characters and is case sensit...

Страница 10: ...a router Static Select if your ISP supplied you with your IP settings PPPoE Most DSL ISPs Click Next If you selected Dynamic enter a host name optional If you are connecting directly to a cable modem...

Страница 11: ...ll the software Click Next Setup is nished Click Restart to reboot the DVG G1402S Once the adapter is nished rebooting turn on your modem and allow up to 2 minutes to connect to your ISP Click Restart...

Страница 12: ...ys are exactly 10 characters in length 12345678FA is a valid string of 10 characters for 64 bit encryption 128 bit hexadecimal keys are exactly 26 characters in length 456FBCDF123400122225271730 is a...

Страница 13: ...ceilings is minimized 1 Be aware of the direct line between network devices A wall that is 1 5 feet thick 5 meters at a 45 degree angle appears to be almost 3 feet 1 meter thick At a 2 degree angle it...

Страница 14: ...ss This number instructs the call to travel over the Internet to the D Link VoIP Router your phone rings and all you have to do is pick up and answer it How does it work VoIP technology converts your...

Страница 15: ...192 168 15 15 and the subnet mask to 255 255 255 0 The default gateway and primary DNS server IP addresses should be set to the LAN IP address of the DVG G1402S 192 168 15 1 Click Network Select Built...

Страница 16: ...00am EST World Wide Web http support dlink ca E mail support dlink ca Version 1 0 Revised 09 07 2005 Copyright 2005 D Link Corporation D Link Systems Inc All rights reserved D Link the D Link logo ar...

Отзывы: