background image

36

D-Link DSM-312 User Manual

Section 4 - Configuration

WPS

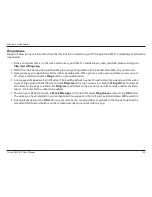
The easiest and most secure way to connect your DSM-312 to your wireless network is WPS (Wi-Fi Protected Setup). Most wireless 

routers and access points will have a WPS button (or a software utility with WPS) that you can press to connect to the DSM-312. 

Please refer to your user manual for your wireless router or access point to make sure you understand how to enable WPS. 

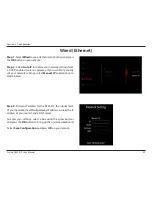
Step 1

 - Select 

WPS 

and press the 

OK

 button on your remote.

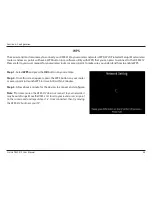
Step 2

 - Once this screen appears, press the WPS button on your router 

or access point (or launch WPS in its web UI) within 2 minutes.

Step 3

 - Allow about a minute for the devices to connect and configure.

Note:

 If for some reason the DSM-312 does not connect to your network, it 

may be out of range. Move the DSM-312 closer to your router or access point 

(in the same room) and repeat steps 1-2. Once connected, then try moving 

the DSM-312 back near your TV. 

Содержание DSM-312

Страница 1: ......

Страница 2: ...arks or registered trademarks of D Link Corporation or its subsidiaries in the United States or other countries All other company or product names mentioned herein are trademarks or registered trademarks of their respective companies Copyright 2012 by D Link Systems Inc All rights reserved This publication may not be reproduced in whole or in part without prior expressed written permission from D ...

Страница 3: ...orporation Reverse Engineering and disassembly are prohibited HDMI the HDMI logo and High Definition Multimedia Interface are trademarks or registered trademarks of HDMI Licensing LLC The Wi Fi CERTIFIED Logo is a certification mark of the Wi Fi Alliance Manufactured under license from Dolby Laboratories Dolbyandthedouble DsymbolaretrademarksofDolby Laboratories ...

Страница 4: ...egin 7 Connect Directly to a TV 8 Connect to an A V Receiver 10 Apps 17 VUDU 17 Netflix 17 YouTube 18 Pandora 18 Picasa 19 AccuWeather 19 MovieNite Apps 19 Table of Contents mydlink 20 Flingo 22 Configuration 23 System 23 Screen Saver 24 Maintenance 25 Playback 27 Video 28 Resolution 28 Audio 29 HDMI 29 Dolby DRC 30 Network 31 Wired Ethernet 32 Wireless 33 Parental Control 37 D Link Remote Control...

Страница 5: ...ude an EthernetorHDMIcable For the best quality video and audio it is strongly recommended to purchase an HDMI cable Package Contents System Requirements HDTV with an HDMI input or a standard TV with a composite standard A V input Wired or wireless network connection with Internet connectivity Optional AV receiver with HDMI input or composite standard A V input Note For HD quality video 480p 720p ...

Страница 6: ... Renting a DVD or Blu Ray Save on going out for movies with the endless array of movie selections on Netflix or VUDU available anytime you want MovieNite Plus is the cheaper better solution to costly and inconvenient movie tickets and rentals Achieve the same quality in home theater experience with HD movies in 1080p on your big screen TV Free MovieNite Plus remote app available for iPhone and And...

Страница 7: ...al Section 1 Product Overview Hardware Overview 1 LED Solid green light indicates when the DSM 312 has a good connection to your network The light will be amber during boot up and if there is no connection to your network LED 1 ...

Страница 8: ...cable 2 HDMI Port Connect an HDMI cable not included here and the other end into your TV or A V receiver 3 LAN Port Connect an Ethernet cable not included here and the other end to your network router gateway or switch If you would like to connect using a wireless connection do not connect an Ethernet cable 4 Power Receptor Connect the supplied power adapter here and the other end into an outlet o...

Страница 9: ...s on app 5 Rewind Button 6 Play Pause Button 7 Fast Forward Button 8 Directional Pad to navigate menus 9 OK Enter Button 10 Press to go to the home page 11 Back Button 12 Options Button function depends on app 13 Press to launch Vudu 14 Press to launch Netflix 15 Press to launch Pandora 16 Press to launch YouTube 1 Remote Control Overview 4 7 8 12 14 16 3 2 5 6 9 15 13 11 10 ...

Страница 10: ... direct line between network devices A wall that is 1 5 feet thick 5 meters at a 45 degree angle appears to be almost 3 feet 1 meter thick At a 2 degree angle it looks over 42 feet 14 meters thick Position devices so that the signal will travel straight through a wall or ceiling instead of at an angle for better reception 3 Building Materials make a difference A solid metal door or aluminum studs ...

Страница 11: ...ox DVR or other appliances that produce heat The quality of the video and audio will depend on several factors The type of audio and video connections you use to connect the DSM 312 and your TV may impact sound and picture quality Use HDMI for the best possible video and audio quality HDMI is required for video resolution 480p and above and for surround sound 5 1 Your Internet speed quality will a...

Страница 12: ... install your MovieNite Plus Media Player directly to yourTV Step 1 Connect an HDMI cable not included to the HDMI port on the DSM 312 and the other end into an available HDMI input port on your TV Note that HDMI is required for HD resolution HDMI LAN DC 12V AV HDMI Connect Directly to a TV ...

Страница 13: ... on your TV yellow is for video red and white are for audio Note A composite connection made with the supplied A V cable will not be capable of HD output to your TV Also do not connect the devicethroughaVCR VideosignalsfedthroughVCRsmaybeaffectedbycopyrightprotectionsystemsandthepicturewillbedistorted on the television HDMI HDMI LAN DC 12V AV Step 2 Power on your TV and select the correct video ou...

Страница 14: ...f you are unable to connect using an HDMI cable connect the supplied A V cable into the AV port on the DSM 312 and the other end into the correct matching input ports on your receiver yellow is for video red and white are for audio HDMI LAN DC 12V AV HDMI Connect to an A V Receiver Please refer to your A V receiver s user manual for more information if you are unsure about how to connect and opera...

Страница 15: ...e built in wireless adapter do not connect the Ethernet cable The on screen setup wizard will allow you configure your wireless settings refer to Step 6 for wireless setup information HDMI LAN DC 12V AV 5V 3A 1 2 LAN 3 4 INTERNET USB RESET Step 4 Connect the supplied power adapter to the power receptor on the DSM 312 and plug it into a power outlet or surge protector The device will power on HDMI ...

Страница 16: ...ear Follow the on screen setup if any to configure your DSM 312 media player You may manually change your settings by clicking the gear icon from the Home page If you connected an Ethernet cable and you cannot connect please refer to Ethernet Setup on page 16 Wireless users continue to Step 6 next page ...

Страница 17: ...ect Manually Connect to manually enter your wireless network name SSID and security settings Note that your wireless network will not be displayed if your router is out of range or the SSID broadcast is disabled or visibility is set to invisible Remember that the SSID and security password must match your wireless router or access point exactly case sensitive Step 6 If you did not connect an Ether...

Страница 18: ...uter from the Select Connection Mode screen select Enter Static IP to manually enter the network settings for your DSM 312 refer to the If DHCP is disabled on your router section on page 16 You should now be connected to your wireless network and the Home page will be displayed on your TV Note IfforsomereasontheDSM 312doesnotconnecttoyournetwork itmaybeoutofrange MovetheDSM 312closertoyourrouter o...

Страница 19: ...n to configure your wireless settings automatically If you do not know how to start WPS on your router or access point please refer to its user manual After you select your wireless network from Step 7 select WPS Auto and then press the OK button on your remote WPS Setup Step 3 Your DSM 312 should now be connected to your wireless network Note IfforsomereasontheDSM 312doesnotconnecttoyournetwork i...

Страница 20: ...n Mode screen Select Manual IP and press OK to enter the IP settings manually see below Step 1 Select the IP box and press OK on your remote Use the on screen keyboard to enter an IP address for the DSM 312 Select Enter and then press the OK button on your remote Step 2 Repeat step 1 for subnet mask gateway usually the LAN IP address of your router and DNS server usually the LAN IP address of your...

Страница 21: ...ard buttons Press the home button at any time to go to the MovieNite Plus Home page Netflix Watch unlimited movies and TV shows instantly Watch as often as you want anytime you want You can launch Netflix from the Home page or press the Netflix button on your remote at any time Log in with your existing user account information or create a new user account Use the up down left and right arrow butt...

Страница 22: ...dbuttonsorpress the OKbuttonto bring up on screen controls Press the down arrow button to cycle through other options Info Related Videos and Playlist Press the home button at any time to go to the MoveNite Plus Home page Pandora Listen to free Internet radio Personalize your stations and discover new music You can launch Pandora from the Home page or press the Pandora button on your remote at any...

Страница 23: ...ernational Worldclassweatherradarplusyouruptotheminuteweatherreportandcurrent conditions You can launch AccuWeather from the Home page Use the up and down arrow buttons to navigate through your selections and press the OK button to make a selection Press the back button to back out of the current selection Press the options button to change toggle between Celsius and Fahrenheit Press the home butt...

Страница 24: ...if you add a new camera When you select the camera you want to view its live video feed will display full screen Depending on your camera different icons will be displayed at the bottom where you can turn audio on or off zoom pan and tilt Refer to the next page for more information Your camera model and mydlink ID number will also be displayed To go back to the mydlink home page press the back but...

Страница 25: ...an Tilt Select the arrow icon in the direction you want to pan or tilt your camera Select the middle icon for your camera s home position If your camera does not support pan tilt these icons will not be displayed 4 Camera Information Your camera name model number and its mydlink ID will be displayed here Use the arrow buttons on your remote to move the light blue teal cursor to the icon you want t...

Страница 26: ...our web browser 4 Anewpagewillappearwithalistofvideos Therewillbeacheckboxnexttoeachvideo Ifyouwanttoaddthevideo to your Flingo Queue check the box and click Fling em at the top You can also check the Fling all box to select all the videos on the page and then click Fling em to add them to the queue If you select a large number of videos allow 1 2 minutes for the videos to be added 5 Power on your...

Страница 27: ... version of your DSM 312 The hardware revision The MAC address of the DSM 312 Displays the current network setting Wired or Wireless Displays the wireless network name SSID that the DSM 312 is currently connected to if wireless is selected The IP address of the DSM 312 The subnet mask of the network you are connected to The default gateway usually the IP address of your router The primary DNS serv...

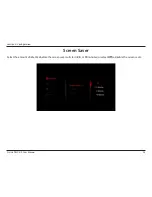
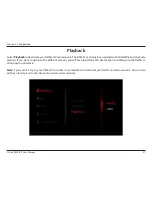
Страница 28: ...24 D Link DSM 312 User Manual Section 4 Configuration Screen Saver Select the amount of idle time before the screen saver will start 2 5 or 10 minutes or select Off to disable the screen saver ...

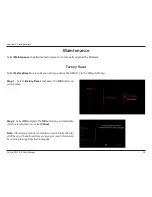
Страница 29: ...e all your settings and set the DSM 312 to the default settings Step 1 Select Factory Reset and press the OK button on your remote Step 2 Select OK and press the OK button on your remote to start the reset process or select Cancel Note A factory reset will deactivate the account information for alloftheapps Youwillneedtore enteryouraccountinformation by selecting the app from the Home page ...

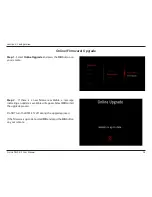
Страница 30: ...rade and press the OK button on your remote Step 2 If there is a new firmware available a message indicating an update is available will appear Select OK to start the upgrade process Do NOT turn the DSM 312 off during the upgrade process Ifthefirmwareisuptodate selectOKandpresstheOKbutton on your remote ...

Страница 31: ...ne Netflix and oneVudu account If you want to sign in with a different account you will have to perform this deactivation and then go to the Netflix or Vudu app to sign back in Note If you ever sell or give your DSM 312 to another user remember to deactivate your Netflix and Vudu accounts You can also perform a factory reset to deactivate all accounts recommended ...

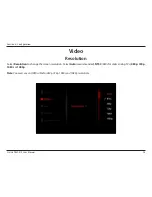
Страница 32: ...n 4 Configuration Video Resolution Select Resolution to change the screen resolution Select Auto recommended NTSC 480i for older analog TVs 480p 720p 1080i or 1080p Note You must use an HDMI cable for 480p 720p 1080i and 1080p resolutions ...

Страница 33: ...sthrough or Stereo Passthrough will send the raw undecoded audio from the source This option is required for 5 1 surround sound Dolby Digital Plus If your TV does not support Dolby Digital Plus select Stereo This will set the audio to 2 channel stereo Enable if you are having audio issues with older incompatible equipment ...

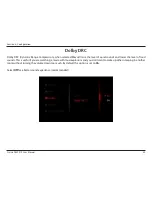
Страница 34: ... raise the level of quiet sounds and lower the level of loud sounds This is useful if you are watching a movie with loud explosions and you don t want to wake up others sleeping in another room without turning the volume down too much By default this option is set to On Select Off for a better sound experience recommended ...

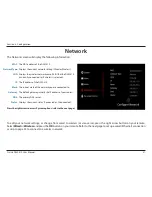
Страница 35: ...ork you are connected to The default gateway usually the IP address of your router The primary DNS server Displays the current status Connected or Disconnected MAC Network Type SSID IP Mask Gateway DNS Status To edit your network settings or change from wired to wireless or vice versa press the right arrow button on your remote Select Wired or Wireless and press the OK button on your remote Refer ...

Страница 36: ...or gateway If you want to manually set your network settings select Manual IP and continue to Step 3 below Step 3 Enter an IP address for the DSM 312 the subnet mask of your network the default gateway IP address usually the IP address of your router and a DNS server To enter your settings select a box using the arrow buttons and press the OK button to bring up the on screen keyboard Select Save C...

Страница 37: ...ch Select to launch a site survey window and you can select from any available wireless network Refer to the next page ManualConnect Enter the settings for your wireless network manually You will need to know the SSID and security passphrase if any Refer to page 35 WPS If your router or access point supports WPS this is the easiest and most secure method Refer to page 36 ...

Страница 38: ...pear Select the network you want to connect to and press the OK button on your remote Step 3 If the network you are connected to is secure you will be prompted to enter the security password Use the on screen keyboard and enter the password Select Enter and then press the OK button on your remote Note The password is case sensitive Your DSM 312 will now connect to your wireless network ...

Страница 39: ... box and press OK on your remote Use theon screenkeyboardtoenterthewirelesssecuritypassword Select Enter and then press the OK button on your remote Leave blank if you are not connecting to a secure network Note The SSID and Password must be exactly the same as on your wireless router or access point case sensitive Step 4 Click the Security box to select the type of encryption being used on your n...

Страница 40: ...er or access point to make sure you understand how to enable WPS Step 1 Select WPS and press the OK button on your remote Step 2 Once this screen appears press the WPS button on your router or access point or launch WPS in its web UI within 2 minutes Step 3 Allow about a minute for the devices to connect and configure Note If for some reason the DSM 312 does not connect to your network it maybeout...

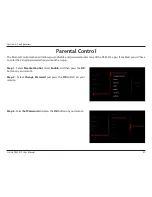
Страница 41: ...ord protect any of the DSM 312 apps If enabled you will have to enter the 4 digit password when you launch an app Step 1 Select Parental Control select Enable and then press the OK button on your remote Step 2 Select Change Password and press the OK button on your remote Step 3 Select Set Password and press the OK button on your remote ...

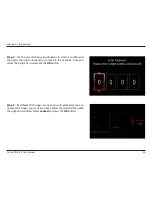
Страница 42: ... and then press the right arrow button to move to the next box Once you select the 4 digit password click the OK button Step 5 By default all the apps are not password protected You can choose which apps you want to protect Select the app and then click the right arrow button Select Locked and press the OK button ...

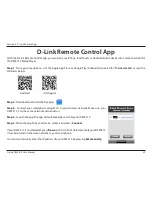
Страница 43: ...ow Step 2 Download and install the free app Step 3 Connect your smartphone using Wi Fi to your wireless network Make sure your DSM 312 is on the same network and turned on Step 4 Launch the app The app will automatically search for your DSM 312 Step 5 When the app finds your device select it and press Connect If your DSM 312 is not detected press Re scan If it is still not detected verify your DSM...

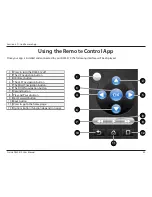
Страница 44: ...face will be displayed 1 Press to turn the DSM 312 off 2 The UP navigation button 3 OK Enter button 4 The LEFT navigation button 5 The RIGHT navigation button 6 The DOWN navigation button 7 Rewind button 8 Play and Pause button 9 Fast Forward button 10 Back button 11 Press to go to the home page 12 Options Button function depends on app 1 4 6 2 3 5 7 10 9 8 12 11 ...

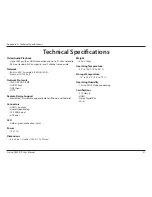
Страница 45: ...cols IPv4 ARP UDP ICMP DHCP Client DNS Client HTTP Remote Device Support MovieNite Plus remote app available for iPhone and Android Connectors HDMI 1 4 output Audio Video analog 10 100 Ethernet AC Power LED Amber green connection status Power 12V 1A Dimensions 4 8 x 4 6 x 1 1 inches 124 x 117 x 27mm Weight 6 5oz 180g Operating Temperature 32o to 104o F 0o to 40o C Storage Temperature 13o to 158o F...

Страница 46: ...ink s option to repair or replace the defective Hardware during the Warranty Period at no charge to the original owner or to refund the actual purchase price paid Any repair or replacement will be rendered by D Link at an Authorized D Link Service Office The replacement hardware need not be new or have an identical make model or part D Link may at its option replace the defective Hardware or any p...

Страница 47: ...ng Software will be refunded by D Link provided that the non conforming Software and all copies thereof is first returned to D Link The license granted respecting any Software for which a refund is given automatically terminates Non Applicability of Warranty The Limited Warranty provided hereunder for Hardware and Software portions of D Link s products will not be applied to and does not cover any...

Страница 48: ...N 5S2 Canada D Link will not be held responsible for any packages that are lost in transit to D Link The repaired or replaced packages will be shipped to the customer via Purolator Canada or any common carrier selected by D Link Return shipping charges shall be prepaid by D Link if you use an address in Canada otherwise we will ship the product to you freight collect Expedited shipping is availabl...

Страница 49: ...OSS OF GOODWILL LOSS OF REVENUE OR PROFIT WORK STOPPAGE COMPUTER FAILURE OR MALFUNCTION FAILURE OF OTHER EQUIPMENT OR COMPUTER PROGRAMS TO WHICH D LINK S PRODUCT IS CONNECTED WITH LOSS OF INFORMATION OR DATA CONTAINED IN STORED ON OR INTEGRATED WITH ANY PRODUCT RETURNED TO D LINK FOR WARRANTY SERVICE RESULTING FROM THE USE OF THE PRODUCT RELATING TO WARRANTY SERVICE OR ARISING OUT OF ANY BREACH OF...

Страница 50: ...nstalled and used in accordance with the instructions may cause harmful interference to radio communication However there is no guarantee that interference will not occur in a particular installation If this equipment does cause harmful interference to radio or television reception which can be determined by turning the equipment off and on the user is encouraged to try to correct the interference...

Страница 51: ...cable to products purchased outside the United States please contact the corresponding local D Link office Industry Canada Statement This device complies with RSS 210 of the Industry Canada Rules Operation is subject to the following two conditions 1 This device may not cause harmful interference and 2 this device must accept any interference received including interference that may cause undesire...

Страница 52: ...k DSM 312 User Manual Appendix C Registration Version 1 0 June 14 2012 Product registration is entirely voluntary and failure to complete or return this form will not diminish your warranty rights Registration ...

Отзывы: