background image

D-Link DNS-31 Quick Install Guide

Hardware Installation

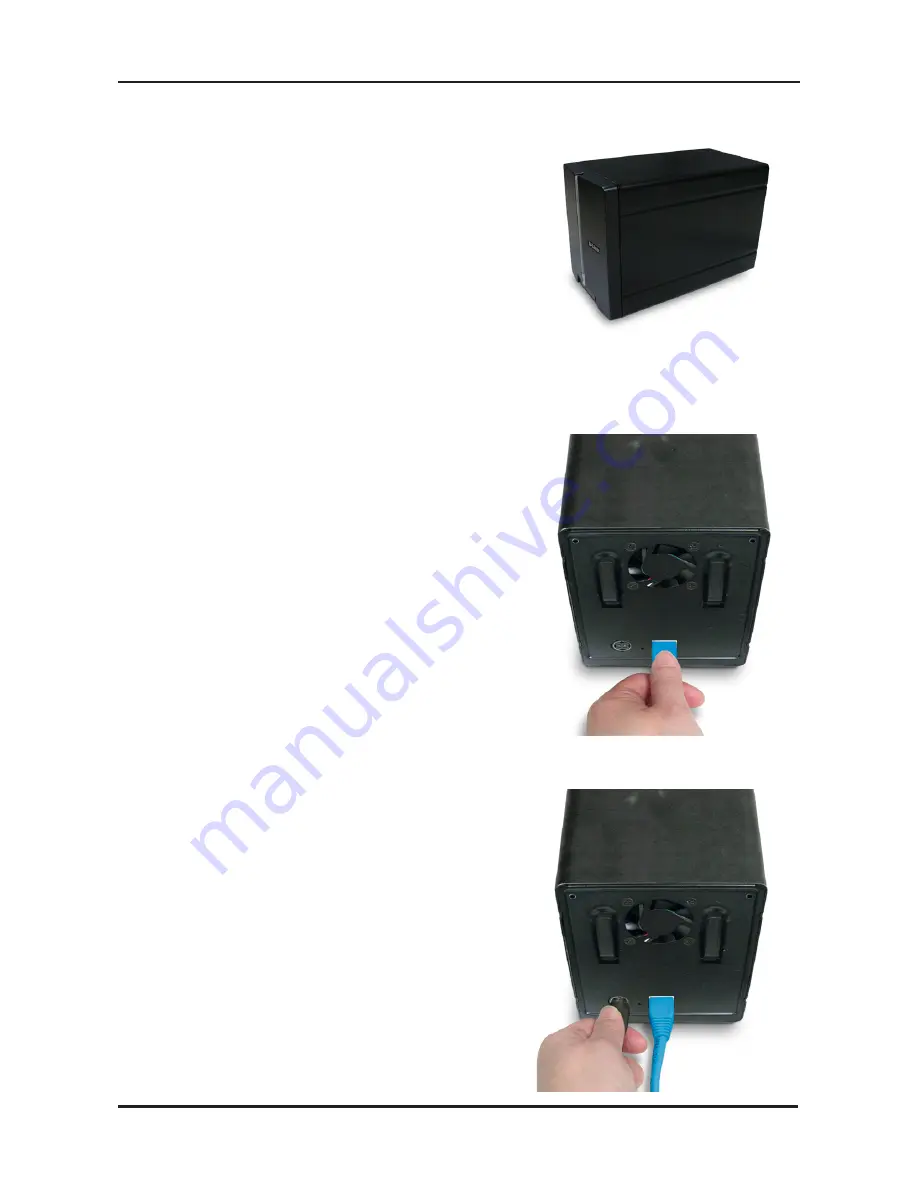
4.  Attach the faceplate to the front of 

the device.

5.  Connect an Ethernet cable into the 

available Ethernet port. This cable 
should  connect  the  DNS-321  to 
your  local  network  or  directly  to  a 
computer for configuration.

6.  Finally, connect the power adapter 

to the power receptacle.

Содержание DNS-321

Страница 1: ...Wireless G USB 2 0 Adapter Wireless Internet Camera with 3G Mobile Video ...

Страница 2: ... contact your reseller 1GHz Processor 512MB RAM 200MB available space CD ROM drive Internet Explorer 6 0 or Mozilla Firefox 1 0 and above One or two 3 5 Internal SATA Hard Drives Windows Vista or XP with Service Pack 2 D Link DNS 321 2 Bay Network Storage Enclosure CD ROM with Manual and Software Quick Installation Guide Power Adapter CAT5 Ethernet Cable ...

Страница 3: ...he device Drive LEDs These LEDs will be solid BLUE when drives are connected The LEDs will blink when the drives are being accessed formatted or synchronized They will illuminate AMBER if a drive has failed Activity LED This LED will illuminate solid BLUE when there is an Ethernet connection It will blink to indicate LAN traffic Front View Power Button Drive LED Activity LED Drive LED ...

Страница 4: ...le The supplied power adapter connects here Ethernet Port A Gigabit Ethernet port that connects the DNS 321 to the local network Drive Eject Lever Use the provided levers to eject the SATA hard drives Ethernet Port Drive Eject Lever Power Receptacle Drive Eject Lever Reset Button ...

Страница 5: ...ding the faceplate up until it unlatches from the device 2 Once the faceplate is unlatched pull it off of the device exposing the drive bays 3 Insert a 3 5 SATA hard drive into an available drive bay Make sure to align the drive connector to the endpoint in the DNS 321 Gently push the drive in until it connects ...

Страница 6: ...h the faceplate to the front of the device 5 Connect an Ethernet cable into the available Ethernet port This cable should connect the DNS 321 to your local network or directly to a computer for configuration 6 Finally connect the power adapter to the power receptacle ...

Страница 7: ...ned IP address by default it will boot up with a self assigned IP address of 192 168 0 32 The Easy Search Utility provided on the DNS 321 CD ROM makes it simple to find any DNS 321 devices on your network and it is recommended to use the Easy Search Utility when accessing and configuring the DNS 321 for the first time Each DNS 321 will have a unique name of dlink xxxxxx where xxxxxx is the last si...

Страница 8: ... There are four available options Standard JBOD RAID 0 and RAID 1 Highlight an available DNS 321 and click Configuration to access the web based utility At the login screen type admin for the user name and leave the password field blank Click Configuration Select a type of hard drive configuration and click Next Getting Started From the DNS 321 CD select Easy Search Utility ...

Страница 9: ... the drives are formatted all data will be erased Click OK to continue Asthedrivesarebeingformatted a progress meter will display When formatting has completed the results will be displayed Click Restart to continue A message informing you that the DNS 321 will restart appears Click OK ...

Страница 10: ...10 D Link DNS 321 Quick Install Guide Configuration Your DNS 321 setup is now complete After the DNS 321 restarts type admin fortheusername and leave the password field blank Click Configuration ...

Страница 11: ...ighlight the drive you want to map Select an available drive letter from the drop down menu and click Connect The Easy Search Utility makes it simple to map drives to your computer To get started insert the DNS 321 CD into your CD ROM drive and launch the Easy Search Utility Once connected your mapped drives s will appear in My Computer as network drives ...

Страница 12: ...da Telephone 800 361 5265 World Wide Web http support dlink com Version 1 0 March 27 2008 Copyright 2008 D Link Corporation D Link Systems Inc All rights reserved D Link and the D Link logo are registered trademarks of D Link Corporation or its subsidiaries in the United States and other countries Other trademarks are the property of their respective owners Product specifications size and shape ar...

Отзывы: