background image


64 

Menu 


Names 

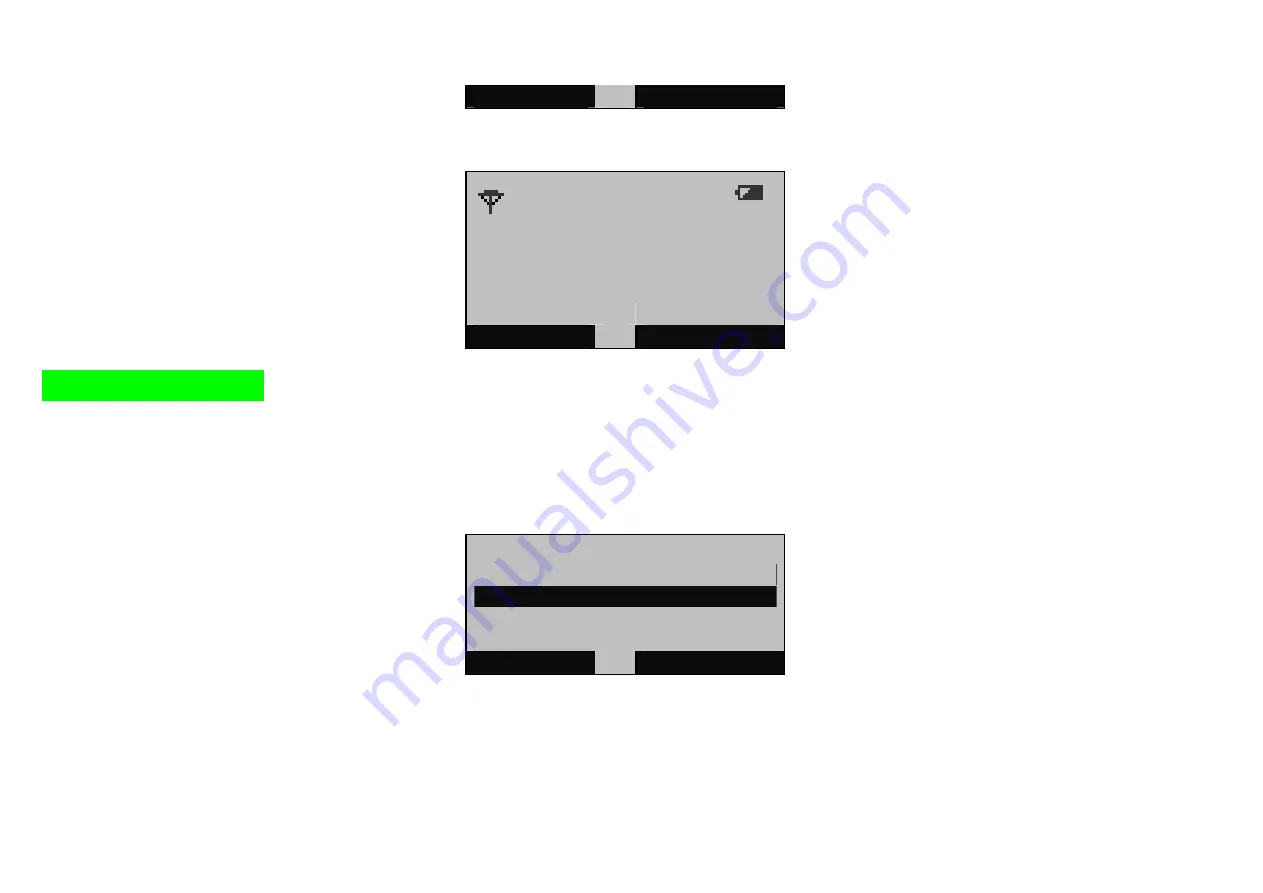
9.  When the DECT connection is established, the channel number used for communication between the base station and the handset appears under the 

battery icon near the upper left corner of the display. Finally when “D-Life” appears in the center of the display, the phone is ready to use.     


1

D-Life 


01/01 


00:05 

Menu 


Names 


Change Base Station 

The procedure to change which base station a handset will associate with is very similar to the procedure to add a new handset to a base station association group. 
First press the Intercom button on the front of the base station for 5 seconds until the LEDs flash on and off in an alternating pattern. 
 

1.  To use another base station in an environment where more than one DHA-130 are being used, go to the 

BASE SETUP

 menu, choose 

SELECT BASE


and press 

OK

.  


BASE SETUP 

REGISTER                                             

SELECT BASE 

DELETE HANDSET 
RESET 

OK 


EXIT 


Содержание DHA-130

Страница 1: ...DHA 130 IP DECT Phone User Guide ...

Страница 2: ...ok Entry 19 Using Quick Dial 21 Dialing a New Number 24 D Life VoIP Calls to PSTN Numbers 25 D Life VoIP Calls to Other D Life Accounts 26 Local PSTN Phone Calls 27 Phone Network Settings 28 View Host Station IP Address 28 View Host Station IP Address PPPoE Connection 29 Using the Phonebook 30 View Names in Phonebook 30 Add Names to Phonebook 31 Check Memory Status 32 Using Call Logs 33 Clear Log ...

Страница 3: ... Base Station 64 Delete Handset 66 Reset Base Station 67 Change PIN 68 USING THE WEB UTILITY 69 Maintenance 72 Status 73 TECHNICAL SPECIFICATIONS 75 ROUTER PORTCONFIGURATION 78 Opening Ports on Routers and Gateways 78 How to Manually Open Ports on a Router 79 T ROUBLESHOOTING 80 LCD DISPLAY ICONS 81 ...

Страница 4: ... If any of the above items are missing please contact your reseller Requirements for Setup and Connection System Minimum Broadband Internet connection Ethernet Based Cable or DSL Modem A multi port Ethernet router preferably configured as a DHCP server Computer with Windows Macintosh or Linux based operating system and an installed Ethernet adapter Internet Explorer Version 6 0 or Netscape Navigat...

Страница 5: ...after a brief automatic configuration procedure This auto provisioning feature makes the DHA 130 a truly Plug and Play IP phone Features and Benefits Automatic provisioning for Plug and Play VoIP setup Dialing via PSTN to standard telephone numbers Dialing via Ethernet port as VoIP calls 10 100BASE TX Fast Ethernet port for network connection Voice Activity Detection VAD Comfort Noise Generation C...

Страница 6: ... 25 A power adapter here Factory Reset Button Pressing this button will restore the DHA 130 to its factory default settings LAN Port LEDs Use the LAN port LED indicators to check link status and port speed The right side LED lights steady green for a valid link and blinks green when there is activity on the port The left side LED lights amber when the port speed is 100 Mbps it is dark for a 10 Mbp...

Страница 7: ...y green light indicates the D Life connection is established A blinking green light indicates the phone is undergoing VoIP provisioning PSTN A steady amber light indicates the PSTN line is connected This will be dark if there is no PSTN link Off Hook A steady green light indicates the phone is off the hook A blinking green light indicates an incoming call The light is dark when the phone is on the...

Страница 8: ... receive a call 5 Mode Key Switch between D Life VoIP call mode and PSTN call mode 6 Number Keypad to enter numbers characters 7 Key Switch Key to key in asterisk hold a few seconds to silence the ringer 8 LCD Display 9 Right Soft Key performs the displayed function return to previous menu Back 10 Power Key to switch the phone on off end a call or return to standby mode 11 Key Lock Key to key in p...

Страница 9: ...L router with the Phone please read Appendix B Router PortConfiguration on page 78 The DHA 130 is very easy to setup and use Connect the phone line and Ethernet cable as illustrated in the Back Panel picture Connect the power and the Phone will begin to establish the connection to the D Life account server This process is called provisioning During the provisioning the green VoIP LED indicator on ...

Страница 10: ... display For example in the handset s desktop display shown below press the Right Soft Keys to use the Names option used to view the phone book Since this is the first time setting up the phone of course the phone book is empty To register the handset with the base station you will need to first access the Main Menu 1 D Life 01 01 05 00 Menu Names Use the Left Soft Key to choose the option or acti...

Страница 11: ... handset the soft keys and navigation button are illustrated here for your reference Right Soft Key Left Soft Key Navigation Button From the desktop Up Arrow D Life Phone Book Down Arrow Handset Phone Book Left Arrow Calls Dialed Right Arrow Calls Received ...

Страница 12: ... using a broadband or DSL router as a DHCP server for your network the phone should have no problem establishing a connection to the Internet Make sure that the DHCP server router is configured with the correct IP settings for DNS service and gateway IP settings Typically the gateway IP address is the router s IP address when there are no other routers or gateway routers used The ISP usually suppl...

Страница 13: ...HA 130 from the Main Menu go to System D Life No The sequence of display screens you will see are simulated below MAIN MENU SYSTEM CALL LOGS SETTINGS EXTRAS OK EXIT Select D Life No SYSTEM HOST IP NETWORK SETTINGS D Life No OK EXIT View D Life account phone number D Life No 42001111 OK ...

Страница 14: ...56 04 03 12 15 ANSWER SILENT To answer the call immediately either press the Talk Key or the Left Soft Key Press the Right Soft Key to silence the ringer but not answer the call When the call has been answered a timer for the call appears as well as OPTIONS that can be viewed using the Left Soft Key The call can be muted so the call The number of the caller appears as well as the type of call i fo...

Страница 15: ...o still come through from the other end To MUTE the handset press the Right Soft Key while the call is active i i 123456 00 00 04 OPTIONS MUTE Use the Left Soft key to view the options available while the call is active OPTIONS SPEAKER HOLD LINE HS PHONEBOOK OK EXIT ...

Страница 16: ...PHONEBOOK OK EXIT Putting Calls on Hold To put the active line on hold use the HOLD LINE option in the OPTIONS menu While one line is on hold another incoming call can be answered just like a conventional multiple line PSTN telephone When a line is on hold the H icon appears in the main display If multiple lines are active the icon will indicate which line is on hold OPTIONS SPEAKER HOLD LINE HS P...

Страница 17: ...ss the Left Soft Key to ANSWER the incoming call The original call will be on hold this is indicated by the H1 icon indicating that line 1 is on hold P P 5558961 00 00 02 OPTIONS MUTE Use the Left Soft Key to view the options including the option to switch back to the original caller Incoming call indicated by flashing indicator flashing i for VoIP flashing P for PSTN The name and number of the un...

Страница 18: ...H CALLS CONFERENCE OK EXIT 3 Way Conference Calls Conference calls can be held when both lines have active calls To use the 3 way conference call function go the OPTIONS menu when both lines are connected one or both lines can be on hold P i MOM 123456 P BOB 5558961 00 00 35 OPTIONS MUTE It will be necessary to choose to put one call in conference mode switch to the other line then place that call...

Страница 19: ...ONS SPEAKER RELEASE HOLD SWITCH CALLS CONFERENCE OK EXIT Then SWITCH CALLS to the other line OPTIONS SPEAKER RELEASE HOLD SWITCH CALLS CONFERENCE OK EXIT And put the other line in CONFERENCE mode OPTIONS SPEAKER RELEASE HOLD SWITCH CALLS CONFERENCE OK EXIT ...

Страница 20: ...ence call or select one line to leave the conference call bring up the OPTIONS menu again OPTIONS SPEAKER END CALL 1 END CALL 2 END ALL CALLS OK EXIT Select the option to END ALL CALLS if you want to terminate calls on both lines Or choose to END CALL 1 or END CALL2 to return to single call mode with the remaining line ...

Страница 21: ...dset intercom To use the intercom press the Intercom button on the handset INTERCOM HANDSET 1 HANDSET 2 HANDSET 3 HANDSET 4 OK CANCEL The display indicates the handset being paged To terminate the intercom session use the CANCEL option HANDSET 3 CANCEL ...

Страница 22: ...tion describes how to do all of these Calling a Phone Book Entry 1 To call a number that is already in the phone book simply choose NAMES from the desktop display PHONE BOOK HANDSET D Life OK EXIT 2 Choose the HANDSET or D Life phonebook HANDSET VIEW RECORD NEW ENTRY QUICK DIAL MEMORY STATUS OK EXIT 3 Select the number to call and choose DETAILS HANDSET i ALICEB P BOBK i CAROLD P DENNYJ DETAILS EX...

Страница 23: ...20 4 Choose OPTIONS DETAILS MOM i 123456 OPTIONS EXIT 5 Choose the HANDSET or D Life phonebook OPTIONS USE NUMBER EDIT DELETE OK EXIT 6 Select DIAL to call the number 123456 DIAL DELETE ...

Страница 24: ...are used for Quick Dial To designate a number as a Quick Dial number it must already be in the Handset phone book Follow the steps below to set up a Quick Dial entry 1 Choose NAMES from the desktop display then go to the HANDSET phone book PHONE BOOK HANDSET D Life OK EXIT 2 Choose the QUICK DIAL HANDSET VIEW RECORD NEW ENTRY QUICK DIAL MEMORY STATUS OK EXIT 3 Select the number to call and choose ...

Страница 25: ...ck Dial slot or choose LIST to go back to the HANDSET phone book DETAILS MOM i 123456 DEFAULT OK LIST 6 To add new Quick Dial numbers for the remaining keys 5 to 9 use the up and down navigation buttons on the handset to get to the remaining Quick Dial slots KEY 4 EMPTY CHANGE EXIT 7 To edit or delete a Quick Dial entry go to NAMES HANDSET QUICK DIAL and scroll to the key you want to edit or delet...

Страница 26: ...Quick Dial entry KEY 4 MOM i 123456 OPTIONS EXIT 8 Select CHANGE to go to the Handset phone book listed entries and select a new number for the Quick Dial slot Choose DELETE to remove the Quick Dial assignment you will be asked to CONFIRM The decision to delete in a new screen OPTIONS CHANGE DELETE OK EXIT ...

Страница 27: ...ake VoIP calls make sure the handset is in VoIP mode Use the Mode button to toggle between VoIP mode and PSTN mode The mode is indicated in the LCD main display The i icon indicates the phone is in VoIP mode 1 D Life 10 01 05 18 Menu Names The P icon indicates the phone is in PSTN mode 1 10 01 05 18 Menu Names ...

Страница 28: ...cated For example to dial the number 555 1234 in the 212 area code in the United States enter as follows 00121255551234 10 01 05 20 DIAL DELETE Then press the green call button on the phone or choose DIAL to initiate the phone call You will hear the phone ring on the other end just as if calling through the traditional switched telephone network If the line is busy you will hear a normal busy sign...

Страница 29: ...he account number and press the green call button on the phone or choose DIAL 4200105 10 01 05 21 DIAL DELETE As with regular PSTN phone calls you will hear the phone ring on the other end If the line is busy you will hear a normal busy signal otherwise the ring will continue until the phone is answered at the remote end ...

Страница 30: ...ode Press the Mode button on the handset notice the P icon appears in the main display and the D Life can no longer be seen 1 10 01 05 27 Menu Names To place a local PSTN call enter the number you want to dial and press the green call button on the phone or choose DIAL to initiate the phone call 555 1234 10 01 05 27 Menu Names ...

Страница 31: ...N MENU SYSTEM n CALL LOGS SETTINGS EXTRAS OK EXIT 2 In the SYSTEM menu choose the first item in the list HOST IP to see the local IP address on the base station If you are not using a DHCP server on your LAN and this is the first time setting up the phone it will be necessary to change the network settings to assign a static IP address to the phone SYSTEM HOST IP n NETWORK SETTINGS D Life No OK EX...

Страница 32: ...ods to view the IP address if the phone is configured for PPPoE connection Use either the SYSTEM menu and choose HOST IP or use the NETWWORK SETTINGS menu and choose PPPoE to view a display similar to the example below This only works if the phone is already configured for PPPoE To configure the phone for PPPoE please read 錯誤 找不到參照來源 below HOST IP PPPoE 172 18 167 48 OK ...

Страница 33: ...set phone records or the D Life phone records The navigation key arrows can be used to go directly to the D Life phone book or the Handset phone book From the desktop use the navigation key to press the Down arrow to view the Handset Phone Book record menu press the Up arrow to view the D Life Phone Book record PHONE BOOK HANDSET D Life OK EXIT View Names in Phonebook If you have already entered p...

Страница 34: ... are listed in alphabetic order on keys 2 to 9 press the key once to display the first letter listed on the key press it twice to display the second letter listed and so forth To choose a displayed letter do not press any keys for a few seconds until the flashing cursor moves ahead one space If you made a mistake click the Right Soft Key to DELETE one space each time it is pressed When satisfied w...

Страница 35: ...Book and can be selected for quick dialing or dialed using the Handset Phone Book NEW ENTRY NUMBER 123456_ OK DELETE Check Memory Status The handset has 100 memory slots available for phone book entries To view how many slots are available select the MEMORY STATUS option from the Handset menu NAMES HANDSET MEMORY STATUS MEMORY STATUS USED 023 FREE 077 OK ...

Страница 36: ... answered 1 To access the handset phone log menus go to the MAIN MENU then to the CALL LOGS menu MAIN MENU SYSTEM CALL LOGS SETTINGS EXTRAS 10 15 05 35 OK EXIT 2 In the CALL LOGS menu you can view numbers dialed received and missed Any of these numbers can be entered into the phone book The procedure to view logs and entry of numbers into the phonebook is identical for MISSED DIALED and RECEIVED c...

Страница 37: ... dialed time and date of the call are listed in the display The number can then be saved DIALED i 0012125551234 18 00 00 2007 10 16 OPTIONS EXIT 5 To save the number in the phone book use OPTIONS to go to the save or delete options menu OPTIONS SAVE DELETE OK EXIT 6 Use the SAVE option to create a new phone book entry for this number The procedure is similar to creating a new entry in the phone bo...

Страница 38: ... Entries The call logs can be cleared deleted for all missed dialed or received calls recorded in the logs To clear log records go to MAIN MENU CALL LOGS CLEAR LOGS and choose the log category to be cleared You will be prompted to CONFIRM That you want to clear the log CLEAR LOG MISSED DIALED RECEIVED OK EXIT ...

Страница 39: ...es first how to establish a Static IP Address The example after that one shows how to set up a PPPoE connection Configure a Static IP Address To assign a Static IP address for the phone do the following 1 To change the local network IP settings for the DHA 130 go to the Network Settings menu In the Main Menu choose SYSTEM MAIN MENU SYSTEM CALL LOGS SETTINGS EXTRAS OK EXIT 2 In the SYSTEM menu choo...

Страница 40: ... menu choose STATIC IP to go to the IP address entry menu for Static IP address NETWORK SETTINGS DHCP STATIC IP PPPoE OK EXIT 4 A prompt asks if you really want to manually configure the IP address STATIC IP SET MANUALLY YES NEXT ...

Страница 41: ...n of the IP address using the handset Use DELETE to remove unwanted numbers form the menu as displayed Press OK when you are satisfied with the IP address as it appears STATIC IP IP ADDRESS 005 044 082 100 OK DELETE STATIC IP IP ADDRESS 010 001 001 252 OK DELETE 6 Use the standard subnet mask offered by choosing OK or change it using the same method used to change the IP address STATIC IP SUBNET M...

Страница 42: ...ddress is supplied by the ISP Press OK to save the new IP settings and restart the base station STATIC IP DNS2 168 095 001 002 OK DELETE 9 The LCD menu informs you that the DHA 130 base station is rebooting It will take one or two minutes to restart and establish the D Life connection STATIC IP REBOOTING PLEASE WAIT OK DELETE 10 A successful connection is indicated when D Life appears in the main ...

Страница 43: ...40 1 D Life 10 01 05 18 Menu Names ...

Страница 44: ... the Main Menu choose SYSTEM MAIN MENU SYSTEM CALL LOGS SETTINGS EXTRAS OK EXIT 2 In the SYSTEM menu choose NETWORK SETTINGS to see options for changing IP settings and PPPoE configuration SYSTEM HOST IP NETWORK SETTINGS D Life No OK EXIT 3 In the NETWORK SETTINGS menu choose PPPoE to go to the user name and password entry menu for PPPoE connection NETWORK SETTINGS DHCP STATIC IP PPPoE OK EXIT ...

Страница 45: ...eys for a few seconds until the flashing cursor moves ahead one space PPPoE NAME test_ OK DELETE PPPoE NAME ipphoneuser viopnet com OK DELETE PPPoE PASSWORD OK DELETE 6 The LCD menu informs you that the DHA 130 base station is rebooting It will take one or two minutes to restart and establish the D Life connection 5 A Press DELETE to remove one character at a time 5 B Enter the new user name using...

Страница 46: ...43 PPPoE REBOOTING PLEASE WAIT 7 A successful connection is indicated when D Life appears in the main screen The phone is now ready for use 2 D Life 10 01 05 18 Menu Names ...

Страница 47: ... keyed entries key tone and to turn on and off the tone made by the handset for events other than incoming calls for example the handset will make a noise when it is placed in the base station recharging cradle handset tone The Sounds menu options also include an Equalizer menu for enhanced treble or enhanced bass tones Change Ringer Tone The procedure to change ringer tones for VoIP PSTN and Inte...

Страница 48: ...SETTINGS SOUNDS VoIP RINGER 1 Go to the SETTINGS menu MAIN MENU SYSTEM CALL LOGS SETTINGS EXTRAS OK EXIT 2 Go to the SOUNDS menu SETTINGS SOUNDS DATE AND TIME LANGUAGE CALL SERVICES OK EXIT 3 Choose VoIP RINGER SOUNDS VoIP RINGER PSTN RINGER INTERCOM RINGER CALL SERVICES OK EXIT ...

Страница 49: ...cond Likewise when scrolling through the melody options the melody or ring tone will play briefly VoIP Ringer VOLUME 3 MELODY 4 OK CANCEL Turn On Off Key Tone To turn off key tones the noise produced when a key is pressed on the handset go to SETTINGS SOUNDS KEY TONE To turn key tone on or off 1 Go to the SETTINGS menu MAIN MENU SYSTEM CALL LOGS SETTINGS EXTRAS OK EXIT 2 Go to the SOUNDS menu SETT...

Страница 50: ...s OK KEY TONE ON OFF OK CANCEL Turn On Off Handset Tone To turn off key tones the noise produced when settings changes are changed or the handset is returned to its re charger on the base station go to SETTINGS SOUNDS HANDSET TONE To turn key tone on or off 1 Go to the SETTINGS menu MAIN MENU SYSTEM CALL LOGS SETTINGS EXTRAS OK EXIT ...

Страница 51: ...TINGS SOUNDS DATE AND TIME LANGUAGE CALL SERVICES OK EXIT 3 Choose HANDSET TONE SOUNDS PSTN RINGER INTERCOM RINGER KEY TONE HANDSET TONE OK EXIT 4 Choose to turn the handset tone ON or OFF and press OK HANDSET TONE ON OFF OK CANCEL ...

Страница 52: ...SETTINGS SOUNDS EQUALIZER To change the equalizer settings 1 Go to the SETTINGS menu MAIN MENU SYSTEM CALL LOGS SETTINGS EXTRAS OK EXIT 2 Go to the SOUNDS menu SETTINGS SOUNDS DATE AND TIME LANGUAGE CALL SERVICES OK EXIT 3 Choose EQUALIZER SOUNDS INTERCOM RINGER KEY TONE HANDSET TONE EQUALIZER OK EXIT ...

Страница 53: ...tings menu Date and time are displayed on the bottom of the desktop To configure date and time or the format for display of time and date for the handset go to SETTINGS DATE AND TIME and choose the function you want to change Change Current Time Setting To configure the time that is displayed on the bottom of the desktop on the handset LCD screen 1 From the SETTINGS menu select DATE AND TIME and p...

Страница 54: ... HOUR and MINUTE with the right and left arrows of the navigation button Press the right arrow to increase the number displayed by 1 for each press press the left arrow key to decrease the number Use the up and down arrow keys to select HOUR or MINUTE for configuration TIME HOUR 04 MINUTE 43 OK CANCEL ...

Страница 55: ... and press OK DATE AND TIME DATE FORMAT DATE TIME FORMAT TIME OK EXIT 3 Configure the MONTH DAY and YEAR with the right and left arrows of the navigation button Press the right arrow to increase the number displayed by 1 for each press press the left arrow key to decrease the number Use the up and down arrow keys to select MONTH DAY or YEAR for configuration MONTH MONTH 10 DAY 13 YEAR 07 OK CANCEL...

Страница 56: ...MAT DATE TIME FORMAT TIME OK EXIT 3 There are two date formats to choose from a 12 HOUR will display time in the form HOUR MINUTE plus A or P to indicate AM or PM for example 01 09P is nine minutes after one o clock in the afternoon The 24 HOUR option uses a 24 hour clock so nine minutes after one o clock in the afternoon would look like 13 09 without any separate character to indicate AM or PM TI...

Страница 57: ...E LANGUAGE CALL SERVICES OK EXIT 2 Select DATE FORMAT and press OK DATE AND TIME DATE FORMAT DATE TIME FORMAT TIME OK EXIT 3 Choose to display the date in numeric form in the order Month Day Year or Day Month Year The default date format setting uses an abbreviation English name of the month the language setting does not have an effect on this DATE FORMAT MM DD YY DD MM YY MMM YY OK CANCEL ...

Страница 58: ...e handset are English French German Italian Spanish Portuguese Swedish Danish Norwegian and Finnish 1 Choose LANGUAGE in the SETTINGS menu and click OK SETTINGS SOUNDS DATE AND TIME LANGUAGE CALL SERVICES OK EXIT 2 Scroll to select the language from the list and click OK to immediately begin using the chosen language LANGUAGE FRANÇAIS DEUTSCH ITALIANO ESPAÑOL OK EXIT 3 A setting SAVED message appe...

Страница 59: ...l it is only necessary to pick up the handset It is not necessary to press the Call button in this circumstance Likewise when this is enabled a call is ended by returning it to the base stations cradle To enable Auto Answer 1 Choose the CALL SERVICES option in the SETTINGS menu and press OK SETTINGS SOUNDS DATE AND TIME LANGUAGE CALL SERVICES OK EXIT 2 Select AUTO ANSWER and press OK CALL SERVICES...

Страница 60: ...to SETTINGS CONTRAST select the level of contrast and press OK the display will use the selected contrast level so you will immediately see how it will appear CONTRAST CONTRAST 1 CONTRAST 2 CONTRAST 3 CONTRAST 4 OK CANCEL CONTRAST CONTRAST 3 CONTRAST 4 CONTRAST 5 OK CANCEL ...

Страница 61: ...m clock timer and stopwatch functions Alarm Clock To use the alarm clock function 1 Choose the ALARM CLOCK option and press OK EXTRAS ALARM CLOCK TIMER STOPWATCH OK EXIT 2 Turn the alarm ON and click OK to enter the time you want the alarm to sound ALARM CLOCK ON OFF OK EXIT ...

Страница 62: ...n ALARM CLOCK HOUR 00 MINUTE 00 OK CANCEL Timer To use the alarm timer 1 Choose the TIMER option and press OK EXTRAS ALARM CLOCK TIMER STOPWATCH OK EXIT 2 Configure the HOUR MINUTE and SECOND for the alarm with the right and left arrows of the navigation button Press the right arrow to increase the number displayed by 1 for each press press the left arrow key to decrease the number Use the up and ...

Страница 63: ...rder to be recognized by the base station This process involves first activating the registration process from the base station then configuring the new handset being added and requires a negotiation process to be initiated from the base station with which the added handset will associate Activate the Base Station When you are ready to add a handset press and hold the Intercom button on the front ...

Страница 64: ...1 00 02 Menu Names 2 Now you can navigate through the MAIN MENU options by pressing the arrows of the navigation key MAIN MENU SYSTEM CALL LOGS SETTINGS EXTRAS OK EXIT 3 Use the navigation key to scroll down to the BASE SETUP option Press the Left Soft Key to view the BASE SETUP menu MAIN MENU CALL LOGS SETTINGS EXTRAS BASE SETUP OK EXIT ...

Страница 65: ...e Left Soft Key to select the BASE from the list The base that has just been activated will appear marked by an asterisk in the list REGISTER BASE 1 BASE 2 BASE 3 BASE 4 OK CANCEL 6 You must now enter the PIN number for the handset to establish the DECT connection Use the number keypad to enter the PIN number The factory default PIN number is 0000 REGISTER ENTER PIN OK CANCEL ...

Страница 66: ...ion The handset will initiate a search for the base station and a negotiation process will take a few seconds until the DECT connection is established SEARCHING 8 The antenna icon in the upper left corner of the display will blink on and off during the DECT connection negotiation process SEARCHING 01 01 00 04 ...

Страница 67: ...Change Base Station The procedure to change which base station a handset will associate with is very similar to the procedure to add a new handset to a base station association group First press the Intercom button on the front of the base station for 5 seconds until the LEDs flash on and off in an alternating pattern 1 To use another base station in an environment where more than one DHA 130 are ...

Страница 68: ... register handset menu where you will need to enter the PIN SELECT BASE BASE 1 BASE 2 BASE 3 BASE 4 OK EXIT 3 You must now enter the PIN number for the base station to establish the DECT connection Use the number keypad to enter the PIN number The factory default PIN number is 0000 REGISTER ENTER PIN OK CANCEL REGISTER ENTER PIN OK DELETE ...

Страница 69: ...ETUP menu choose DELETE HANDSET and press OK BASE SETUP REGISTER SELECT BASE DELETE HANDSET RESET OK EXIT 2 Choose a handset from the list and press OK to go the menu where you will need to enter the PIN of the base station to remove the handset from service SELECT BASE BASE 1 BASE 2 BASE 3 BASE 4 OK EXIT ...

Страница 70: ...menu BASE SETUP REGISTER SELECT BASE DELETE HANDSET RESET OK EXIT 2 Entering the correct PIN number is required to reset the base station Enter the PIN number and press OK RESET BASE ENTER PIN OK DELETE 3 A correct PIN number entry will bring up a CONFIRM prompt The factory default PIN number is 0000 Choose Yes to reset the base station to factory default settings ...

Страница 71: ...OK BASE SETUP SELECT BASE DELETE HANDSET RESET CHANGE PIN OK EXIT 2 Entering the current PIN number is required in order change it to a new number Enter the current PIN number for the handset in use and press OK The factory default PIN is 0000 CHANGE PIN ENTER PIN OK DELETE 3 Enter the new PIN number for the handset in use and press OK CHANGE PIN ENTER NEW PIN OK DELETE 4 A CONFIRM prompt appears ...

Страница 72: ...ch to configure The VoIP settings cannot be configured through the web configuration utility Type the IP address assigned to the DHA 130 by your Router or use the static IP addressed assigned in the form http xxx xxx xxx xxx Type the Password used to log in to the web manager The factory default User Name is admin and cannot be changed the default Password is admin and click on Log In ...

Страница 73: ... Save Settings button The Setup menu is also used to configure the system time for the Phone Dynamic IPAddress DHCP The Dynamic IP Address DHCP option can be used if you are using automatic IP address assignment for IP devices on your network This can be used for a local DHCP server on the LAN or for DHCP service from your ISP or network services provider The Phone becomes a DHCP client using this...

Страница 74: ...tatic IP option from the My Internet Connection is pull down menu and configure IP settings suitable for your LAN Click the Save Settings button to apply the new IP settings Notice that it will be necessary to use the newly configured IP address to again access the web manager After applying the settings type the new IP address into the browser address bar and press the Enter key to regain managem...

Страница 75: ... and Password used for authentication and if desired or required provide a Service Name and AC Name The Idle Timeout is the time in minutes the PhoneCorder is allowed to remain idle i e no data received or transmitted before the PPPoE session is ended Use this option if your ISP charges for Internet access based on the amount of time spent connected If you have unlimited Internet use leave this bl...

Страница 76: ...d to access the Router s management software cannot be changed by the user Firmware Upgrade To upgrade firmware type in the name and path of the file or click on the Browse button to search for the file Click the Upload button to begin copying the file The file will load and restart the Phone automatically Status To view the current status and key settings configured on the PhoneCorder click the S...

Страница 77: ...74 The Status information includes IP settings and connection status of the Phone This information is useful for troubleshooting ...

Страница 78: ... Cordless Phone Interface Standard Compliance DECT Digital Europe Cordless Telecommunication GAP Generic Access Profile Frequency 1880 1900 MHz RF Channels 10 Channels Modulation GFSK Voice Coding ADPCM 32K bit s t Voice Port One RJ 11 POTS port for PSTN Life Line Telephone dialing mode support DTMF Dial Pulse 20pps 10pps Ringer Equivalency Number REN 5 Tone Detection DTMF Modem Fax V 21 V 25 Line...

Страница 79: ...Width Depth Height Weight Power AC Power Adapter Output AC12V 1 2A Battery Metal Hydride Cylindrical Cell Size AAA Telephony Call Control Protocol SIP RFC3261 CODEC G 711 A law and U law G 726 G 729A iLBC Echo Cancellation G 168 ...

Страница 80: ...ad Security Username Password control for TELNET and WEB configuration SIPAuthentication SIP Authentication with MD5 password encryption VoIP NAT Traversal SIP STUN Safety EMI Requirements UL CUL EMI Certification FCC Class B BSMI Class B CE Class B Environmental Operating Temperature 0 to 40 C Storage Temperature 10 to 55 C Operating Humidity Range 5 to 95 Non condensing ...

Страница 81: ...ters and Gateways The firewall security features built into most routers and gateways might prevent users from accessing the VoIP features of their DHA 130 Arouter connects to the Internet through a series of numbered ports The ports used by the DHA 130are often blocked from access over the Internet by the firewall features of therouter Y ou may be able to connect to anotherV oIPtelephonebut not r...

Страница 82: ...IP address from the DHA 130 Turn the DHA 130 on Highlight the Settings button on the Main Screen Navigate to Settings Network Network Address IP address D Under Protocol Type choose Both TCP and UDP E Under Private Port and Public Port enter 3478 F Under Schedule click Always G Click Apply to save this entry Y ou have now completed the entering of one port to be opened Y ou will need to open six m...

Страница 83: ... IP address of the person you are trying to call is correct 3 The DHA 130 or television produces an off hook signal The telephone is off the hook Hang up the phone 4 The DHA 130 or television produces a fast busy signal Person you are trying to call is not registered with the directory service Call the person using direct IP or wait until the person is registered with the directory service Person ...

Страница 84: ...dicator Line 2 indicator during phone mode Line 1 ringer off Line 1 ringer off Icon Line 2 ringer off Line 2 ringer off icon Line 1 2 ringers off Lines 1 2 ringers off icon Speaker Hands free speaker is turn on Intercom indicator Intercom call indication in conference mode Battery 3 block level indication animated when charging empty when battery is low New message New message indication VMWI is o...

Отзывы: