background image

(6 feet) of the Switch. Make sure that there is proper heat dissipation from and adequate
ventilation around the Switch. Leave at least 10 cm (4 inches) of space at the front, sides,
and rear of the Switch for ventilation.

Installing the Switch in a Standard 19'' Rack

This section is used to guide the user through installing the Switch into a switch rack. The
Switch can be mounted in a standard 19"(1U) rack using the provided mounting brackets.
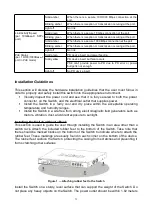
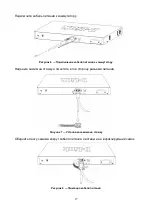
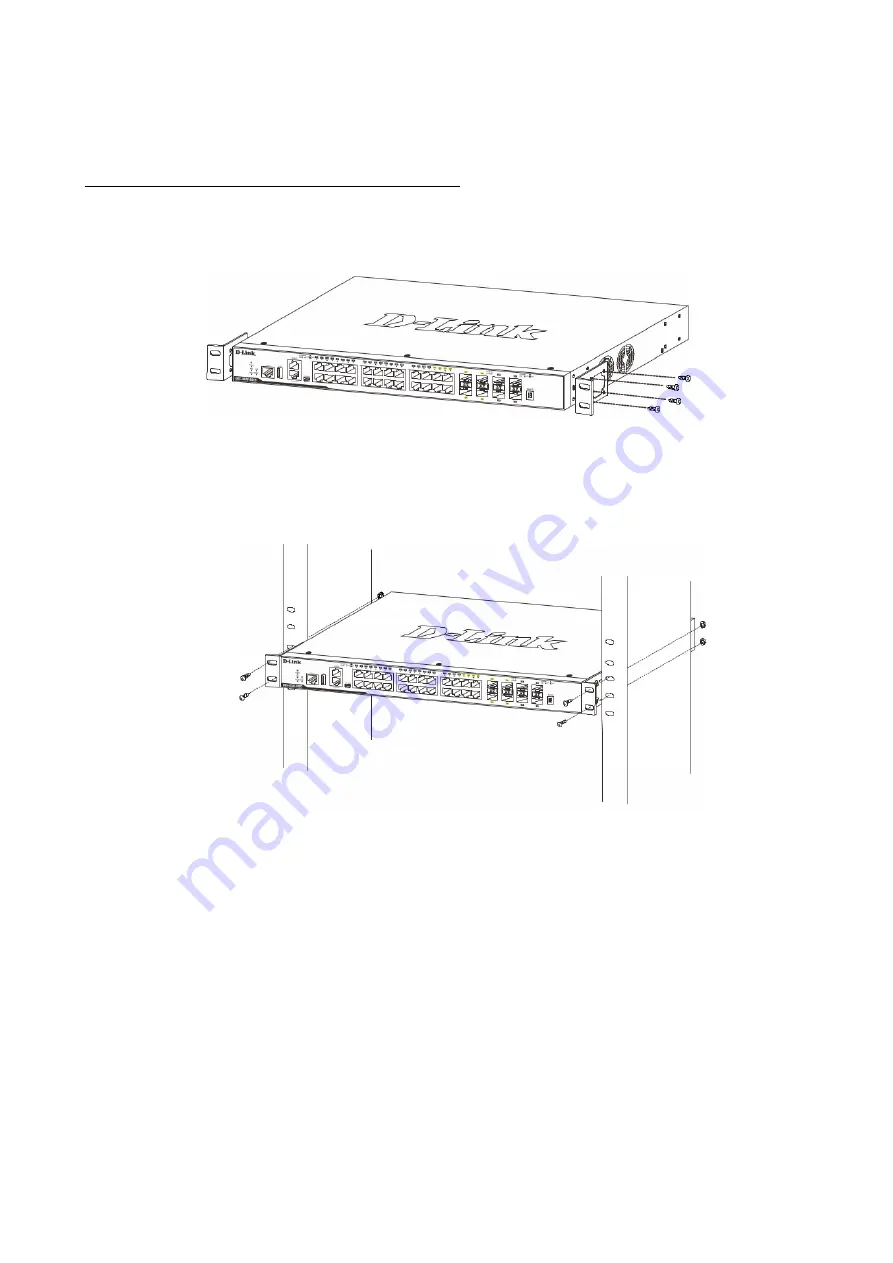
Fasten the mounting brackets to the sides of the Switch using the screws provided.

Figure 2 — Attaching rack-mount brackets to the Switch

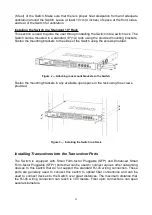
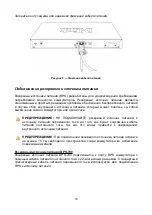
Fasten the mounting brackets in any available open space in the rack using the screws 
provided.

Figure 3 — Installing the Switch in a Rack

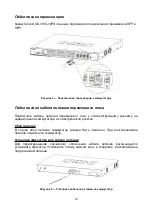
Installing Transceivers into the Transceiver Ports

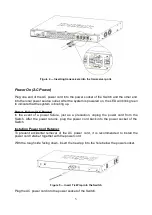
The Switch  is  equipped with  Small Form-factor  Pluggable (SFP)  and Enhanced Small
Form-factor Pluggable (SFP+) ports that can be used to connect various other networking
devices to this switch that do not support the standard RJ-45 wiring connection. These
ports are generally used to connect this switch to optical fiber connections and can be
used to connect devices to the Switch over great distances. The maximum distance that
the RJ-45 wiring connection can reach is 100 meters. Fiber optic connections can span
several kilometers.

4

Содержание DGS-3130-30PS

Страница 1: ...30PS 24 10 100 1000Base T PoE ports 2 10GBase T ports 4 10 GbE SFP ports L3 Stackable Managed Switch L3 24 10 100 1000Base T 2 10GBase T 4 10GBase X SFP 24 PoE 802 3af at PoE 370 740 DPS 700 Quick Ins...

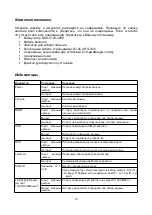
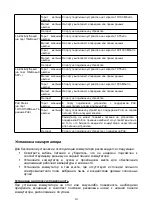
Страница 2: ...hutdown USB Solid green USB disk is connected Blinking Data is transmitting Light off No device is connected RPS Solid green RPS in using Light off RPS off Fan Error Solid yellow The fan has run time...

Страница 3: ...onment Visually inspect the power cord and see that it is fully secured to both the power connector on the Switch and the electrical outlet that supplies power Install the Switch in a fairly cool and...

Страница 4: ...unt brackets to the Switch Fasten the mounting brackets in any available open space in the rack using the screws provided Figure 3 Installing the Switch in a Rack Installing Transceivers into the Tran...

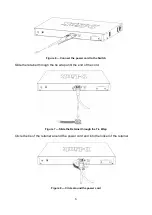
Страница 5: ...e event of a power failure just as a precaution unplug the power cord from the Switch After the power returns plug the power cord back into the power socket of the Switch Installing Power Cord Retaine...

Страница 6: ...Slide the retainer through the tie wrap until the end of the cord Figure 7 Slide the Retainer through the Tie Wrap Circle the tie of the retainer around the power cord and into the locker of the reta...

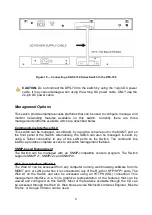
Страница 7: ...ow cost simple solution to the problem of an inadvertent failure of the internal power supply of an Ethernet switch which can result in the shutdown of that switch the devices attached to its ports or...

Страница 8: ...in band by using a Telnet connection to any of the LAN ports on the Switch The command line interface provides complete access to all switch management features SNMP based Management The Switch can b...

Страница 9: ...ial port on the computer running terminal emulation software then insert the RJ 45 connector into the RJ 45 console port on the front of the Switch To configure the terminal emulation software as foll...

Страница 10: ...ended to create a user account containing a username and a password on the Switch to prevent unauthorized access to the management interface Connecting to the MGMT Port The front panel of the Switch f...

Страница 11: ...gle Chrome Safari To access the Web UI open a standard web browser enter the Switch s IP address into the address bar of the browser and press the ENTER key To access the Web UI from normal LAN ports...

Страница 12: ...2022 D Link Corporation 0 50 5 c 2 6 7 2012 D 2013 E 2014 F 2015 G 2016 H 2017 I 2018 J 2019 0 2020 1 2021 2 2022 1 2 9 A B D Link 12...

Страница 13: ...DGS 3130 30PS RJ 45 RS 232 2 19 4 Power Console MGMT USB USB RPS Fan Error Stack ID 1 8 Box ID stacking master Box ID H boxID H boxID H Link Activity Speed 10 100 1000Base T 1000 13...

Страница 14: ...10 100 Link Activity Speed 10GBase T 10 100 1000 Link Activity Speed 10GBase X SFP 10 1000 PoE Status 10 100 1000Base T PoE PoE PoE PoE PoE PoE PoE 14...

Страница 15: ...1 1 82 10 19 2 3 15...

Страница 16: ...DGS 3130 30PS SFP SFP 4 5 16...

Страница 17: ...6 7 8 17...

Страница 18: ...9 RPS 15 DPS 700 DPS 700 RPS 22 RPS 18...

Страница 19: ...10 DPS 700 14 DPS 700 22 DGS 3130 30PS CLI SNMP Web CLI MGMT Telnet LAN SNMP SNMP DGS 3130 30PS SNMP 1 2c 3 Web RJ 45 19...

Страница 20: ...RJ 45 RS 232 RS 232 RJ 45 1 RS 232 2 RJ 45 COM1 COM2 115200 8 1 11 COM 20...

Страница 21: ...Enter Switch MGMT MGMT RJ 45 Ethernet MGMT Web Telnet IP 192 168 0 1 255 255 255 0 MGMT IP 192 168 0 0 24 MGMT 21...

Страница 22: ...MGMT IP MGMT Web Web Microsoft Internet Explorer 7 Firefox Google Chrome Safari LAN Web IP 10 90 90 90 Web Web IP Enter Login 12 22...

Страница 23: ...SB RPS Fan Error Stack ID MGMT DPS 700 IEEE 802 3 10Base T IEEE 802 3u 100Base TX IEEE 802 3ab 1000Base T IEEE 802 3an 10GBase T IEEE 802 3z 1000Base X IEEE 802 3ae 10GBase X IEEE 802 3az Energy Effic...

Страница 24: ...E 370 DPS 700 PoE 740 30 PoE 5 6 x x 440 x 430 x 44 100 240 50 60 454 55 PoE 38 74 PoE 19 63 1 550 92 MTBF 279 418 56 43 5 6 IEC61000 4 5 3 0 50 CC 40 70 CC 10 90 5 90 CB cUL BSMI EMI FCC Class A CE C...

Страница 25: ...C Negruzzi 8 Tel 373 22 80 81 07 E mail info dlink md 169 375 17 218 13 65 E mail support dlink by c 143 7 727 378 55 90 E mail almaty dlink ru 3 23 5 374 10 39 86 67 info dlink am Lietuva Vilnius irm...

Отзывы: