background image

12

DCS-9500T Quick Installation Guide

ENGLISH

2. 

The default IP address is 

127.0.0

. Alternatively, enter the IP address of your central management 

server. If the central management server is deployed on another server, please input the server‘s 
IP address.

3. 

You can choose to remember the password or log in automatically according to the user’s 
preference. 

4. 

Click 

Login

.

Interface Brief

1. 

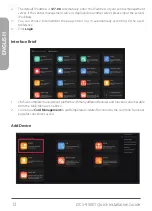
CMS is a complete management platform with many different features and functions, all accessible 
from the Main Menu seen above. 

2. 

You can use 

Card Management

 to add temperature-related functions to the Common Functions 

page for convenient access. 

Add Device

Содержание DCS-9500T

Страница 1: ...Additional documentation is also available on the D Link website DCS 9500T Quick Installation Guide Group Temperature Screening Camera Kit ...

Страница 2: ...Contents English 1 ...

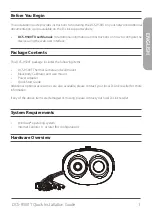
Страница 3: ...e using the web user interface Package Contents This DCS 9500T package includes the following items DCS 9500T Thermal Camera and wall mount Blackbody Calibrator and wall mount Power Adapter Quick Start Guide Additional optional accessories are also available please contact your local D Link reseller for more information If any of the above items are damaged or missing please contact your local D L...

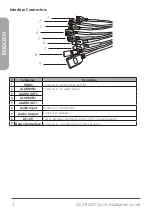
Страница 4: ...S485 Connects to external pan and tilt 2 ALARM IN2 Connects to an alarm device 3 ALARM OUT2 4 ALARM IN1 5 ALARM OUT1 6 Audio Input Connect to microphone 7 Audio Output Connect to speaker 8 DC12 V Power interface connects to the 12 V DC power adapter 9 Network Interface Connects to a standard RJ45 Ethernet cable ...

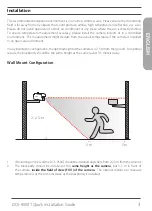
Страница 5: ...ment The measurement might deviate from the actual temperature if the camera is installed in an open air environment In any installation configuration the optimal height of the camera is 2 2 3 m from the ground For optimal results the blackbody should be the same height as the camera and 3 5 meters away Wall Mount Configuration 2 2 3 m 3 m 5 m 1 Ifmountingonthewall theDCS 9500Tshouldbeinstalledany...

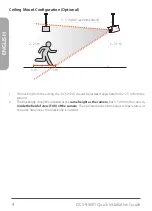
Страница 6: ... mounting from the ceiling the DCS 9500T should be installed anywhere from 2 2 3 m from the ground 2 The Blackbody should be installed at the same height as the camera but 3 5 m from the camera inside the field of view FOV of the camera The optimal distance to measure temperature is at the same distance as the blackbody is installed ...

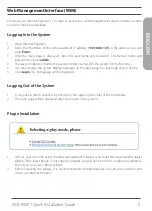
Страница 7: ...o the system for the first time 5 You may change the system display language on the login page to a language of your choice 6 Click Login The homepage will be displayed Logging Out of the System 1 To logout of system click the logout icon in the upper right corner of the homepage 2 The login page will be displayed after you logout of the system Plugin Installation 1 If this is your first time usin...

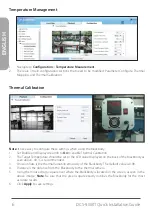
Страница 8: ... Info to On to enable Thermal Calibration 2 The Target Temperature should be set to the LED value displayed on the back of the Blackbody as seen above 40 C is recommended 3 Emission Rate is the thermal radiation emissivity of the Blackbody The default value is 0 98 4 Distance is the distance from the Blackbody to the thermal camera 5 Using the mouse drag a square over where the Blackbody is locate...

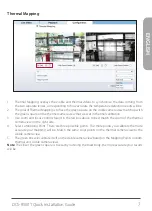
Страница 9: ...set in thermal calibration 3 Use zoom and focus controls found in the red box above to best match the zoom of the thermal camera view on the right side 4 Select a Mapping Point There are three possible points The more points you calibrate the more accurate your mapping will be Match the same color points on the thermal camera view to the visible camera view 5 The green box will calibrate itself on...

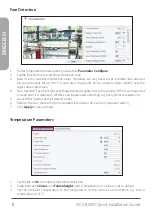
Страница 10: ...e Pixel Max and Image Matting Quality refer to the quality of the face image that is saved after it is detected All three can be adjusted according to your systems requirements 5 Leave other options at their default values 6 Refer to the User Manual for more detailed information on each configuration setting 7 Click Apply to save settings Temperature Parameters 1 Set Enable to On to enable tempera...

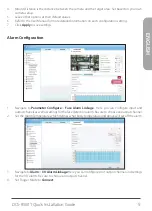
Страница 11: ...y to save settings Alarm Configuration 1 Navigate to Parameter Configure Face Alarm Linkage Here you can configure input and output chanels as well as settings for the face detection alarm Be sure to choose an output channel 2 Set the AlarmTemperature which defines what body temperature and above will set off the alarm 3 Navigate to Alarm I O Alarm Linkage Here you can configure your output channe...

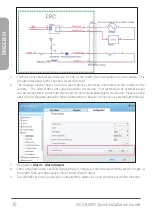
Страница 12: ...r to the device Your alarm device s external power can be connected in series with the circuit or connected separately to the device Please see the above DI DO diagram above for more information on how to connect your external alarm device 7 Navigate to Alarm Alarm Output 8 Enter a channel name set Valid Signal to Open choose an Alarm Output Mode set the length of the Alarm Time and optionally ena...

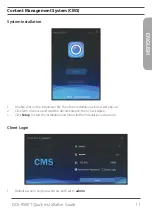
Страница 13: ... Double click on the installation file The above installation window will pop up 2 Click Term of service and read the documentation then check Agree 3 Click Setup to start the installation and follow further installation instructions Client Login 1 Default account and password are both set to admin ...

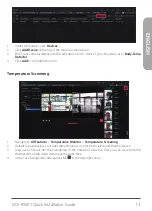
Страница 14: ...se input the server s IP address 3 You can choose to remember the password or log in automatically according to the user s preference 4 Click Login Interface Brief 1 CMS is a complete management platform with many different features and functions all accessible from the Main Menu seen above 2 You can use Card Management to add temperature related functions to the Common Functions page for convenie...

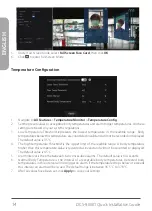
Страница 15: ...Detector 4 Click Add to complete the form Temperature Screening 1 Navigate to All Features Temperature Monitor Temperature Screening 2 Default Group displays your selectable channels one for both visible and thermal lenses 3 Drag each channel into the two panels in the middle of screen so that you can view both the thermal and visible video streams at the same time 4 In the Face Recognition side p...

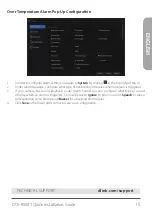
Страница 16: ...ered invalid and will not be recorded or displayed The default value is 35 C 4 The high temperature threshold is the upper limit of the readible range A body temperature higher than this temperature value is regarded as invalid and will not be recorded or displayed The default value is 45 C 5 Alarm interval is the time between two consecutive alarms The default value is 60 seconds 6 Normal Body Te...

Страница 17: ...re what type of notification to receive when an alarm is triggered 3 If your camera has sound playback under Alarm Sound you can configure what type of sound will play when an alarm is triggered Choose between Ignore to play no sound Speech to play a corresponding voice prompt and Buzzer for a beeping alarm signal 4 Click Save in the lower right corner to save your configuration TECHNICAL SUPPORT ...

Страница 18: ...Ver 1 00 WW _130x183 2020 03 06 5300 00007657 01W ...

Отзывы: