6
7
Ethernet Installation Process
Configure the TCP/IP Protocol on Your PC
Before installing the cable modem in the Ethernet mode, you must verify that your
computer has the TCP/IP protocol installed. Follow the procedure for your computer’s
operating system to verify or install the TCP/IP protocol.
Windows 95, Windows 98, or Windows Me Operating System:
A. Click
Start
, point to
Settings
, and then click
Control Panel
.
B. Double-click the
Network
icon. The screen displays a list of installed network
components.
C. Search for an entry containing TCP/IP, followed by the NIC hardware device installed in
your computer. If you see TCP/IP listed next to your Ethernet hardware device, you may
now proceed to “
Install the Cable Modem
” section.
The Ethernet connection is OS-independent and can be used to
connect any computer that has a pre-installed Ethernet adapter.
Install the USB Software Drivers
When the computer detects the cable modem, insert the D-Link Installation and
Documentation CD into the computer’s CD-ROM drive and follow the on-screen
prompts to install the necessary driver files. Follow the instructions for your specific
operating system.
USB Installation Process (optional)
If TCP/IP is NOT listed, you must complete the following steps:
1. Click
Add
.
2. Click
Protocol
, and then click
Add
.
3. Click
Microsoft
in the “Manufacturers” list and then click the
“
Network Protocols
” list.
4. Click
OK
. You are prompted to restart your computer.
D. Click
Yes
. You can now proceed to the “
Install the Cable Modem
” section.
Windows XP or 2000 Operating System
A. Right-click
My Network Places
icon on the Windows desktop.
B. Right-click
Local Area Connection
and click
Properties
. Search for an entry
containing TCP/IP. If you see TCP/IP listed next to your Ethernet hardware device,
you can now proceed to the “
Install the Cable Modem
” section.
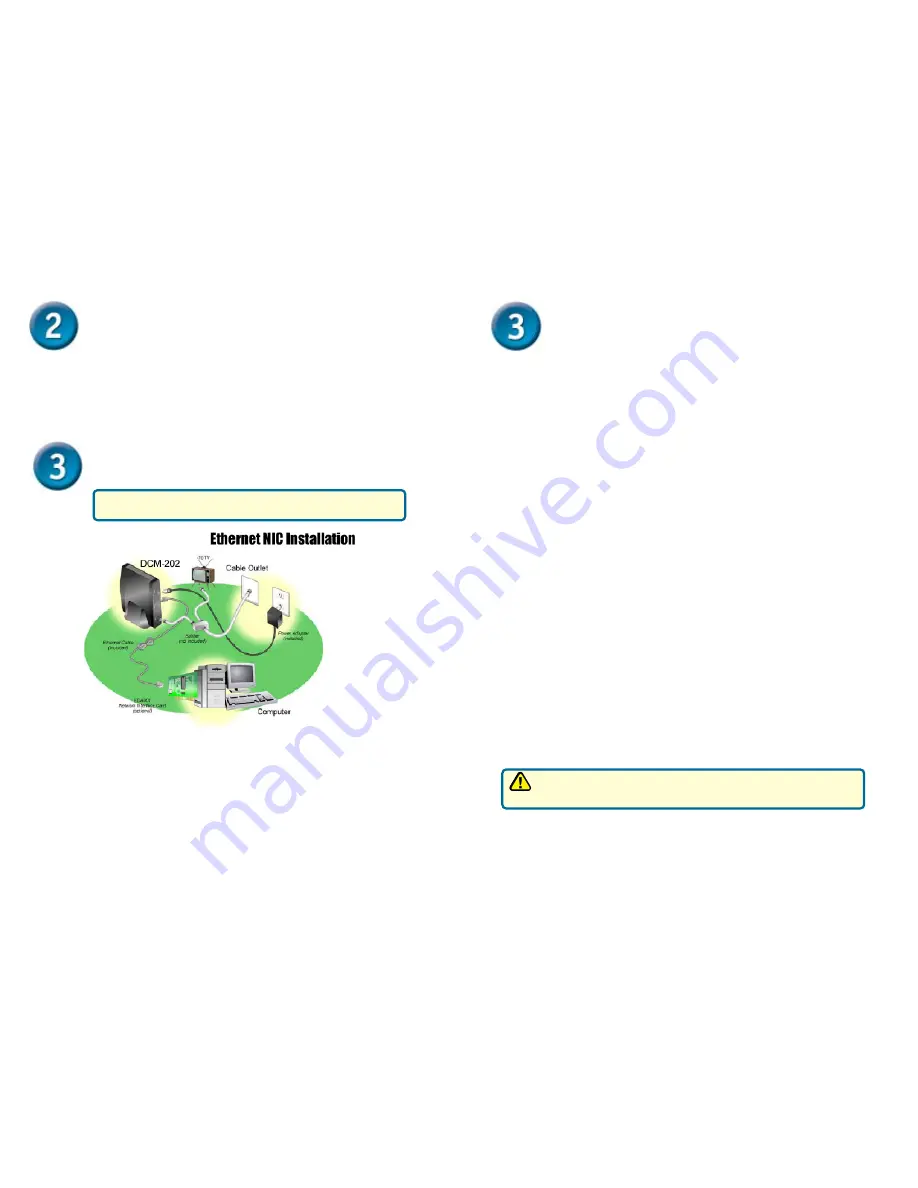
Install the Cable Modem
Refer to the Ethernet NIC illustration (previous page) when making the following
connections:
A. Power off the computer.
B. Unplug the computer’s power cable.
C. Connect the RF coaxial cable (not included) to the back of the cable modem labeled
“CATV”, connect the other end to the wall cable outlet.
Note
: If you are using a cable line-splitter (not included) to connect the computer and a
television to the same wall cable outlet, you will use three lengths of coaxial cable.
As shown in the Ethernet NIC illustration (see previous page), a cable line-splitter
has three connectors. Use the illustration to make the appropriate coaxial cable
connections.
D. Connect one end of the Ethernet cable to the cable modem labeled “ETH” and the
other end to the Ethernet NIC installed on your computer.
E. Connect the 12VDC/1A power adapter to the back of the cable modem labeled
“Power.”
Ethernet Installation Process
Be sure to use only the power adapter that came with the cable modem.
Using the wrong power adapter can damage the cable modem and void
the warranty.
F. Plug the power adapter into a surge protector or an electrical outlet.
G. Plug in power cable and turn on the computer.
H. Verify that the proper LED lights are correctly illuminated on the DCM-202.


