D-Link DAP-3410 Скачать руководство пользователя страница 58

58

D-Link DAP-3410 User Manual

Section 3 - Configuration
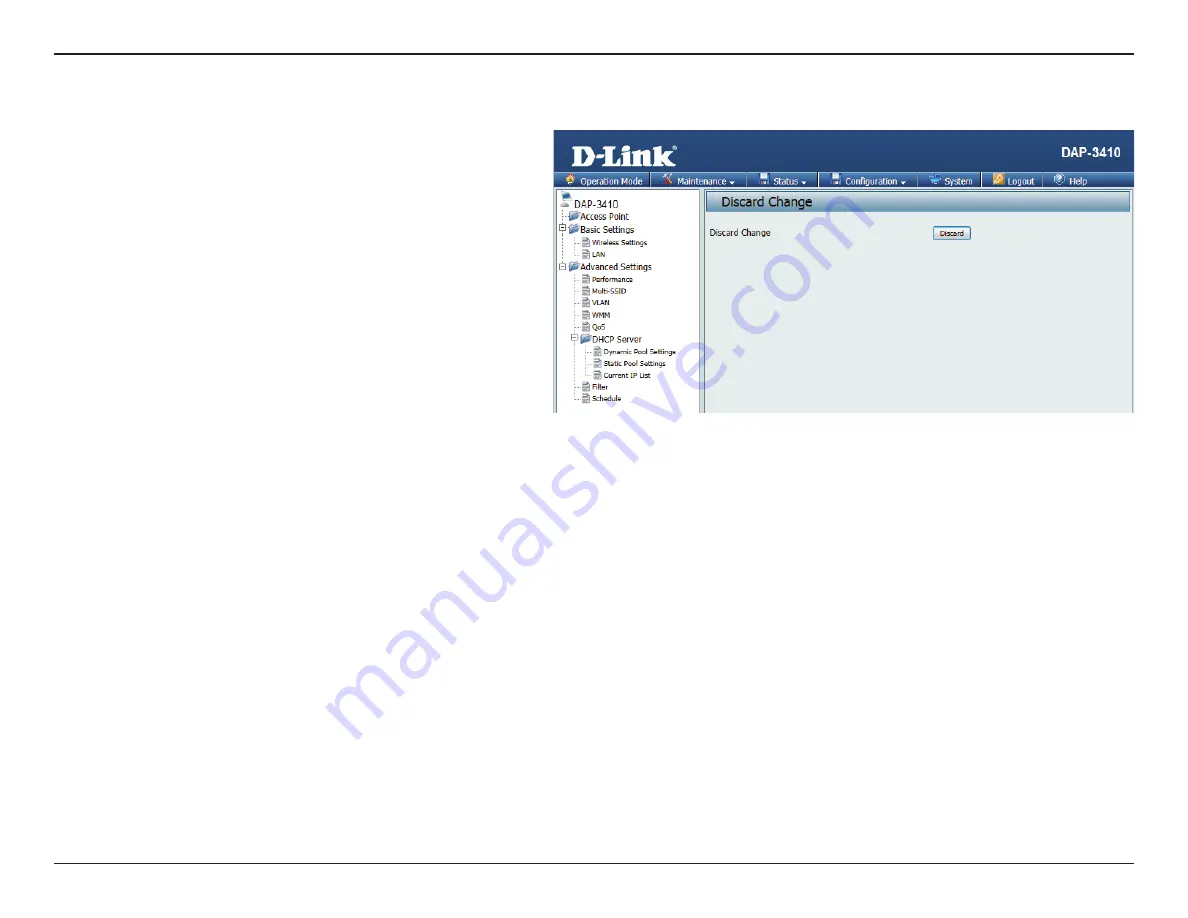
Discard Changes

When making changes on most of the configuration 

screens it is best to use the 

Save

 button at the bottom 

of each screen to save (not activate) your configuration 

changes.

If you wish to discard all of the changes you have made, 

and not yet activated, you may click the 

Discard

 button.

Содержание DAP-3410

Страница 1: ...Version 1 0 05 23 2013 DAP 3410 Wireless N Exterior Access Point ...

Страница 2: ...nce 24 Multi SSID 27 VLAN 28 Add Edit VLAN 29 WMM 30 QoS 32 DHCP Server 33 Dynamic Pool Settings 33 Static Pool Settings 35 Current IP List 36 Filter 37 Schedule 38 DMZ 40 Virtual Server 41 Parental Control 42 IP Routing 43 Static Routing Setup 43 Maintenance 45 Administration Settings 45 Firmware and SSL Certification Upload 48 Configuration File 49 Ping Watchdog 50 Time and Date 51 PoE PassThrou...

Страница 3: ...re WPA WPA2 Enterprise 66 Connect to a Wireless Network 67 Using Windows XP 67 Configure WPA PSK 68 Using Windows Vista 70 Configure WPA PSK 72 Using Windows 7 73 Troubleshooting 76 Wireless Basics 80 What is Wireless 81 Tips 83 Wireless Modes 84 Networking Basics 85 Check your IP address 85 Statically Assign an IP address 86 Technical Specifications 87 ...

Страница 4: ... with a different voltage rating or PoE injector than the one included with the DAP 3410 will cause damage and void the warranty for this product Package Contents DAP 3410 Wireless N Exterior Access Point Quick Installation Guide Power Over Ethernet Injector Power Adapter Wall Mount ...

Страница 5: ... based Configuration Utility Requirements Computer with the following Windows Macintosh or Linux based operating system An installed Ethernet adapter Browser Requirements Internet Explorer 7 and higher Mozilla Firefox 12 0 and higher Google Chrome 20 0 and higher Apple Safari 4 and higher Windows Users Make sure you have the latest version of Java installed Visit www java com to download the lates...

Страница 6: ...liant meaning that it can connect and interoperate with other 802 11n compatible wireless client devices The DAP 3410 is also compatible with devices that comply with the 802 11a standard With its Setup Wizard the DAP 3410 ensures that you will be up and running a wireless network in just a matter of minutes The DAP 3410 features Wi Fi Protected Access WPA PSK WPA2 PSK to provide an enhanced level...

Страница 7: ...iminating dead spots and weak signals Also built into the DAP 3410 is WISP mode which expands functionality for long range communications by including the ability to function as a client or repeater In WISP Repeater mode the AP wirelessly connects to a WISP Wireless Internet Service Provider AP and repeats the signal received from the WISP In this mode the AP also acts as a router for both wireles...

Страница 8: ...r a power cable It can also power D Link surveillance cameras such as the DCS 3716 DCS 6113 and DCS 7110 Convenient Installation The DAP 3410 features a wall pole mount in the rear for easy setup on poles or walls Rugged Construction The DAP 3410 is built to withstand harsh environments and is compliant with theWaterproof IPX6 Standard 3 2 Maximum wireless signal rate derived from IEEE Standard 80...

Страница 9: ...connect to other networking devices 3 Reset Button Hold the reset button for at least 5 seconds to reset the device back to the factory default settings All the LEDs will turn on for 2 second and then begin the reboot process 4 Grounding Wire Connector Connects to a grounding wire 1 2 3 4 Note The DAP 3410 uses a proprietary PoE injector which is needed to function correctly Only use the included ...

Страница 10: ... WISP mode 2 Power LED A solid green light indicates the device is powered and ready 3 LAN LED A solid green light indicates the LAN port connection is OK A blinking green light indicates that the unit is transmitting data over that port 4 LAN LED PoE A solid green light indicates the LAN port PoE connection is OK A blinking green light indicates that the unit is transmitting data over that port 3...

Страница 11: ... has a 802 11n or a 802 11a wireless network interface and is within range of the AP Clients must use the same SSID wireless network name and channel as the AP in order to connect If wireless security is enabled on the AP the client will need to enter a password to connect to the AP In Access Point mode multiple clients can connect to the AP at the same time STEP 1 Connect an Ethernet Cable to the...

Страница 12: ... DATA OUT port on the PoE Injector B Connect an Ethernet cable from a router switch or PC to the DATA IN port on the PoE Injector C Attach the power adapter to the connector labeled POWER IN on the PoE Injector and attach it into an electrical outlet P DATA OUT DATA IN PoE Injector A C B AP STEP 2 Connect the AP to Your Network Power ...

Страница 13: ...that is 1 5 feet thick 5 meters at a 45 degree angle appears to be almost 3 feet 1 meter thick At a 2 degree angle it looks over 42 feet 14 meters thick Position devices so that the signal will travel straight through a wall or ceiling instead of at an angle for better reception 3 Building materials make a difference A solid metal door or aluminum studs may have a negative effect on range Try to p...

Страница 14: ... If you wish to change the default settings or optimise the performanceoftheDAP 3410 youmayusetheweb based configuration utility To access the configuration utility open a web browser such as Internet Explorer and enter http 192 168 0 50 Select admin and then enter your password Leave the password blank by default If you get a Page Cannot be Displayed error please refer to Troubleshooting on page ...

Страница 15: ...ill extend current wireless coverage alleviating dead spots and weak signals WISPClientRoutermodeallowsforthesharingof aWISP connection using the two built in 10 100 Ethernet ports WISP Repeater mode will extend an existing WISP s network coverage area Access Point WDS with AP WDS Wireless Client Repeater WISP Client Router WISP Repeater TheDAP 3410featuressevendifferentoperatingmodes allowing itt...

Страница 16: ...n Access Point mode If you need help determining which operating mode the AP is currently in please see Operating Modes on page 15 Note The DAP 3410 has different configuration options depending on the current operating mode Please be aware that some screens and menus will not be present unless the AP is operating in an applicable operating mode ...

Страница 17: ...el with the least amount of interference Indicates the channel setting for the DAP 3410 The Channel can be changed to fit the channel setting for an existing wireless network or to customize the wireless network If you enable AutoChannelScan thisoptionwillbegrayedout Auto20 40 Selectifyouareusingboth802 11n andnon 802 11nwirelessdevices 20MHz Select if you are not using any 802 11n wireless client...

Страница 18: ...ct which key you want to be the active key Input up to four keys for encryption You will select one of these keys in the Key Index drop down menu Confirm the network key Click Save to commit your changes Note Hexadecimal HEX digits consist of the numbers 0 9 and the letters A F ASCII AmericanStandardCodeforInformation Interchange is a code that represents English letters using numbers ranging from...

Страница 19: ...o use both WPA and WPA2 WhenyouselectWPA Personal youmustalso selectAUTO AES orTKIPfromthedrop down menu Select the interval during which the group key will be valid The default value of 1800 is recommended Select Manual to enter your key Passphrase When you select WPA Personal please enter a Passphrase in the corresponding fields WPA Mode Cipher Type Group Key Update Passphrase Confirm Passphrase...

Страница 20: ...PA or WPA2 allows you to use both WPA and WPA2 When WPA Enterprise is selected you must also select a cipher type from the drop down menu Auto AES or TKIP Select the interval during which the group key will be valid The recommended value is 1800 Alowerintervalmayreducedatatransferrates Enter the IP address of your RADIUS server Enter the RADIUS port Enter the RADIUS secret WPA Mode Cipher Type Gro...

Страница 21: ...l Section 3 Configuration 802 1x Authentication Select 64 Bits or 128 Bits for your key size Enter the IP address of your RADIUS server Enter the RADIUS port Enter the RADIUS secret Key Size RADIUS Server RADIUS Port RADIUS Secret ...

Страница 22: ... security can be Open System WPA Personal WPA Enterprise or 802 1x For a detailed description of the Open System parameters please go to page 18 For a detailed description of theWPA Personal parameters please go to page 19 For a detailed description of the WPA Enterprise parameters please go to page 20 For a detailed description of the 802 1x parameters please go to page 21 This page will allow yo...

Страница 23: ... Enter the IP address of the router The default IP address is 192 168 0 50 If you change the IP address once you click Save you will need to enterthenewIPaddressinyourbrowsertoget back into the configuration utility Enter the Subnet Mask The default subnet mask is 255 255 255 0 Enter the gateway IP Address for your local network Configure the IP address of the preferred DNS server This section wil...

Страница 24: ...d 802 11g and 802 11b mode The choices available are Best Up to 54 54 48 36 24 18 12 9 6 11 5 5 2 or 1 Beacons are packets sent by an access point to synchronize a wireless network Specify a value in milliseconds The default 100 is recommended Setting a higher beacon interval can help to save the power of wireless clients while setting a lower one can help a wirelessclientconnecttoanaccesspointfas...

Страница 25: ...will help prevent bridge loops and will provide nearby AP s with the information needed to reliably route the network should one of the other devices fail To effectively optimize throughput over long distance links enter a value for Acknowledgement Time Out from 1 to 372 microseconds in the 2 4 GHz in the field provided This setting is used to specify an amount of time the AP will wait after a col...

Страница 26: ...ng interference the router will automatically change to 20MHz Select Enable or Disable This is an option for load balancing and determines whether to limitthenumberofusersaccessingthisdevice The exact number is entered in the User Limit field Ifthisfunctionisenabledandthenumber of users exceeds this value the DAP 3410 will not allow any additional clients to associate with the AP Set the maximum a...

Страница 27: ...onnected clients will not be able to view or access each other This option allows for load balancing on the AP It sets a limit on the number of connections that can be used across all of the broadcasted SSIDs Network Name SSID SSID Visibility Client Isolation Connection Limit User Limit Authentication If Connection Limit is enabled this option will allow you to input the maximum number of connecte...

Страница 28: ... a newVirtual LAN with a Name and ID The LAN ports and the Multi SSID function can be assigned to a VLAN UsetheradiobuttontotogglebetweenEnable or Disable After changing the option you will need to click on Save to add or edit VLANs To remove or modify a VLAN click on the Delete or Edit button To add a VLAN click on the Create VLAN button VLAN Status ...

Страница 29: ...n to let your changes take effect Provide a number between 1 and 4094 for the Internal VLAN Enter the VLAN to add or modify Select a LAN port to bind to the SSID Select the corresponding SSID to bind to the LANportinordertocreateaVLAN Youcanfind more information about setting up multiple SSID s by referring to Multi SSID on page 27 VLAN ID VLAN Name LAN Port Multi SSID Port ...

Страница 30: ...Background BK Lowest priority queue high throughput Bulk data that requires maximum throughput and is not time sensitive is sent to this queue FTP data for example Video VI High priority queue minimum delay Time sensitive data such as video and other streaming media are automatically sent to this queue Voice VO Highest priority queue minimum delay Time sensitive data such as Voice over IP VoIP is ...

Страница 31: ...bling continues until either the data frame is sent or the Maximum Contention Window size is reached The Arbitration Inter Frame Spacing AIFs specifies a wait time in milliseconds for data frames The AIFs ensures that multiple access points do not try sending data at the same time but instead wait until a channel is free TheTransmission Opportunity TXOP is an interval of time when aWMM client stat...

Страница 32: ...Select whether QoS should be based on total bandwidth or on a per rule basis Set the QoS limit for upload bandwidth Set the Qos limit for download bandwidth If the Per Rule Bandwidth option is selected the following choices will become available You can enter a comment to easily identify your rule Select whether the rule should apply to an IP address IP segment a destination port or a MAC address ...

Страница 33: ... server Select Enable to allow the DAP 3410 to function as a DHCP server Input the first IP address available for assignment on your network InputthelastIPaddressavailableforassignment on your network All devices in the network must have the same subnet mask to communicate Enter the submask for the network here Enter the IP address of the gateway on the network Enter the IP address of the Domain N...

Страница 34: ...relessnetwork WINSisasystemthatdeterminestheIPaddress of a network computer that has a dynamically assigned IP address Enter the domain name of the network if applicable An example of a domain name is www dlink com The lease time is the period of time before the DHCP server will assign new IP addresses WINS Domain Least Time ...

Страница 35: ... address and assigned MAC address Use the Static Pool Settings to assign the same IP address to a device every time you start up The IP addresses assigned in the Static Pool list must NOT be in the same IP range as the Dynamic Pool EntertheMACaddressofthedevicerequesting association here After you have assigned a static IP address to a device via its MAC address click Save the device will appear i...

Страница 36: ...formation is available when you enable DHCP server on the AP and assign dynamic and static IP address pools The current corresponding DHCP assigned IP address of the device The MAC address of a device on the network that is assigned an IP address from the DHCP dynamic pool ThelengthoftimeuntilthedynamicIPaddress will be invalid Assigned IP Address Binding MAC Address Expired In ...

Страница 37: ...nufacturer of the network adapter Access Control List MAC Address When Disabled is selected MAC addresses are not used to control network access When Enabled is selected only computers with MAC addresses listed in the MAC Address List are granted network access Click the Add button to add the new MAC address to be filtered Filtered MAC addresses will be listed in the section below Current Client I...

Страница 38: ... will either turn the wireless network on or off Once you have determined the wireless state to be controlled by scheduling click Create New Rule to continue The list of schedules will be listed below the weekly graph Click the Edit icon to make changes or click the Delete icon to remove the schedule This page will allow you to setup access schedules for the device This will enable or disable clie...

Страница 39: ... s to specify what days the rule should be active on Select the days that the rule will be active Selectthischeckboxiftheruleshouldbeactive all day for the days specified This should be set to the time when the rule will become active This should be set to the time when the rule will become inactive If you create a new rule or edit an existing one you will see these settings ...

Страница 40: ...ns it s IP address automatically using DHCP be sure to make a static reservation on the DHCP Server Static Pool Settings page sothattheIPaddressoftheDMZmachinedoes not change If the Multiple DMZ option is selected this field will be available This should be set to the external IP address that will be assigned to an internal IP address of a computer or device If the Multiple DMZ option is selected ...

Страница 41: ...device on the internal network Enter the port that you want to open for the external network Note The private and public ports are usually the same The public port is the port seen from the Internet side and the private port is the port being used by the application on the computer or device within your local network This will allow you to open a single port This allows a computer or device to pro...

Страница 42: ...ge that you would like to filter on the local network This is normally used to prevent access to certain parts of the internal network Enter the start and end of an IP address range that you would like to filter on the destination network This is normally used to prevent access to certain parts of the external network Specify which protocol to filter Enter the specific port to filter on the local ...

Страница 43: ...ting setup on the internal network Selecting this checkbox will allow you to enter an area that will be used by the static routing setup on the external network Enabling this option will allow the router to broadcast the RIP routing protocol over OSPF Thispagewillallowyoutoconfigurethebuilt inrouting protocols that the DAP 3410 allows when in certain operating modes Select to either Disable or Ena...

Страница 44: ...eway or if the interface on the AP should route the traffic This option becomes available if Gateway is selected Enter the gateway IP address This option becomes available if Interface is selected Enter the interface on the AP that will be used with the static route Select the checkmark for the routing protocol that will be used to advertise this static route to other routers on the network This p...

Страница 45: ... its role Enter the physical location of the device e g 72nd Floor D Link HQ Enter a user name The default is admin You can change your password by entering the old password then entering the new password and entering it again to confirm it The password is case sensitive and should be between 0 and 12 characters Maintenance Administration Settings This page will allow you to change a number of set...

Страница 46: ... be specified Select this checkbox to enable access to the console via SSH The port which the console will use for connections can also be specified In order to use this feature you will need to click on the Generate Key button to create an SSH key This will display the SSH key generated by the AP Select this checkbox to enable UPnP support for the management console on the AP Check the box to ena...

Страница 47: ...ault Enter the username for read only SNMP access Enter the password for read only SNMP access Enter the username for read write SNMP access Enterthepasswordforread writeSNMPaccess Check the box to enable the sending of Trap Status messages Setacommunitystringrequiredbytheremote host computer that will receive trap messages or notices send by the system Enter the IP addresses of the remote hosts t...

Страница 48: ...is should be the address of the server and the location of the hosted firmware Click on Upgrade to start the process of updating the firmware Click on Browse to locate the certificate file to be used Click on Upload to start the process of transferring the certificate to the AP This page allows you to upgrade the firmware of the access point as well as upload an SSL certificate to secure the conne...

Страница 49: ...tion file Then click the Upload Settings button to transfer those settings to the access point Use this option to save the current access point configuration settings to a file on the hard disk of the computer you are using Click the Downloadbutton Youwillthenseeafiledialog where you can select a location and file name for the settings This page will allow you to upload or download a configuration...

Страница 50: ...the amount of time in seconds that the AP will wait between pings Set the amount of time in seconds that the AP will wait before beginning to ping the target host Set the number of times that the ping will fail before the ping watchdog will force the AP to reboot ThispagewillallowyoutoconfigurethePingWatchdog function of the AP Ping Watchdog works by sending ICMP echo request packets to a target h...

Страница 51: ...Daylight Saving Offset and then enter a start date and an end date for daylight saving time Tomanuallysetthetime entertheYear Month Day Hour Minute and Second and then click Save Toavoidhavingtomanuallysetthetime you can also click the Copy Your Computer s Time Settings button at the bottom of the page to have the DAP 3410 automatically set the time based on the system clock of the computer being ...

Страница 52: ...ect whether the PoE pass through function is Disabled or Enabled ThispagewillallowyoutochangethePoEpassthrough setting of the AP If this is enabled the LAN port will allowD LinksurveillancecamerassuchastheDCS 3716 DCS 6113 and DCS 7110 to be powered through the secondary LAN port ...

Страница 53: ...which may be needed by a network administrator Displays the wireless your wireless settings such as SSID and Channel along with the current power output of the antennae data throughput and wireless security method Displays the private local IP settings for the two built in LAN ports on the access point Displayscurrentsystemutilizationoftheaccess point This page displays the current LAN wireless LA...

Страница 54: ...received signal strength indicator Displays the current wireless speed that the client is connected with This indicates the TX RX sequence of the respective WDS s link Displays the current amount of data that the client has trasferred since it connected Displaysthetotalamountoftimethattheclient has been connected This window displays the wireless client information for clients currently connected ...

Страница 55: ...ion Ethernet Information The DAP 3410 keeps statistics of the traffic that passes through it You can view the amount of packets that pass through the LAN and wireless portions of the network The traffic counter will reset if the access point is rebooted ...

Страница 56: ...ser Manual Section 3 Configuration WLAN Information Thiswindowdisplayswirelessnetworkstatisticsfordata throughput transmittedandreceivedframes andframe errors The traffic counter will reset if the access point is rebooted ...

Страница 57: ...ion screens it is best to use the Save button at the bottom of each screen to save not activate your configuration changes You may change settings to multiple pages before activating Onceyouarefinished clicktheConfiguration buttonlocatedatthetopofthepageandthenclick Save andActivate YoucanthenclickActivateheretoenable your changes ...

Страница 58: ... When making changes on most of the configuration screens it is best to use the Save button at the bottom of each screen to save not activate your configuration changes If you wish to discard all of the changes you have made andnotyetactivated youmayclickthe Discardbutton ...

Страница 59: ...low you to restart the AP or restore its settings to the factory defaults Click the Restart button to reboot the device Click the Restore button to reset all settings back to the factory defaults Please note that this will erase all settingsandchangesmadetothedevice sconfiguration ...

Страница 60: ...D Link DAP 3410 User Manual Section 3 Configuration Help Further information and in depth help can be found anytime from the AP s online help function Scroll down the Help page for topics and explanations ...

Страница 61: ...ity This section will show you the different levels of security you can use to protect your data from intruders The DAP 3410 offers the following types of security WEP Wired Equivalent Privacy WPA Personal Wi Fi Protected Access WPA Enterprise Wi Fi Protected Access ...

Страница 62: ... as effective anymore WEP uses a passphrase or key to authenticate your wireless connection For 64 Bit WEP the key is an alpha numeric password that is 10 hex digits or an ASCII password consisting of 5 text characters The hex digits are either numbers from 0 to 9 or letters from A to F For 128 Bit WEP the key is an alpha numeric password that is 26 hex digits or an ASCII password with 13 text cha...

Страница 63: ...e left side 2 Next to Security Mode select WEP Note ChoosingWEP means the device will only operate in Legacy wireless mode 802 11B G and will not provide 802 11N performance 3 Next to WEP Encryption select 64Bit 10 hex digits 64Bit 5 ASCII characters 128Bit 26 hex digits or 128Bit 13 ASCII characters 4 Next to WEP Key 1 enter a set of digits or letters from A to F or a string of text 5 Next to Aut...

Страница 64: ...thentication protocol EAP WEP regulates access to a wireless network based on a computer s hardware specific MAC address which is relatively simple to be sniffed out and stolen EAP is built on a more secure public key encryption system to ensure that only authorized network users can access the network WPA PSK WPA2 PSK uses a passphrase or key to authenticate your wireless connection The key is an...

Страница 65: ... Click on Setup and then click Wireless Setup on the left side 2 Next to Security Mode select WPA Personal 3 Next to WPA Mode select Auto WPA or WPA2 WPA2 only or WPA only 4 Next to Cipher Type select TKIP AES or TKIP and AES 5 Next to Pre SharedKey enter a key The key is entered as a passphrase in ASCII format at both ends of the wireless connection The passphrase must be between 8 63 characters ...

Страница 66: ...t dlinkap local Click on Setup and then click Wireless Setup on the left side 2 Next to Security Mode select WPA Enterprise 3 Next to WPA Mode select Auto WPA or WPA2 WPA2 only or WPA only 4 Next to Cipher Mode select TKIP AES or Auto 5 Next to RADIUS Server IP Address enter the IP Address of your RADIUS server 6 Next to RADIUS Server Port enter the port you are using with your RADIUS server 1812 ...

Страница 67: ...e a site survey option similar to the Windows XP utility as seen below Right click on the wireless computer icon in your system tray lower right corner next to the time Select View Available Wireless Networks If you receive the Wireless Networks Detected bubble click on the center of the bubble to access the utility or The utility will display any available wireless networks in your area Click on ...

Страница 68: ...onfiguring your wireless adapter If you are joining an existing network you will need to know the WEP key being used 2 Highlight the wireless network SSID you would like to connect to and click Connect 1 Open the Windows XP Wireless Utility by right clicking on the wireless computer icon in your system tray lower right corner of screen SelectViewAvailableWireless Networks ...

Страница 69: ...work Connectionbox will appear Enter theWPA PSK passphrase and click Connect It may take 20 30 seconds to connect to the wireless network If the connection fails please verify that the WPA PSK settings are correct The WPA PSK passphrase must be exactly the same as on the wireless access point ...

Страница 70: ...nvenient built in wireless utility Follow these instructions From the Start menu go to Control Panel and then click on Network and Sharing Center The utility will display any available wireless networks in your area Click on a network displayed using the SSID under Select a network to connect to and then click the Connect button ...

Страница 71: ...ick Connect Anyway to continue The utility will display the following window to indicate a connection is being made The final window indicates the establishment of a successful connection Thenexttwopagesdisplaythewindowsusedtoconnecttoeither a WEP or a WPA PSK wireless network ...

Страница 72: ...nect to and then click the Connect button Enter the appropriate security key or passphrase in the field provided and then click the Connect button Configure WPA PSK It is recommended to enable WEP on your wireless bridge or access point before configuring your wireless adapter If you are joining an existing network you will need to know the WEP key being used ...

Страница 73: ...WPA2 on your wireless router or access point before configuring your wireless adapter If you are joining an existing network you will need to know the security key or passphrase being used 1 Click on the wireless icon in your system tray lower right corner 2 The utility will display any available wireless networks in your area Wireless Icon ...

Страница 74: ...ould like to connect to and click the Connect button If you get a good signal but cannot access the Internet check your TCP IP settings for your wireless adapter Refer to the Networking Basics section in this manual for more information 4 The following window appears while your computer tries to connect to the router ...

Страница 75: ...ase that is on your router and click Connect You can also connect by pushing the WPS button on the router It may take 20 30 seconds to connect to the wireless network If the connection fails please verify that the security settings are correct The key or passphrase must be exactly the same as on the wireless router ...

Страница 76: ...The device has the utility built in to the device itself Your computer must be on the same IP subnet to connect to the web based utility Make sure you have an updated Java enabled web browser We recommend the following Microsoft Internet Explorer 7 and higher Mozilla Firefox 12 0 and higher Google Chrome 20 0 and higher Apple Safari 4 and higher Verifyphysicalconnectivitybycheckingforsolidlinkligh...

Страница 77: ... the login page for your the web management If you still cannot access the configuration unplug the power to the access point for 10 seconds and plug back in Wait about 30 seconds and try accessing the configuration If you have multiple computers try connecting using a different computer 2 What can I do if I forgot my password If you forgot your password you must reset your access point Unfortunat...

Страница 78: ... in increments of ten Ex 1492 1482 1472 etc Note AOL DSL users must use MTU of 1400 To find the proper MTU Size you ll have to do a special ping of the destination you re trying to go to A destination could be another computer or a URL Click on Start and then click Run Windows 95 98 and Me users type in command Windows NT 2000 and XP users type in cmd and pressEnter or click OK Once the window ope...

Страница 79: ... 1480 Once you find your MTU you can now configure your access point with the proper MTU size To change the MTU rate on your access point follow the steps below Open your browser enter the IP address of your access point 192 168 0 50 and click OK Enter your username Admin and password blank by default Click OK to enter the web configuration page for the device Click on Setup and then click Manual ...

Страница 80: ...ssLANsareusedincreasinglyinbothhomeandofficeenvironments andpublicareassuchasairports coffeeshops and universities Innovative ways to utilize WLAN technology are helping people to work and communicate more efficiently Increased mobility and the absence of cabling and other fixed infrastructure have proven to be beneficial for many users Wireless users can use the same applications they use on a wi...

Страница 81: ...oint A to point B But wireless technology has restrictions as to how you can access the network You must be within the wireless network range area to be able to connect your computer There are two different types of wireless networks Wireless Local Area Network WLAN and Wireless Personal Area Network WPAN Wireless Local Area Network WLAN In a wireless local area network a device called an Access P...

Страница 82: ...phones laptops speakers and other devices that operate on batteries Who uses wireless Wireless technology has become so popular in recent years that almost everyone is using it whether it s for home office business D Link has a wireless solution for it Home Gives everyone at home broadband access Surf the web check email instant message etc Gets rid of the cables around the house Simple and easy t...

Страница 83: ...wing where to start That s why we ve put together a few setup steps and tips to help you through the process of setting up a wireless network Tips Here are a few things to keep in mind when you install a wireless network Centralize your access point or Access Point Make sure you place the bridge access point in a centralized location within your network for the best performance Try to place the br...

Страница 84: ...e All wireless clients will connect to an access point or wireless bridge Ad Hoc Directly connecting to another computer for peer to peer communication using wireless network adapters on each computer such as two or more wireless network Cardbus adapters An Infrastructure network contains an Access Point or wireless bridge All the wireless devices or clients will connect to the wireless bridge or ...

Страница 85: ...r IP address please follow the steps below Click on Start Run In the run box type cmd and click OK Windows 7 Vista users type cmd in the Start Search box At the prompt type ipconfig and press Enter This will display the IP address subnet mask and the default gateway of your adapter Iftheaddressis0 0 0 0 checkyouradapterinstallation security settings and the settings on your router Some firewall so...

Страница 86: ...2 Right click on the Local Area Connection which represents your network adapter and select Properties Step 3 Highlight Internet Protocol TCP IP and click Properties Step 4 Click Use the following IP address and enter an IP address that is on the same subnet as your network or the LAN IP address on your router Example If the router s LAN IP address is 192 168 0 1 make your IP address 192 168 0 X w...

Страница 87: ...00 mW Maximum Power Input 48 V 0 5 A Maximum Power Consumption 15 9 watts LEDs Wireless Signal Strength LED Power LAN Wireless Operating Temperature Operating 20 to 60 C 4 to 140 F Storage 20 to 85 C 4 to 185 F Humidity Operating 0 to 90 non condensing Storage 5 to 95 non condensing Safety Emissions FCC CE Dimensions L x W x H 118 x 56 x 195 mm 4 64 x 2 2 x 7 67 inches 1 Rangewillvarydependingonco...

Отзывы: